Easy No-Knead Bread
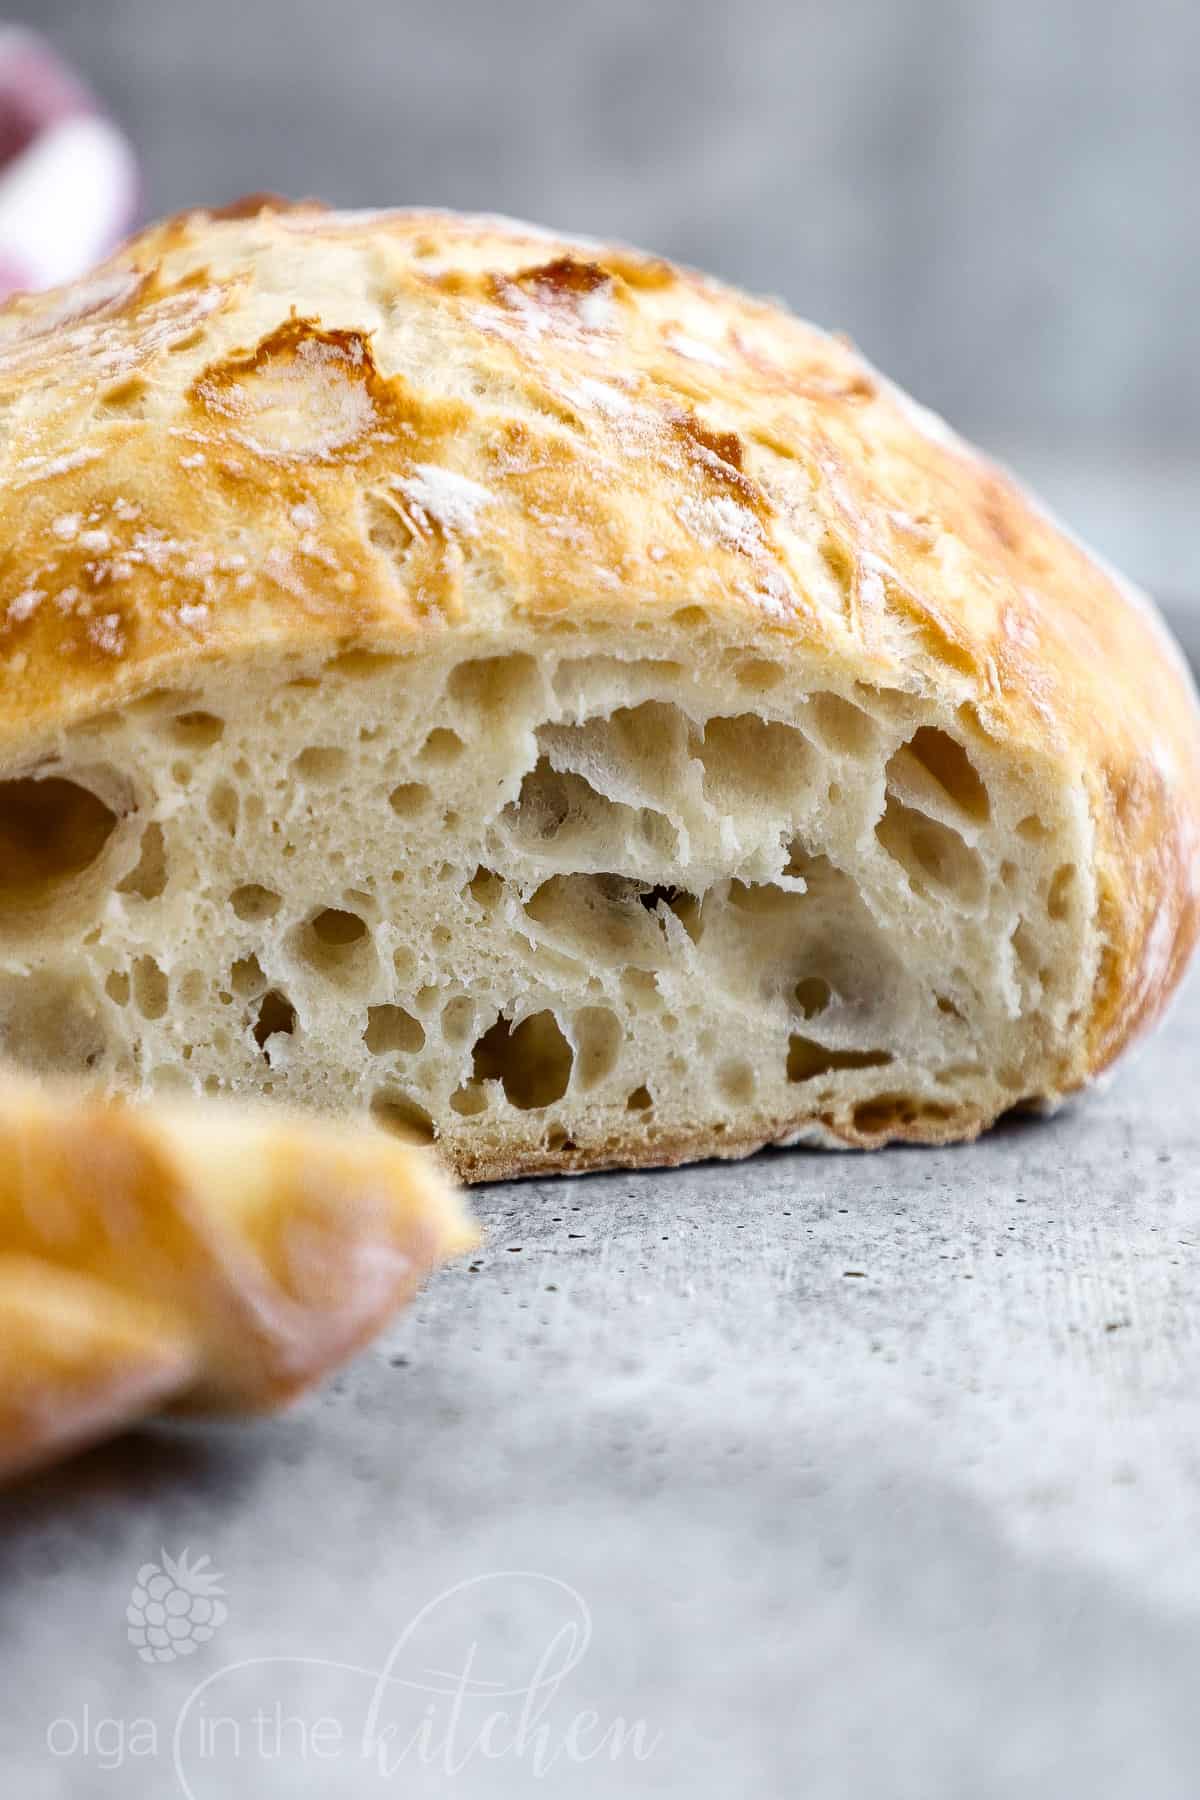
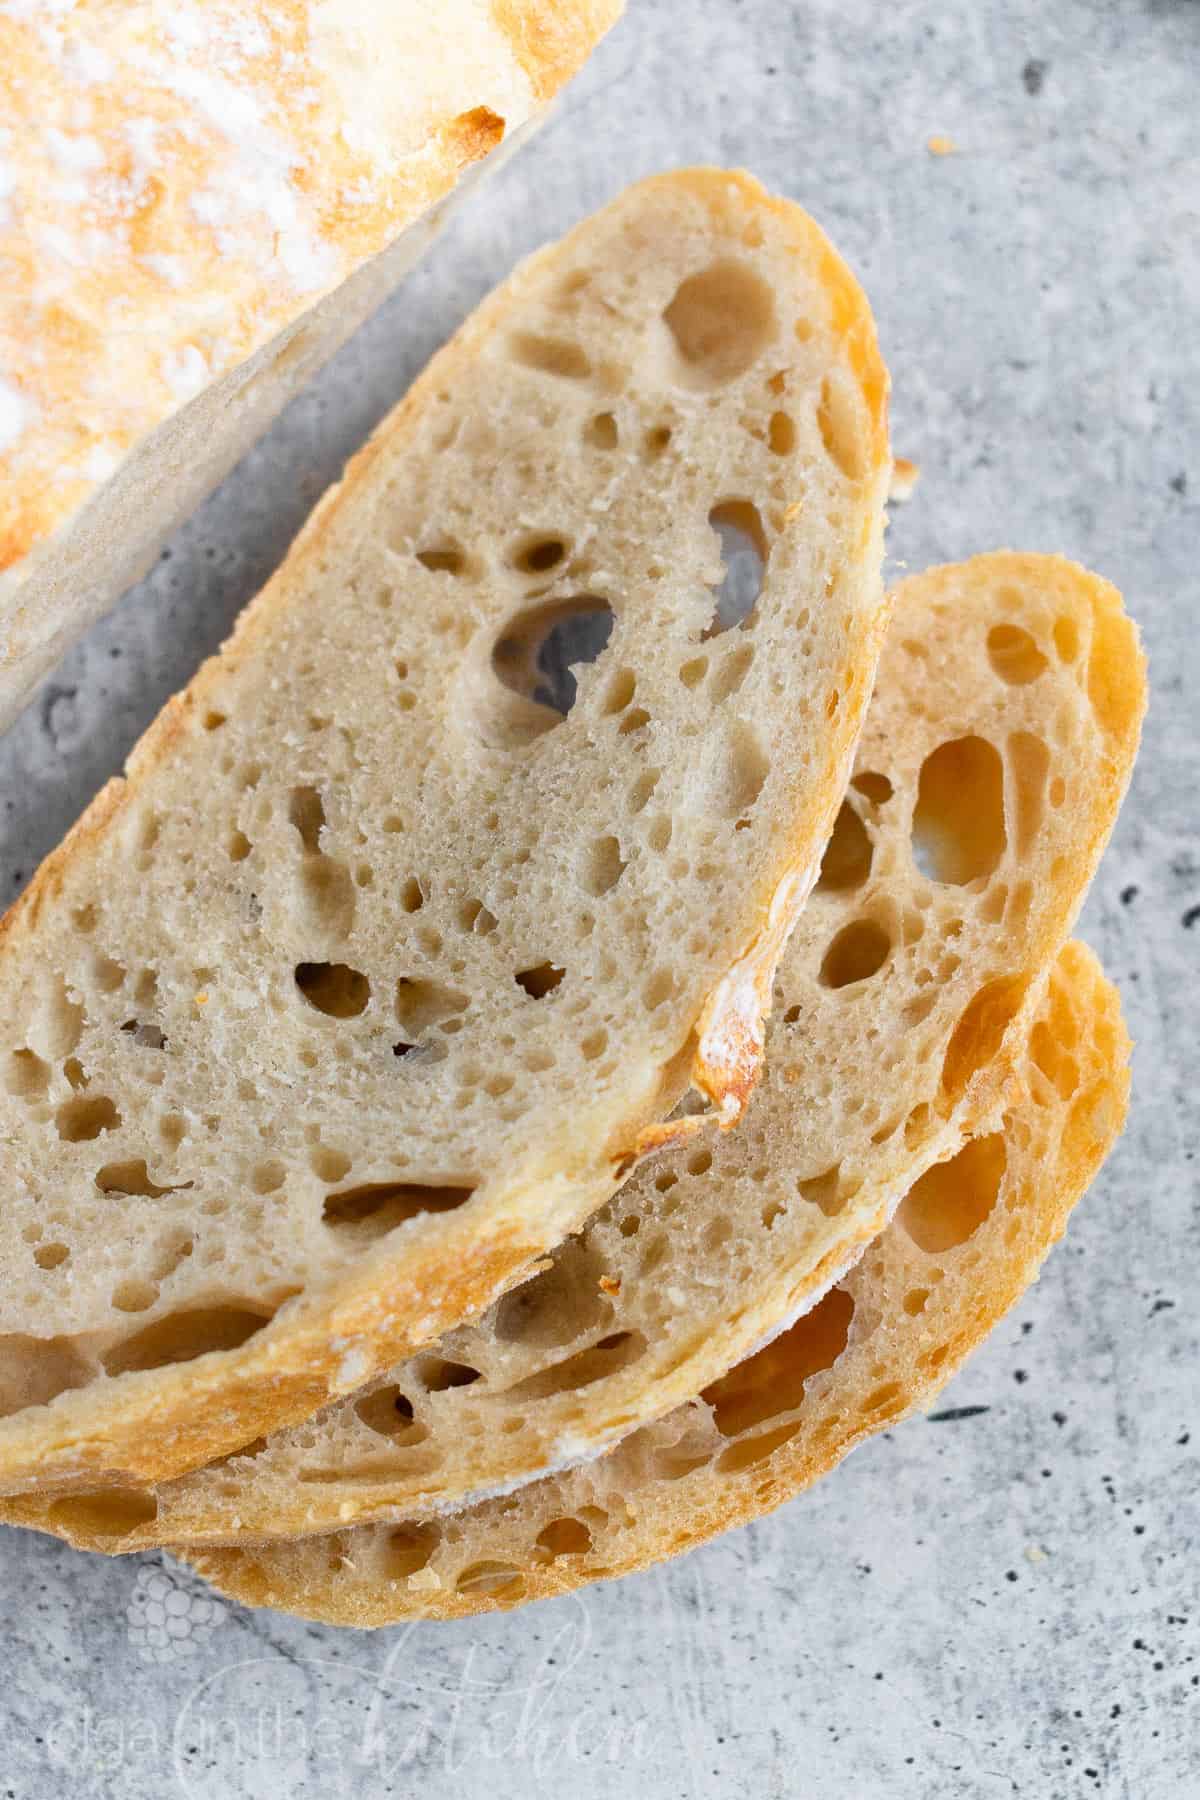
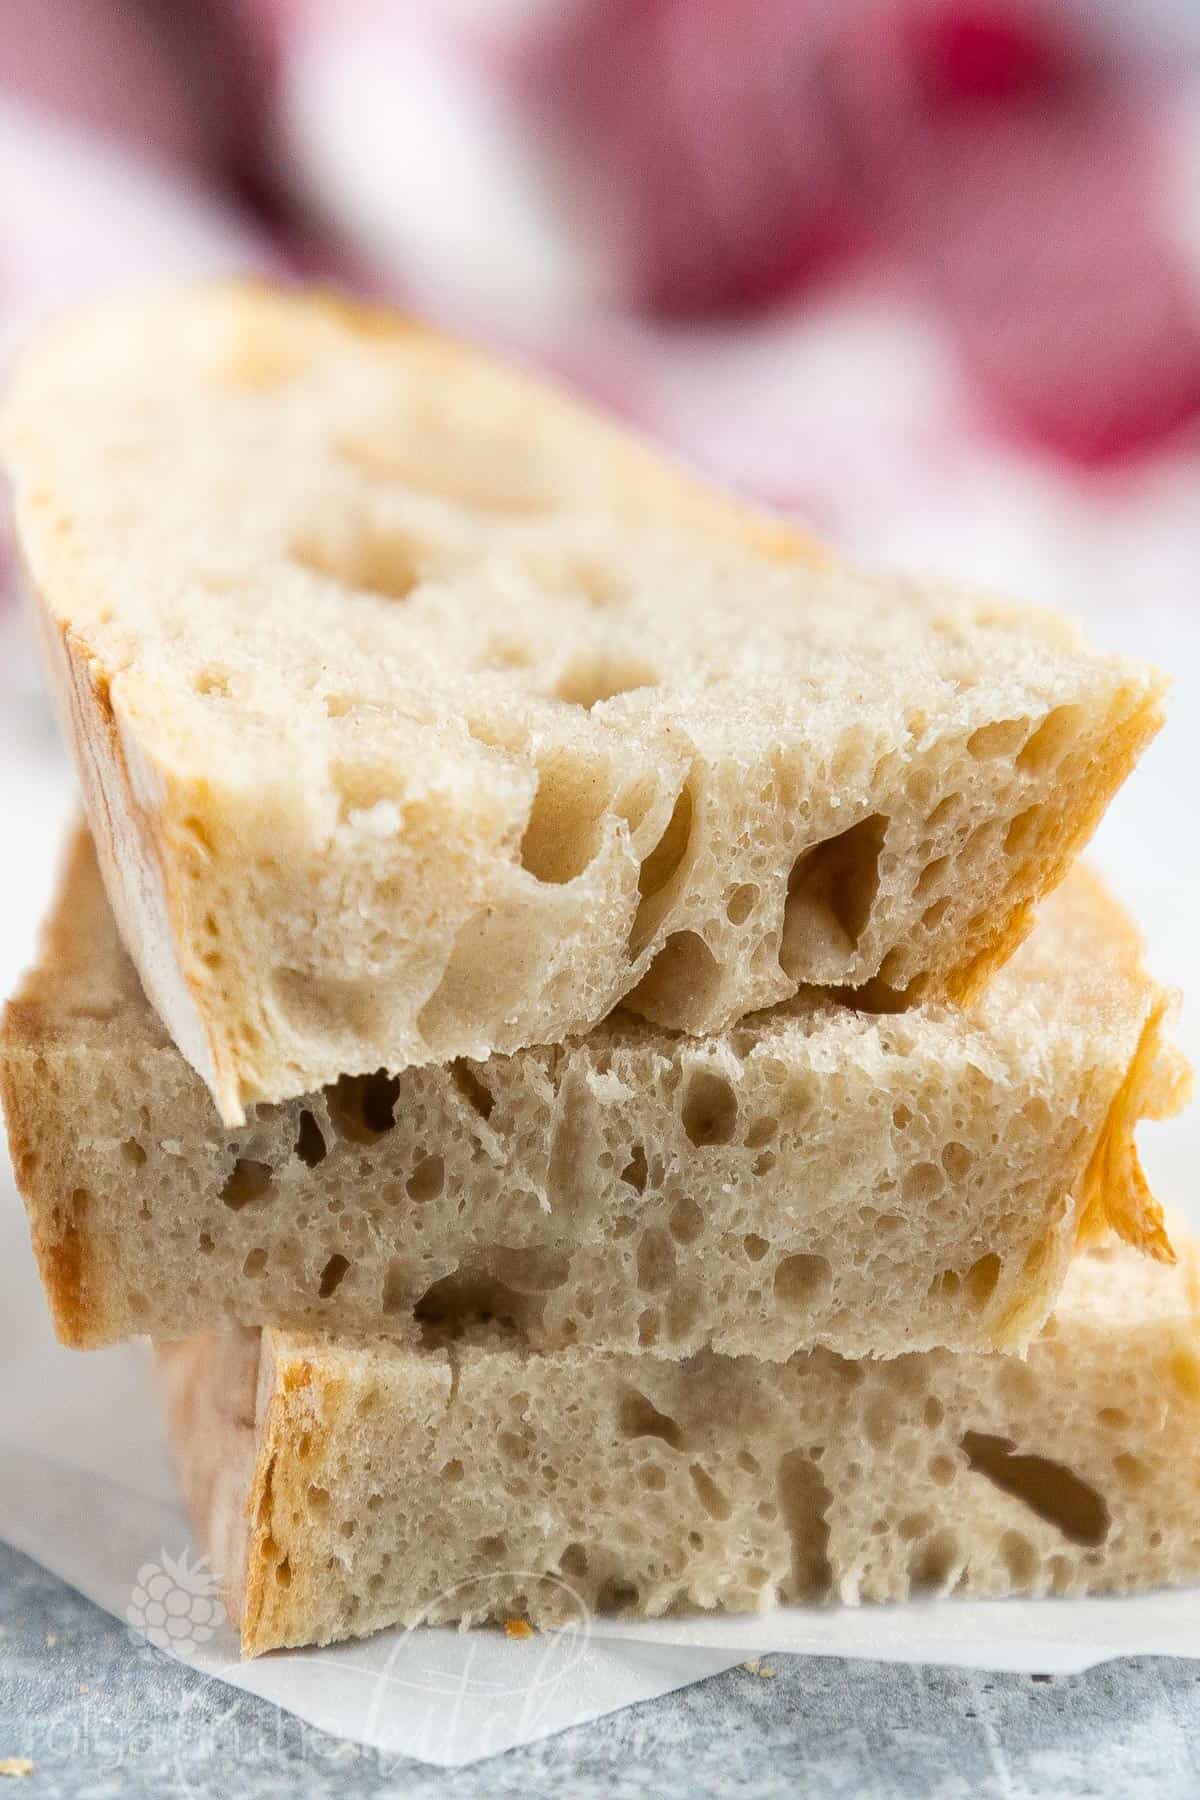
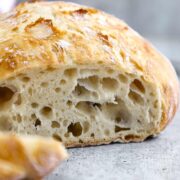
This easy No-Knead Bread loaf has a deliciously crisp crust and a soft spongy center. It’s the perfect blend of soft and chewy. With only 4 ingredients (flour, salt, yeast and water), you can make a bakery-quality, scrumptious loaf of homemade bread.
This post may contain affiliate links. Read my disclosure policy.
Easy No-Knead Bread Recipe:
Dutch Oven Bread is surprisingly easy – there is no kneading required. You just need a bowl and a wooden spoon to stir the ingredients together. Let it rise on the counter overnight and it’s ready for the oven.
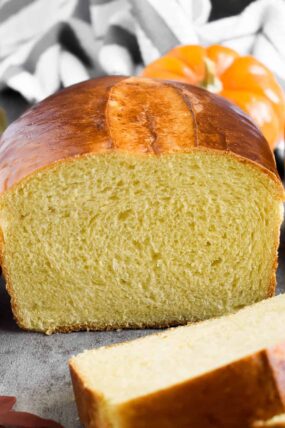
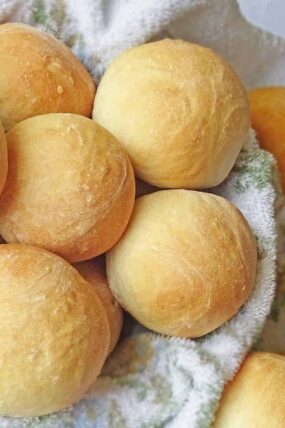
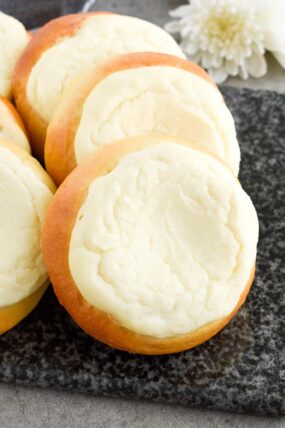
We love the aroma of freshly baked homemade bread in our house, like from our staple White Bread Machine Bread, our classic French Buns and of course for the sweet tooth: Cheese Sweet Rolls.
We make bread in our kitchen at least twice a week. According to my husband, this easy no-knead bread is the best for him. We made this recipe countless times because it’s so easy and needs so little attention. It bakes to perfection every time and you will fall in love with the spongy soft texture instantly.
What is the Best Flour for Bread?
Bread flour is typically recommended for bread making, but this recipe works great with either bread flour or all-purpose flour. We have tested both and we don’t see difference between the two. Both rise nicely and provide incredible results. I prefer using all-purpose flour because it’s the one I always have on hand for all the baking I do.
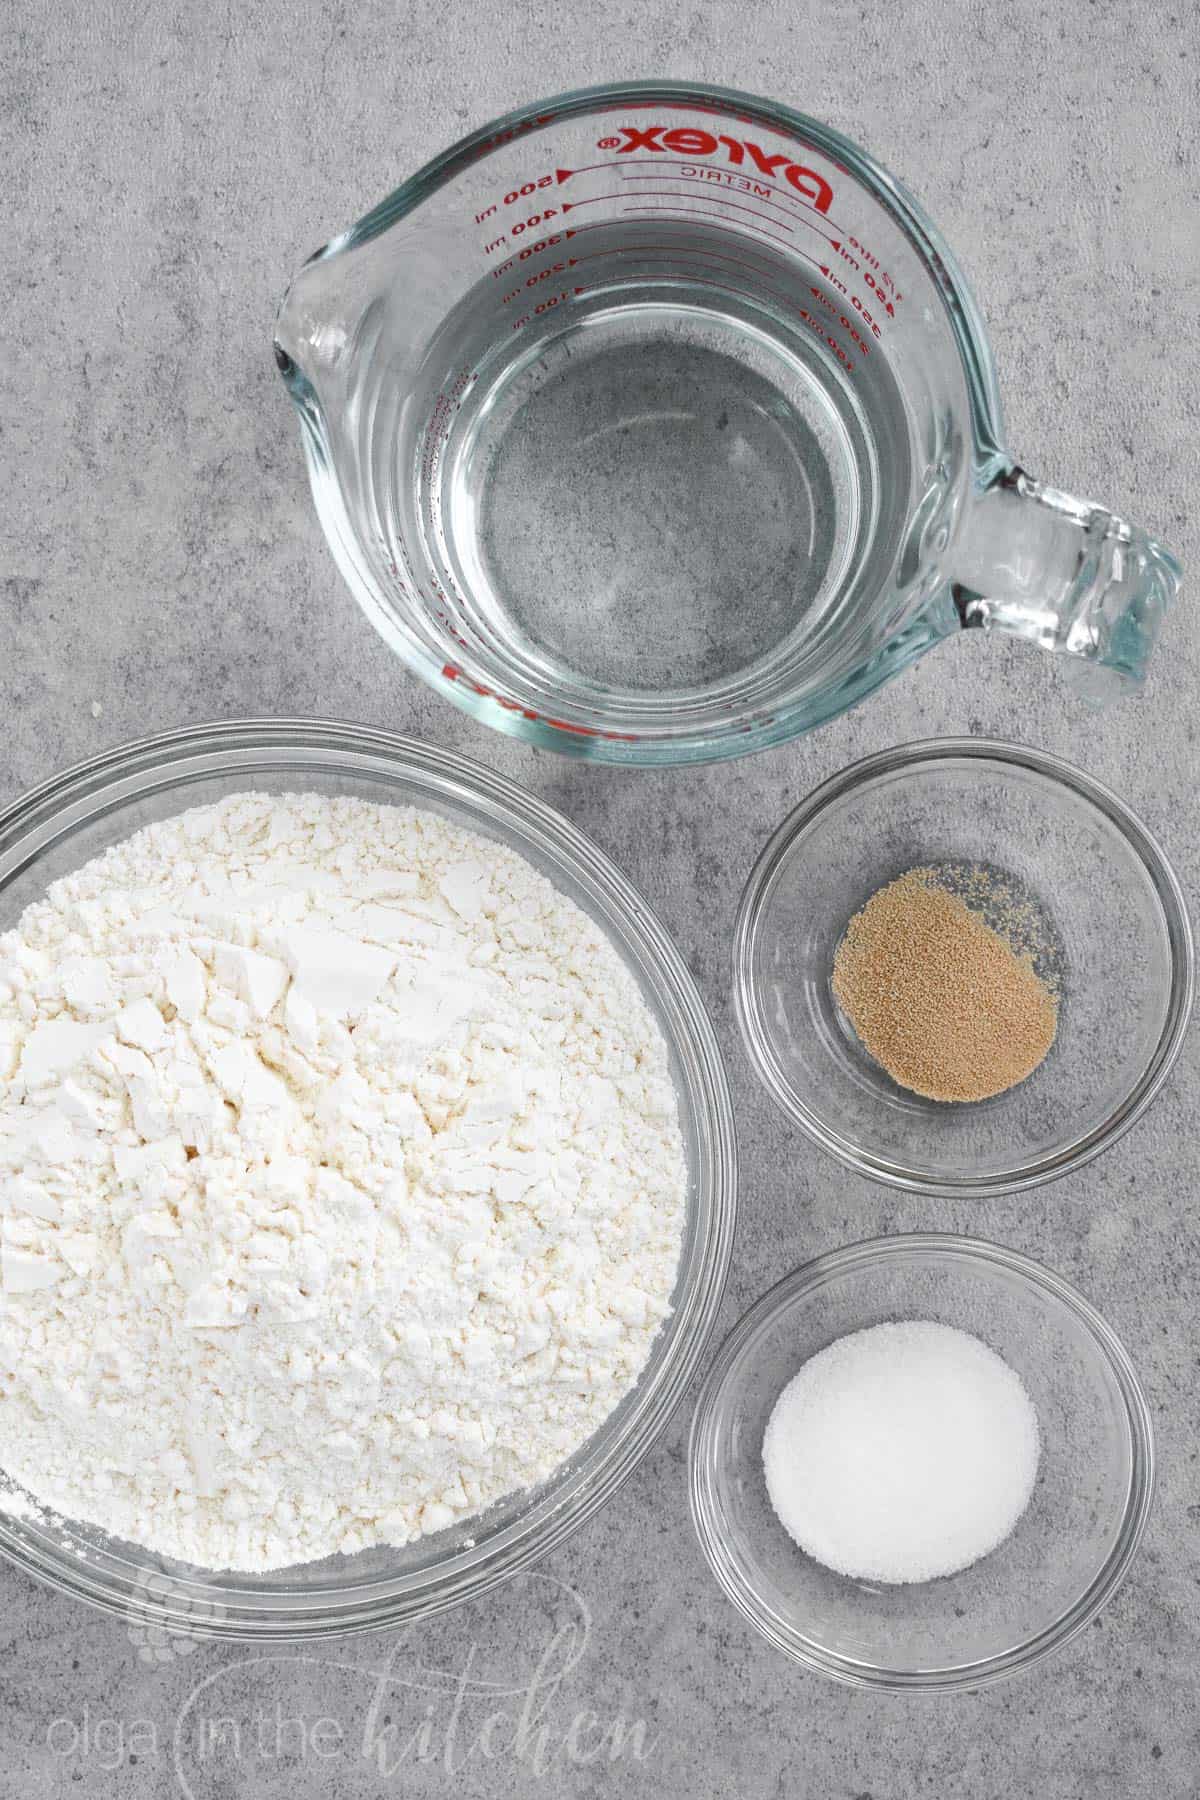
Ingredients for Easy Dutch Oven Bread:
The ingredient list is short and the measurements can be found on the printable recipe card at the bottom of this page.
- Flour – we need all-purpose flour that you all have in your pantries. No need for the fancy stuff!
- Fine salt – gives flavor and makes it extra delicious.
- Instant yeast – I use instant dry yeast as it’s my #1 yeast in the house, but you can definitely use active yeast. I tried with both, and don’t see difference.
- Warm water – it’s important to make sure your water is at room temperature, but not too hot so it doesn’t deactivate the yeast.
How to Make Easy Homemade Bread:
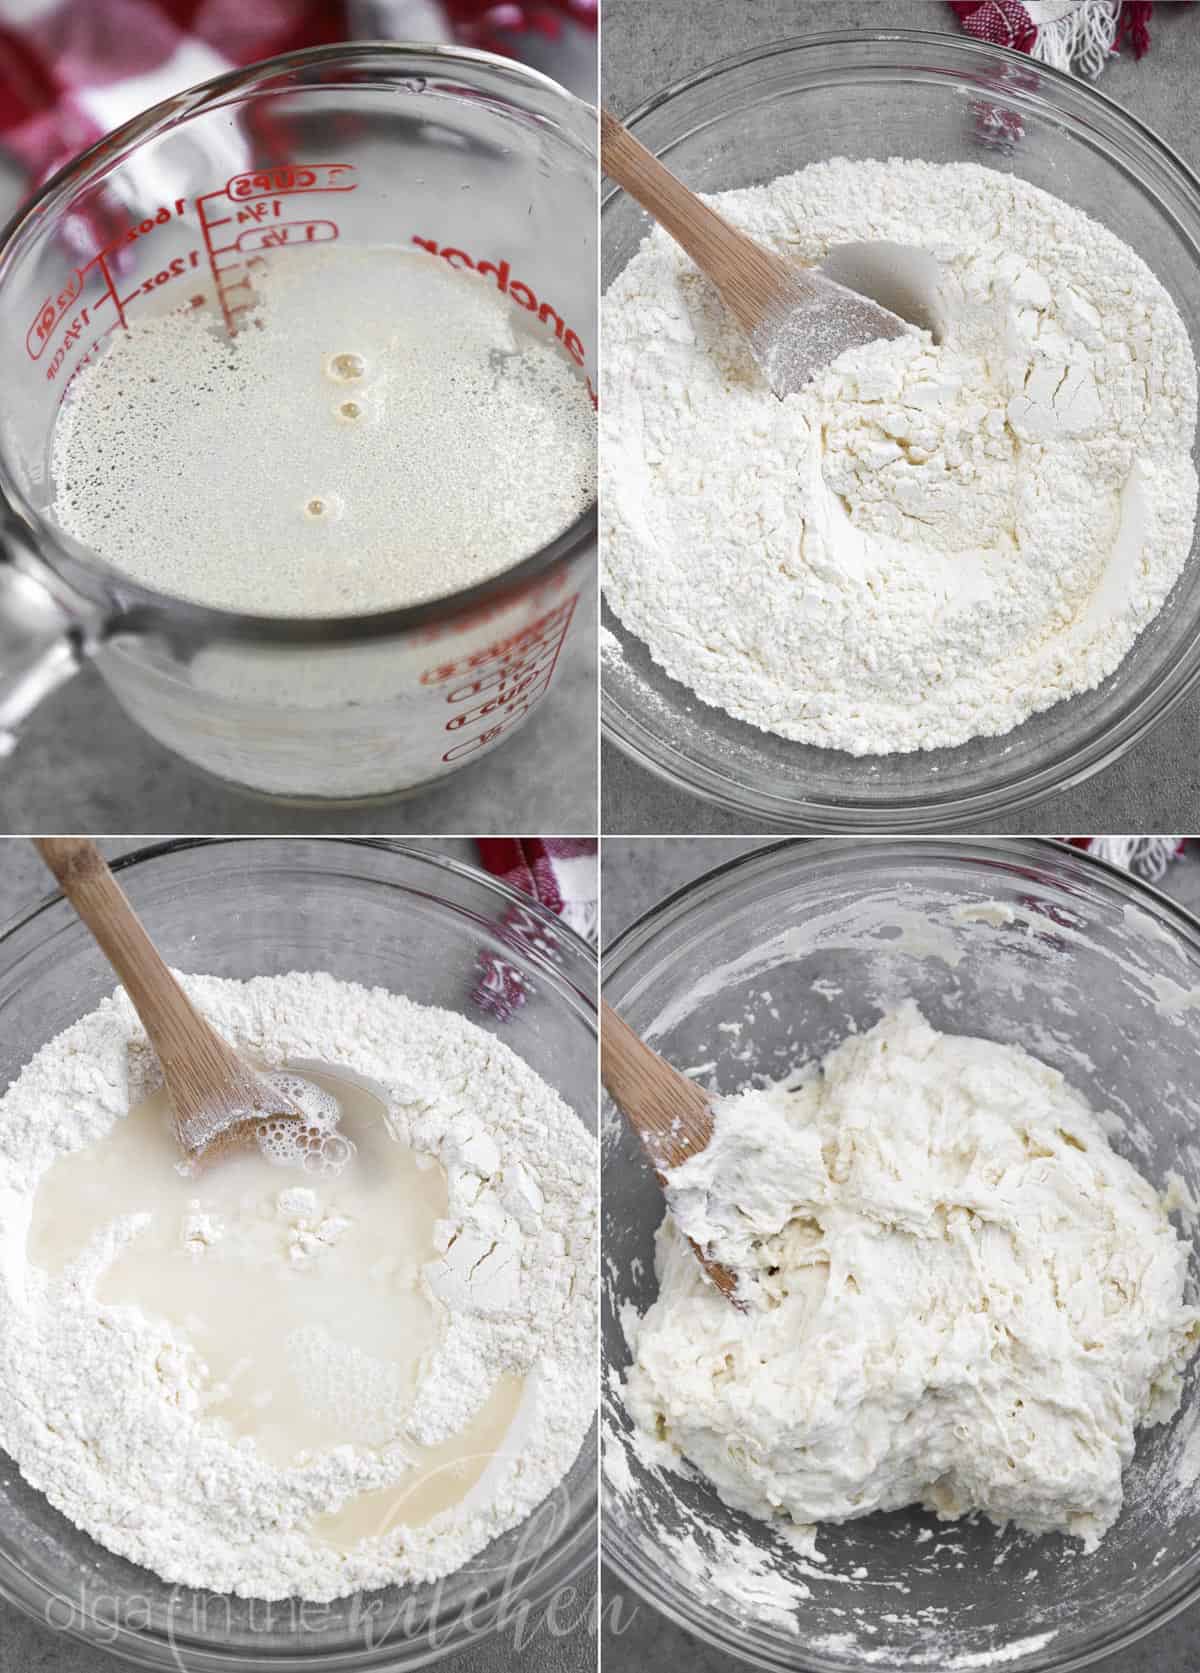
1. In a glass measuring cup, combine to dissolve warm water (100-110°F) and sprinkle instant dry yeast over the top. Let it sit 2-3 minutes.
2. Into a large mixing bowl, sift all-purpose flour and add salt. Whisk to combine.
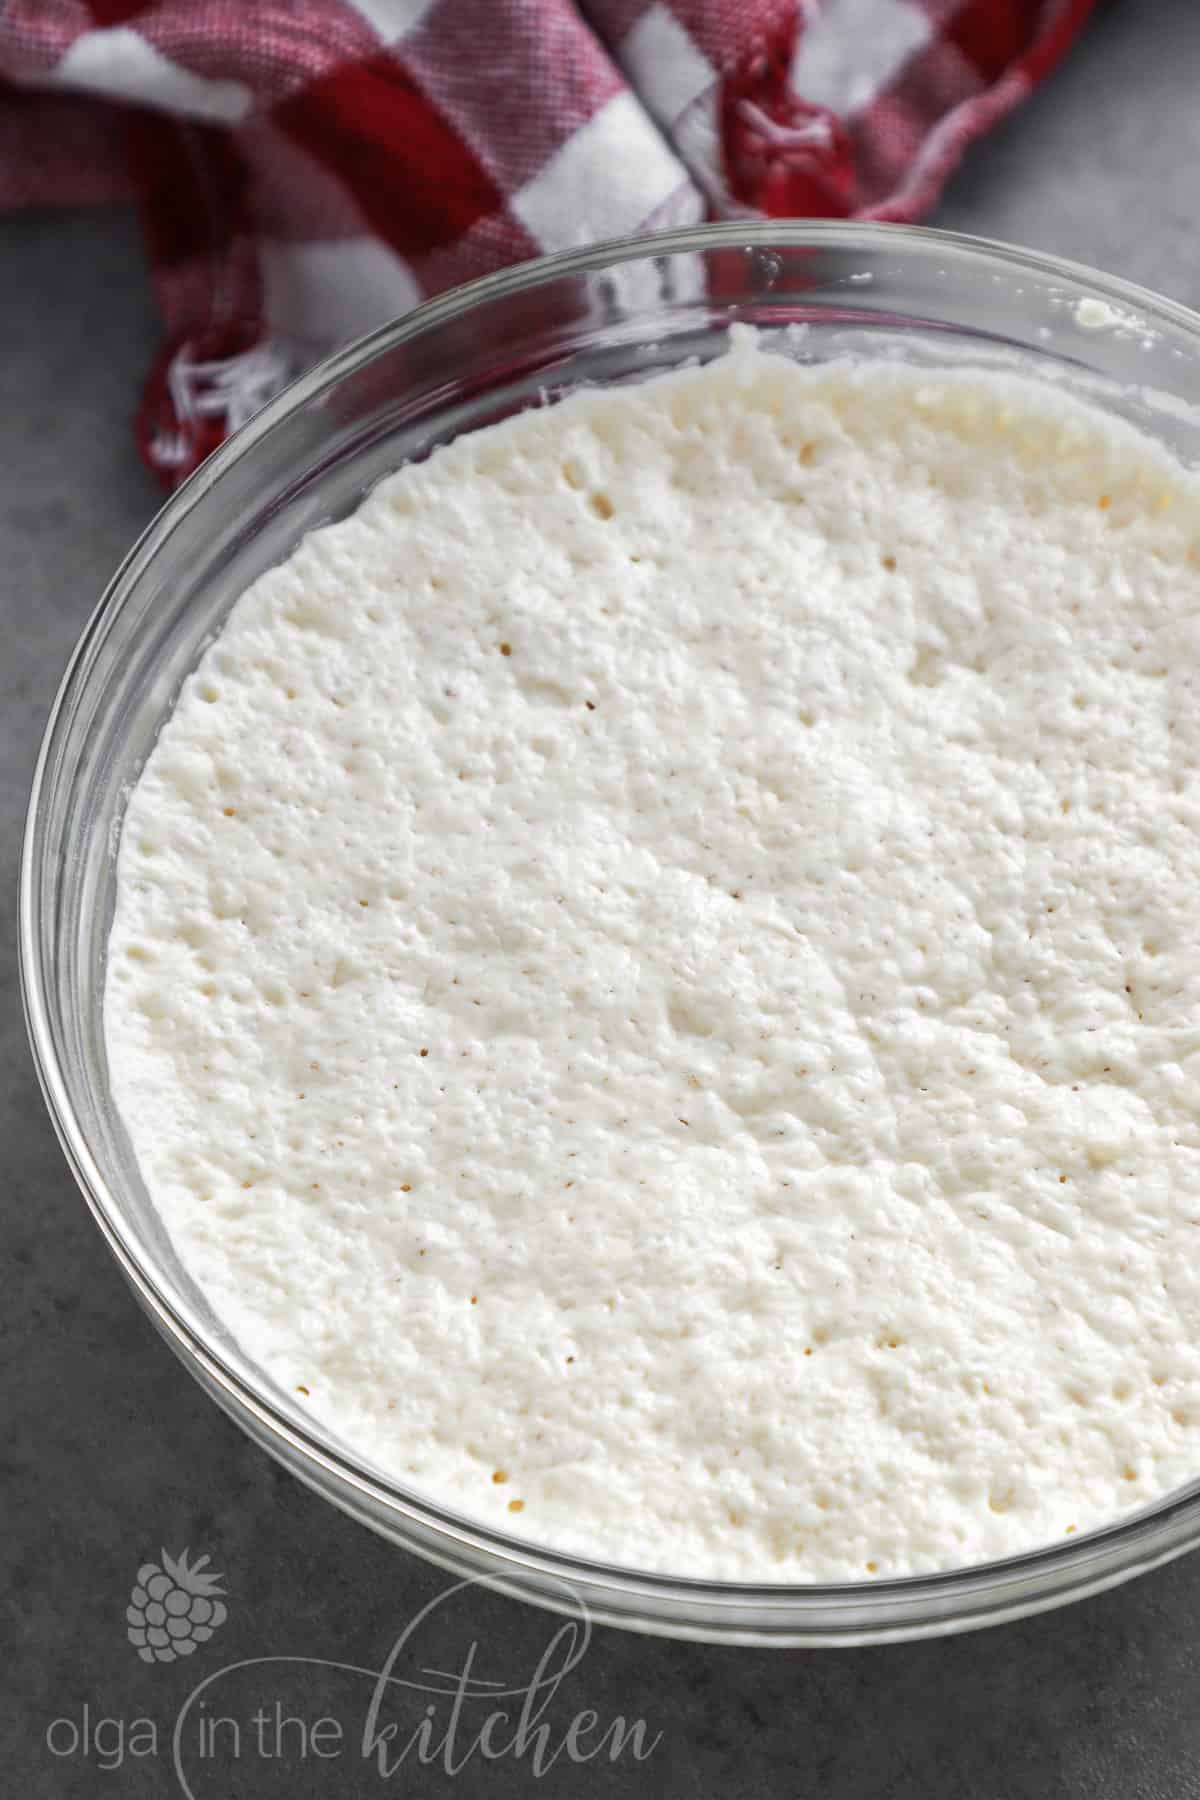
3. Pour in the water mixture and use a wooden spoon to stir until all of the flour is incorporated (do not knead). The dough will be very sticky, but do not add additional flour.
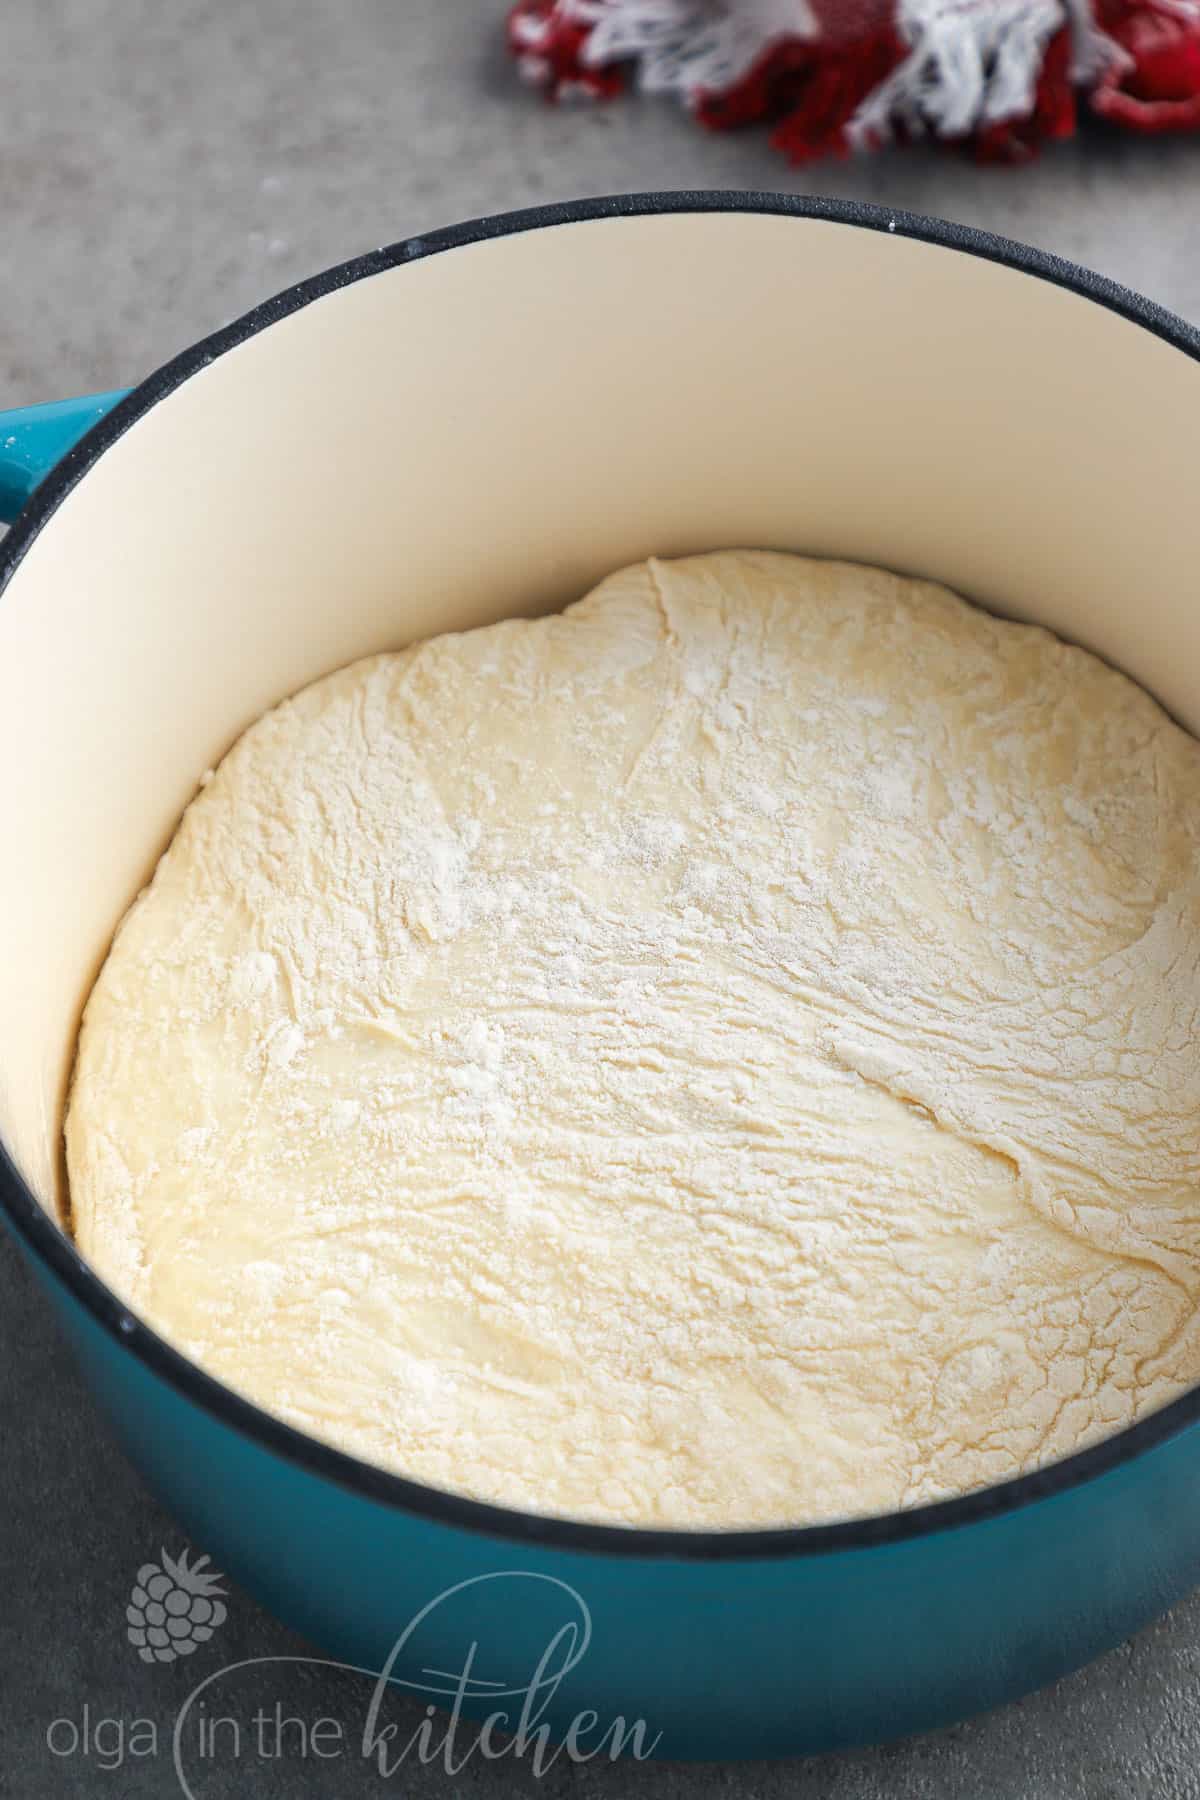
4. Cover the bowl with plastic wrap and let the dough rest on your counter or inside your unheated oven for 18 hours to 24 hours.
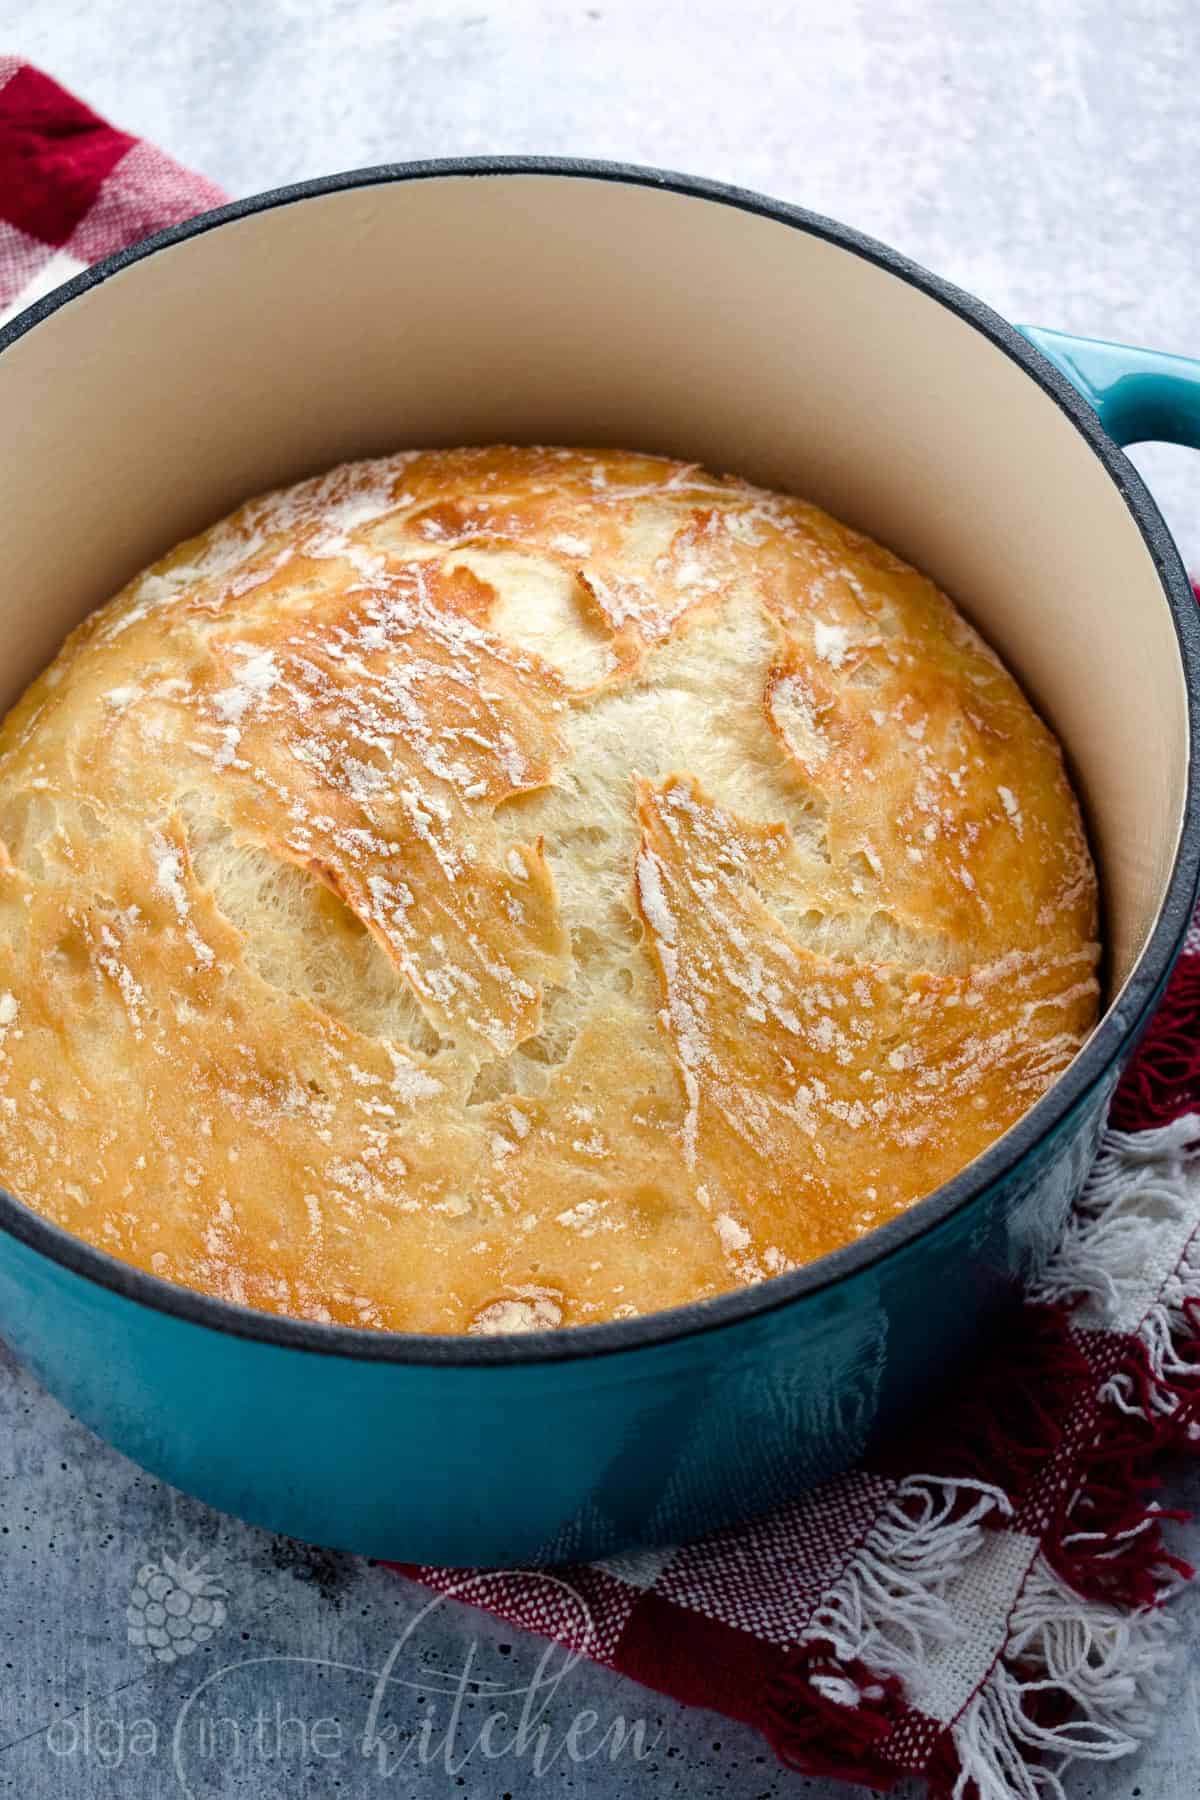
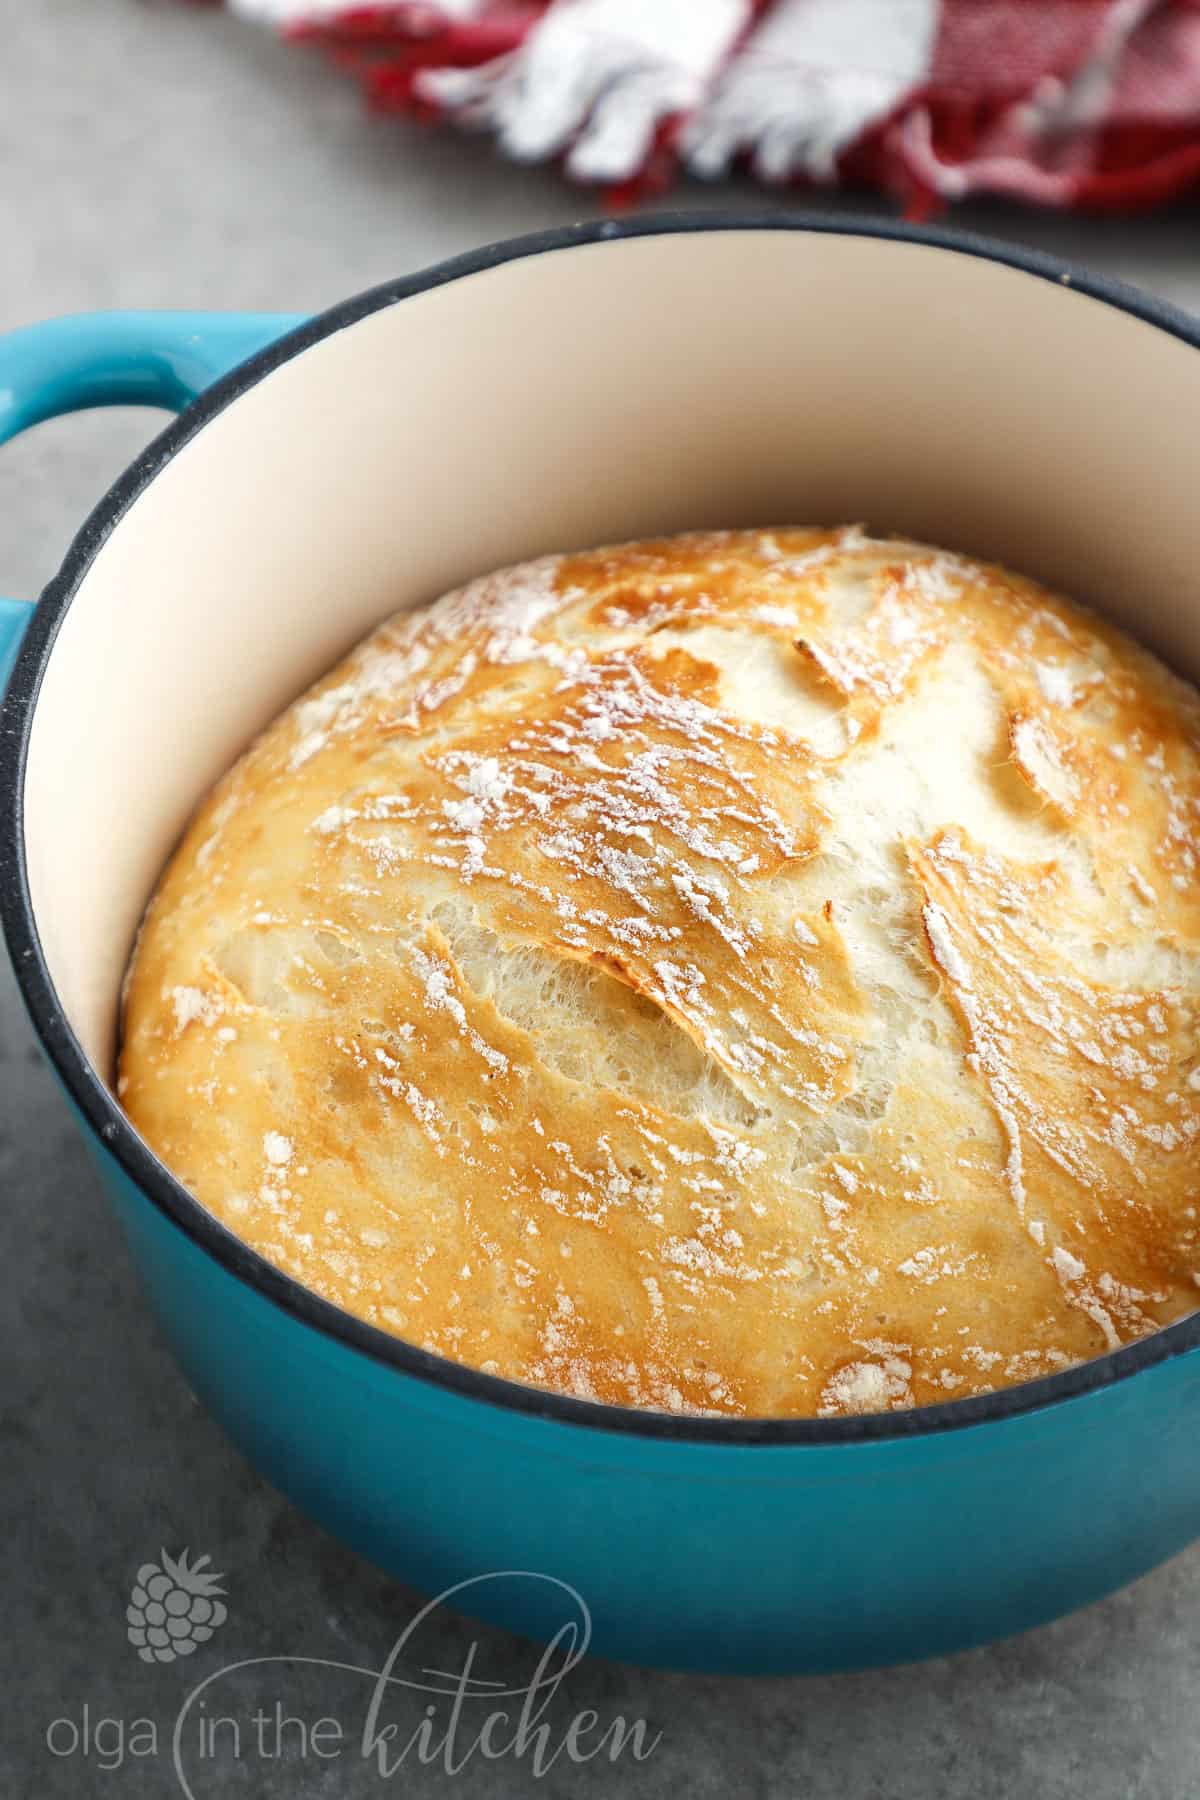
5. Place an empty dutch oven and lid inside the oven and preheat the oven to 450 degrees Fahrenheit. Once preheated, remove dutch oven and place on the stove. Be careful not to touch the dutch oven or lid without oven mitts because it will be very hot.
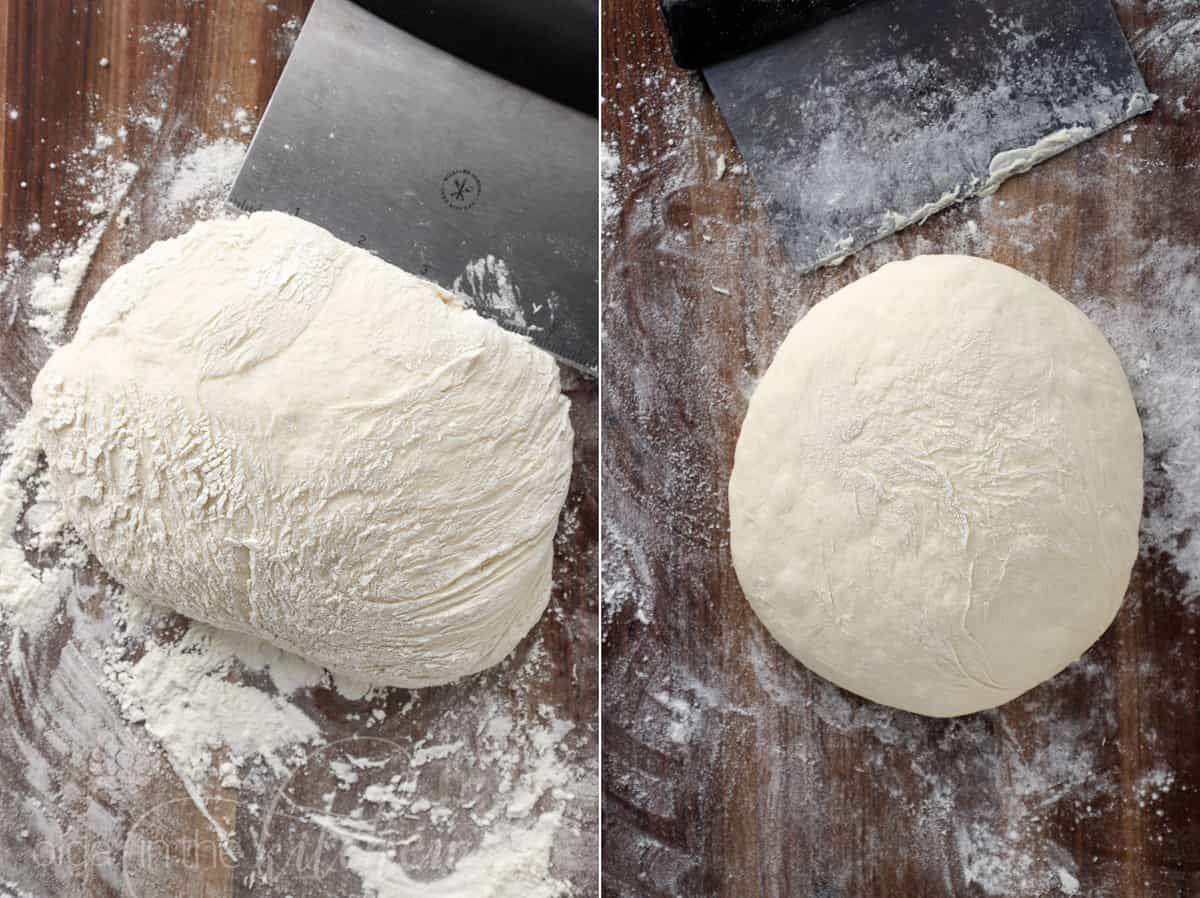
6. Meanwhile, generously dust a cutting board or work surface with flour. Using a rubber spatula, scrape the dough out (which will be very thin and sticky) onto the floured surface. With help of pastry scraper or well-floured hands, shape the dough by folding the dough in half and then fold in half again, pulling the dough together into a loose ball.
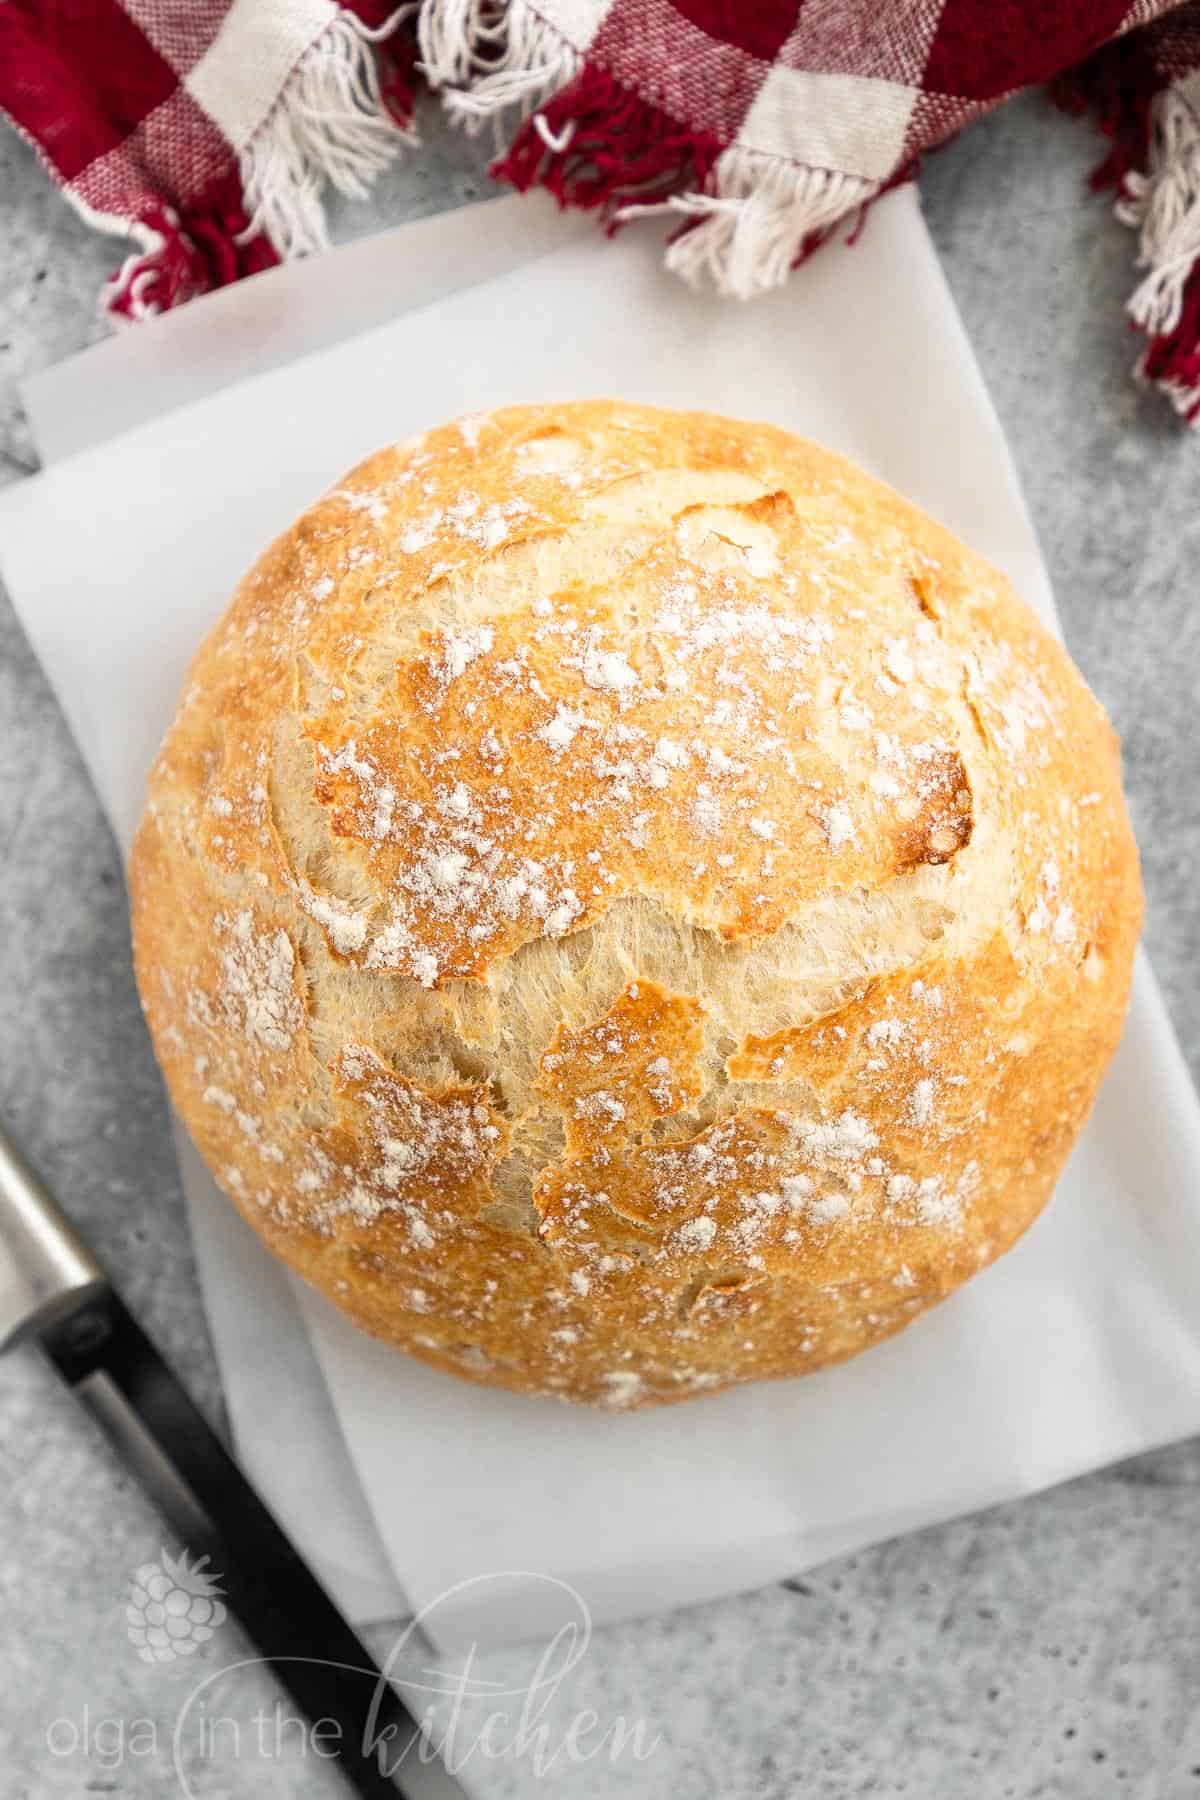
7. Sprinkle the bottom of the dutch oven with flour or cornmeal and carefully place (or drop) the dough in the center of your hot dutch oven. Cover with lid and bake for 30 minutes at 450°F. Carefully remove hot lid and bake for another 15 minutes to 20 minutes until golden brown.
8. Remove the bread from the pot (it should fall out easily) and place directly on wire rack to cool completely until it’s nearly room temperature before slicing it.
Quick Tips:
- Use warm water – between 100°F to 110°F. Avoid using hot water or it will deactivate the yeast.
- Substitute for active yeast – instant dry yeast can be replaced for active dry yeast. Use 3/4 teaspoon active dry yeast in this recipe.
- Measure correctly – spoon flour into a measuring cup and level off the top with the back of a knife.
- Rising the dough – draft-free room temperature, unheated oven or turned off microwave. Avoid placing dough into hot oven to rise. Hot temperature will deactivate and ruin the yeast.
- For round, less flat bread – use a 4qt or 5 qt dutch oven so that the bread rises upwards, rather than spreading out over the entire surface of bigger pot.
- Preheat the oven and dutch oven – placing the bread into hot dutch will help form a beautiful crust.
- Flour the dutch oven – to make sure your bread doesn’t stick to the pot, sprinkle flour or cornmeal on the bottom of the preheated pot.
- Cool before slicing – always wait for hot bread to cool to room temperature before slicing. Cutting it while hot, will release too much steam and the bread will become gummy.
Do You Need Dutch Oven?
The key to making this crusty easy no-knead bread is that you need something really heavy and thick so that it holds and radiates heat well and it must have a lid. A thick glass or stoneware dish may also work, but probably not as well as cast iron dutch oven.
I used a 4 qt Martha Stewart dutch oven, which can be purchased as low as $40 on sale. You do not need to spend hundreds of dollars on single dutch oven. Martha Stewart and other brands have different sizes of dutch ovens for a lot cheaper. They all do the same job!
Do I Need to Proof the Yeast?
You do not need to proof the yeast for this bread recipe. You can just combine it with flour. However, I like to dissolve the yeast in water before combining with the flour to make sure it incorporates equally throughout the dough.
Why Did my Bread Stick to the Pot?
To prevent your bread from sticking to the pot, make sure your dutch oven is hot enough before adding the dough. Also, make sure to sprinkle some flour or cornmeal on the bottom of hot pot before adding the dough.
Alternatively, you would use parchment paper to keep bread from sticking to the pot, but I don’t do it because all the brands of parchment paper I have say 420°F maximum. I don’t want my oven or your oven to get on fire, so let’s use flour to avoid any risk.
My Bread is Too Dense:
Usually bread is too dense if there is too much flour. Keep in mind that this dough will be pretty sticky, so don’t be tempted to add more flour. Also, humidity and age of the flour could be another factor.
Follow the instructions and avoid overmixing the dough in the beginning or before baking. There is no kneading required that is why this bread is called ‘No-Knead’.
Readers Favorite Bread Recipes:
- White Bread Machine Bread – family staple bread recipe for decades
- Cheese Vatrushka – with the scrumptious cheese filling and fluffy dough
- Ukrainian Pumpkin Bread – this bread is made all-year round (Easter and Christmas are a must!)
- French Bread Buns – these are so easy and go well together with any soup
- Banana Berries Bread – moist banana bread, loaded with fresh berries
- Cherry Pizza Pie – amazing cherry and cheese topping
Easy No-Knead Bread
Ingredients
- 3 cups all-purpose flour
- 1 teaspoon fine salt, (for saltier, do 1 1/2 tsp)
- 1/2 teaspoon instant dry yeast
- 1 1/2 cups warm water (100-110°F)
Instructions
- In a glass measuring cup, combine to dissolve 1 1/2 cups warm water and 1/2 tsp instant dry yeast. Let it sit 2-3 mins.
- Into a large mixing bowl, sift 3 cups all-purpose flour and add 1 tsp fine salt. Whisk to combine.
- Pour in the water mixture and use a wooden spoon to stir until all of the flour is incorporated (do not knead). The dough will be very sticky, but do not add additional flour.
- Cover the bowl with a plastic food wrap and let the dough rest on your counter or inside your unheated over for 18 hours to 24 hours.
- Place an empty dutch oven and lid inside the oven and preheat the oven to 450°F. Once preheated, remove dutch oven and place on the stove. Be careful not to touch the dutch oven or lid without oven mitts because it will be very hot.
- Meanwhile, generously dust a cutting board or work surface with flour. Using a rubber spatula, scrape the dough out (which will be very thin and sticky) onto the floured surface. With help of pastry scraper or well-floured hands, shape the dough by folding the dough in half and then fold in half again, pulling the dough together into a loose ball.
- Sprinkle the bottom of the dutch oven with flour or cornmeal and carefully place (or drop) the bread in the center of your hot dutch oven. Cover with lid and bake for 30 minutes at 450°F. Carefully remove hot lid and bake for another 15 minutes to 20 minutes until golden brown.
- Remove the bread from the pot (it should fall out easily) and place directly on wire rack to cool completely until it’s nearly room temperature before slicing it.
Notes
- Use warm water – between 100°F to 110°F. Avoid using hot water or it will deactivate the yeast.
- Substitute for active yeast – instant dry yeast can be replaced for active dry yeast. Use 3/4 teaspoon active dry yeast in this recipe.
- Measure correctly – spoon flour into a measuring cup and level off the top with the back of a knife.
- Rising the dough – draft-free room temperature, unheated oven or turned off microwave. Avoid placing dough into hot oven to rise. Hot temperature will deactivate and ruin the yeast.
- For round, less flat bread – use a 4qt or 5 qt dutch oven so that the bread rises upwards, rather than spreading out over the entire surface of bigger pot.
- Preheat the oven and dutch oven – placing the bread into hot dutch will help form a beautiful crust.
- Flour the dutch oven – to make sure your bread doesn’t stick to the pot, sprinkle flour or cornmeal on the bottom of the preheated pot.
- Cool bread before slicing – always wait for hot bread to cool to room temperature before slicing. Cutting hot bread will release too much steam and the bread will become gummy.
Sign Up for My Email List
Something sweet for your inbox! Join others and subscribe to my free email list. You’ll get every new recipe and post as they’re published, plus an email with my most popular tips and recipes.

Shelly Hitchens says:
1st loaf ever and it turned out great!
I’m trying to make my own sour dough starter. Can I substutute this for
dry yeast? How much do I use?
Olga in the Kitchen says:
That’s awesome, Shelly! I’m so happy to hear the bread turned out great 🙂 I have not experienced with sour dough starter myself, but I don’t see a reason why it would not work. Here’s a great resource for converting to using sourdough starter https://traditionalcookingschool.com/food-preparation/convert-recipes-to-sourdough-aw043/
Louise says:
thank you Olga. This is the first time a make bread and it turns out delicious.
Olga in the Kitchen says:
I’m so happy to hear you enjoyed this recipe, Louise! 🙂
Corinne says:
Love it and it’s beautiful! I would love to add a pic
Olga in the Kitchen says:
I’m so glad you enjoyed it, Corinne! 🙂 You can submit a picture under the bread pin on Pinterest for me and others to see.
Niramai says:
Thank you so much for the recipe! I never thought that I would be able to bake bread like this. It turns out very nice every time.
Olga in the Kitchen says:
I’m so happy to hear you’re enjoying this recipe, Niramai!
Katie says:
I have made this bread at least 10 times! It is SO simple, so delicious and super easy.
Thank you Olga!
Olga in the Kitchen says:
That’s so awesome, Katie! Sounds like a new favorite for you 🙂 I’m so happy to hear you’re enjoying this recipe!
Laurel says:
I am obsessed with making this bread! I have added walnuts and dried cranberries it’s just like the Costco loaf. Other variations I tried are: pumpkin seeds, sunflower seeds, flax seeds, herbs and honestly the plain bread is the best. Each loaf is beautiful and after making this bread at least 10 times, each time is a success. Most importantly is to get that dutch oven hot. If it’s not hot, you’re bread will most likely stick to the bottom or not grow to the top much (it will spread to the sides while the dutch oven keeps heating).
Olga in the Kitchen says:
Thank you for sharing that with us, Laurel! I’m so happy to hear you enjoyed this recipe!
Niramai says:
Do you add the rosemary when mixing the flour and yeast or after it rises before putting it in the oven?
Thank you.
Olga in the Kitchen says:
My family does not really like rosemary (besides me), therefore I’m inexperienced cooking with rosemary, but after doing a bit research, people add rosemary at the beginning. So you would combine rosemary with flour and salt. Hope this helps! 🙂
SOLA says:
I just want to compliment YOu! This is the first recipe that included the measurements in the directions. Usually there is an ingredient list with measurements the detailed instructions and I am scrolling back and forth while mixing. You included them in the directions and I love it! I think I messed up already because I’m afraid my water may have been too hot! But nonetheless, following your recipe was easy peasy! Thanks!
Olga in the Kitchen says:
Thank you for the compliment! 🙂 I try to make each recipe as easy as possible for everyone, making sure the whole process is fun and not painful 😀 . Make sure to use warm water, not hot or it will deactivate yeast. I’m happy to hear you enjoyed the recipe!
Hannah says:
I found your blog over the weekend and made this bread on Monday! So good! Mine was a little floppier than yours and I wasn’t able to shape it very well, but the results were incredible and delicious! Perfection! We had it with a nice hearty chicken soup (from your blog)!
Olga in the Kitchen says:
Thanks for reporting back, Hannah! So glad you enjoyed the bread!
Barb says:
Great recipe. Easy and delicious. Now I cannot stop baking it.
Olga in the Kitchen says:
That’s wonderful, Barb! I’m so happy to hear you enjoyed this recipe!
Erin says:
Soooo good. That’s all I have to say 🙂
Olga in the Kitchen says:
So glad you enjoyed it! 🙂