Blogger Tools
Knowledge of blogger tools can be very important if you’re starting a blog. I get questions all the time on the type of tools, photography and props I use and about OlgaintheKitchen blog growth. I thought it would be helpful to create a resource page that new bloggers (especially food bloggers) can use, to help them make their decisions about certain products before they purchase anything.
These are products and services that I use with my blog. I hope it will be helpful for those who asked or still looking for answers. I’m still learning every day and the list will always be updated as I find new resources and will feel that they are worth mentioning.
Food Photography and Video Tools

Adobe Lightroom – After struggling with Photoshop for couple years, I switched to Adobe Lightroom. It was a game-changer! It’s reasonably priced and has many options for editing & re-sizing photos before uploading them into WordPress. I learned to use it from other bloggers and self-taught myself with tries and errors that led to success.
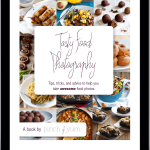
Tasty Food Photography – Photography is a very important tool of any food blog. People eat with their eyes. Beautiful photos make you want to jump into your kitchen and start cooking. I worked as a photographer for couple years and I always had an eye for beautiful photos, but food photography is a totally different world I had to learn. There are so many resources online to help you with selecting a camera and taking great photos. Check Food Blogger Pro or Tasty Food Photography eBook by Lindsay at Food Blogger Pro. These courses are easy to follow, nicely laid out and excellent source for food photography including the lightning basics, Photoshop, Lightroom and more.
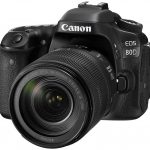 Canon EOS 80D – I upgraded to Canon EOS 80D after using Nikon D3400 for few years. It shoots great photos, incredible HD videos with beautiful bright colors, has amazing auto-focus, touch screen, great videos and many other options. It’s an expensive camera, so if you’re just starting out, you might start with something like NikonD3400, Canon EOS Rebel SL1 or even using the camera on your phone.
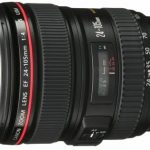 Canon EF 24-105mm f/4 L IS USM Lens – Similar lens to the one that I have in my camera package. My main food photography lens that I use to take step-by-step photos. The image quality is excellent and is proved to shoot great videos as well.
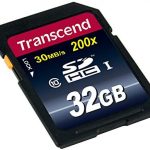 Transcend 32 GB Class 10 SDHC Flash Memory Card – A fast memory card with tons of space that is especially great if you’re shooting RAW or videos. I have many of these (labeled) so I know what’s on each.
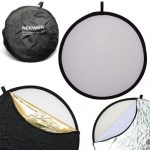 Light Reflector – Reflectors are used to fill in unnecessary shadows around dishes, particularly by the window where you are. A white card might also do the job or a dark card to bring in some shadows. I also use this white reflector to cover the windows from that extreme sunlight.
Building Your Brand
Driving Traffic to Your Food Blog:
Here’s a short-sweet list of food photo submission sites I like to use. It can take some time to go through the process of entering a submission, but the traffic you gain from accepted submission can be so great! You can see as little as 100 to as much as 1000 visits to your blog in a day if you get a submission featured on the right site and at the right time. My best source by far had been Pinterest, but Foodgawker is another great option.
SEO and Writing Posts:
I want to start this section by admitting that I am NOT an expert on SEO! There are thousands of other bloggers who understand it more than I do about search rankings, but let me share the small amount of knowledge I have. This is a very simple explanation and if you have any questions, it’s probably best to ask a search engine or a pro because I most likely won’t know the answer!!
SEO (search engine optimization) is a practice you can apply to the way you deliver your online content. For food bloggers, SEO-friendly blog posts can help them rank higher in search results. Search engines see your optimized content and think that you are an expect on the subject and you should be ranked higher. This means more website traffic and usually that is every blogger’s goal!
I have to admit that I don’t enjoy formatting posts to be SEO-friendly because very often it removes the personality from the blog posts. SEO-friendly posts should load fast, include headers, keywords, lists and relevant information on the subject. Driving traffic to my blog is one of my priorities, but so is connecting with my readers. Sometimes it’s a bit complicated to balance between the two.
- SEMrush – It’s a bit pricy, but I use it for keywords and to see how my keywords rank. I had no idea it existed until one of the bloggers mentioned it to me. It has so much available to members, but I don’t have time (or understanding) for most of this stuff.
- Google Trends – I use this to determine which keywords people are searching for. For example, “banana bread” or “homemade banana bread.” You can compare to see which search is more popular.
- Answer The Public – Similar to Google Trends. You can type in a keyword and it populates what questions people are asking on it. For example, type in “banana bread.” You will see people ask “how to make banana bread moist” and you can make sure to answer that question in your blog post.
 Flodesk E-Mail Marketing – I’ve switched over to Flodesk from Mad Mimi for my email marketing and I love it. It’s simple, reliable, customizable and so easy to use. I never could figure out MailChimp or Mad Mimi – both were so confusing. Both had so many options and no options at the same time. Flodesk has many form options that are completely customizable and you don’t need to deal with html at all because the preview is right in front of you. Use my referral code by clicking on Flodesk link to receive 50% off your subscription.
 WordPress Plugins – Plugins can extend the functionality of your blog, but I recommend to keep the number of plugins to a minimum as they will slow down your site and overload the server. (I am guilty of that.) I used to have over 50 plugins and after my site was redesigned, they coded many of them and now I’m down by 65%. Some plugins I use are: Akismet, WP Recipe Maker, ShortPixel, WP Rocket and Yoast SEO.
Image Sizing:
Image sizing is one of the common mistakes new bloggers make (I’m so guilty of it). Not resizing photos properly and uploading them into to their blogs, which results in a really slow loading site. Yes, we all think in the beginning that uploading 5MB image is going to make your blog beautiful and sharp and it will. You have to think of your readers – if site is loading slow, I will be the first to get off it – it’s frustrating. Thanks to the ShortPixel plugin, I was able to run my web through it and smush all images from several MB to couple hundred kb and you can hardly tell the difference.
Resize to the way your want your photos to appear on your blog. Because my site has custom design, I have 720 width. I resize my photos using Lightroom to 1200 wide by 1800 tall and no more than 400kb, but in reality I can even do as little as 720 wide, making sure the image file has a 400kb limit and then upload it into WordPress. The ShortPixel compresses images once they are uploaded into WordPress and all images are 100-200kb.
Photography Props:
When I first started, I thought I needed tons of different plates, napkins, little props to use in my food photos, but it was all a huge mistake. Unless that’s what you are going for, let me save you the headache. You will not be using those extra plates, napkins and props. Very often I come across food photos with so many props on it that I cannot even find the actual food. The best photography props are your everyday clean kitchen cloths, everyday plates and any fresh herbs, fruits or vegetables you have in your refrigerator in that moment.
Take a look at few recipes to get an idea for props:
- Moist Banana Nut Bread – I’m using pecans in the recipe, so I chopped some extra pecans to fill in the extra empty space on photo. Then I have my gray clean kitchen cloth and an everyday plate. Simple and beautiful!
- Easy Chicken and Rice Soup – I have fresh herbs in soup, sprinkled on top and then as prop. I’m also using bread that you would eat with soup and a towel. You can never go wrong with a towel.
- Sour Cream Blueberry Muffins – You can never go wrong with berries and it’s one of my favorite eatable prop. We have blueberry muffins, so I used blueberries and some leaves to give more pop to the photo.
- Creamy Broccoli Cauliflower Salad – Salads are the easiest to work on because usually you have many options for props. Fresh herbs, radishes, broccoli, lemons, nuts – whatever you have in a salad can also be used as a prop, just don’t overdo-it.
- How to Cook Buckwheat and How to Cook White Rice – I’m using buckwheat as prop and cooked rice in rice recipe. Also for Baked Millet Porridge (pshonyana kasha) I have millet around the dish. Grains make the perfect props because they always make photos look elegant.
Disclaimer: Please note that some of the links above are affiliate links and I will earn a commission if you purchase through those links. I use all of the products listed above and recommend them because they are companies that I have found helpful and trustworthy, not because I want to earn a commission from you using these products. Please let me know if you have any questions about anything listed above!
Normina says:
Olga, thank you so much for creating your food blog. I love all your recipes and your photos are amazing!
Olga in the Kitchen says:
Thank you for your compliment, Normina! 🙂