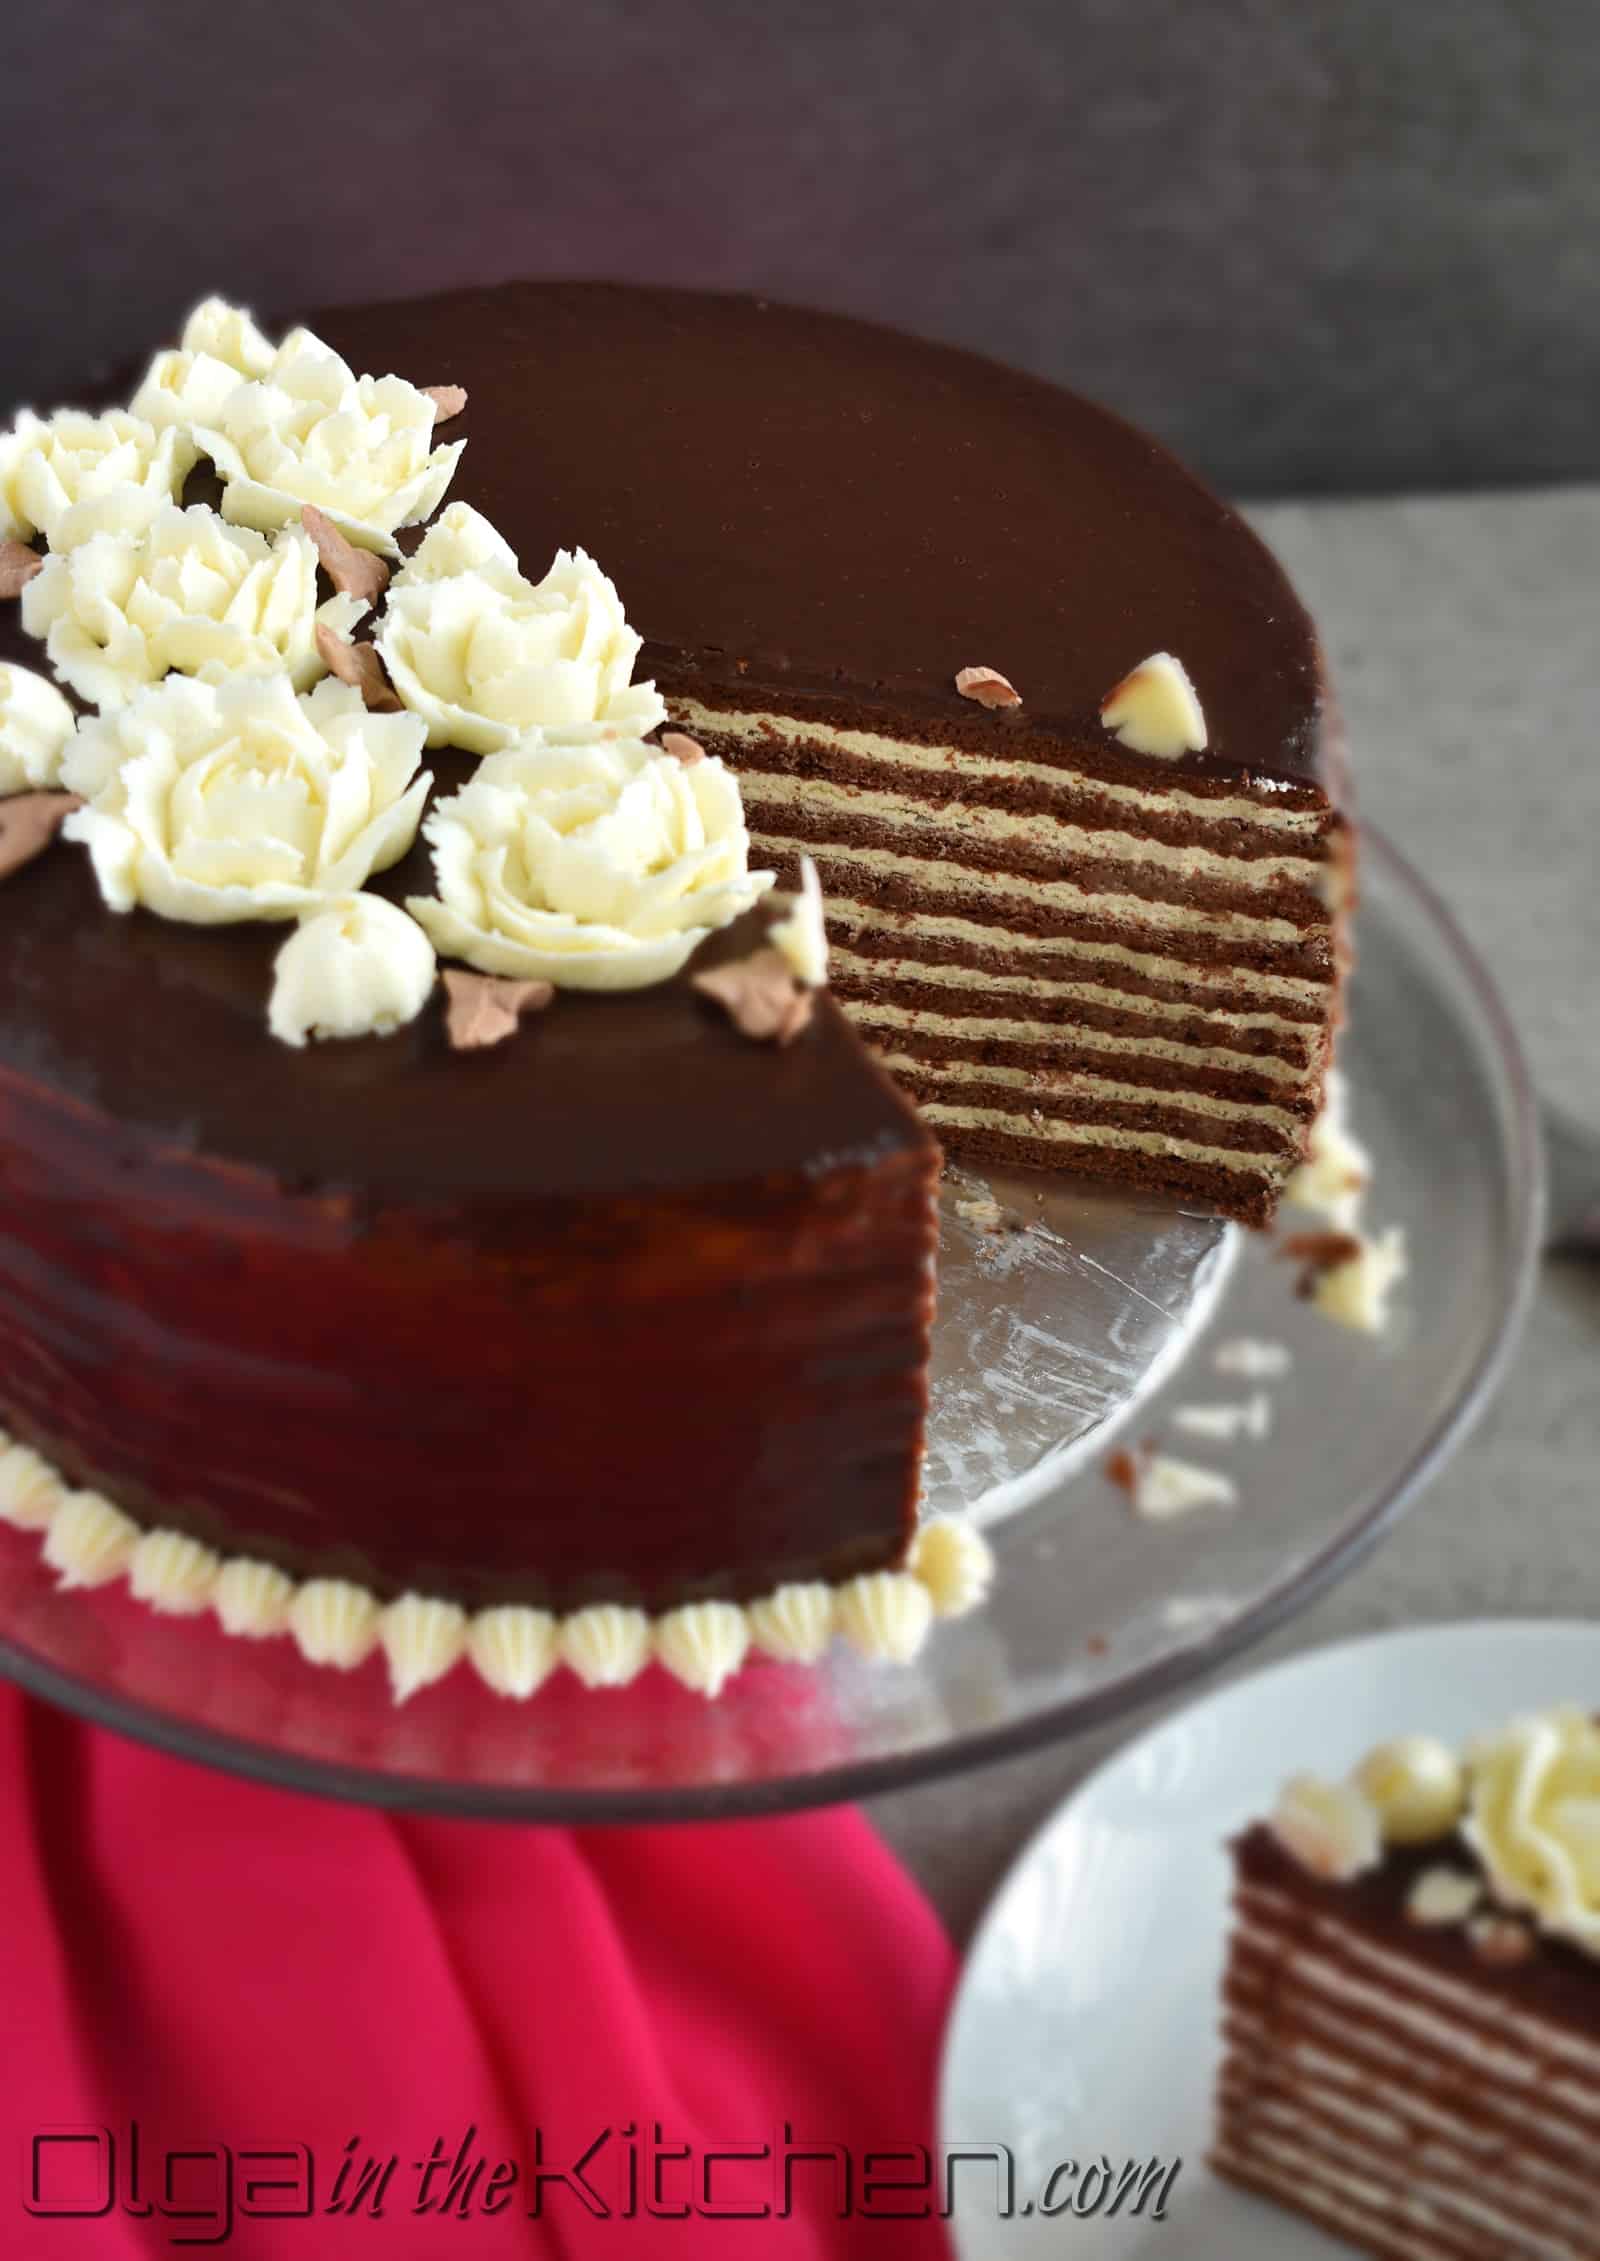
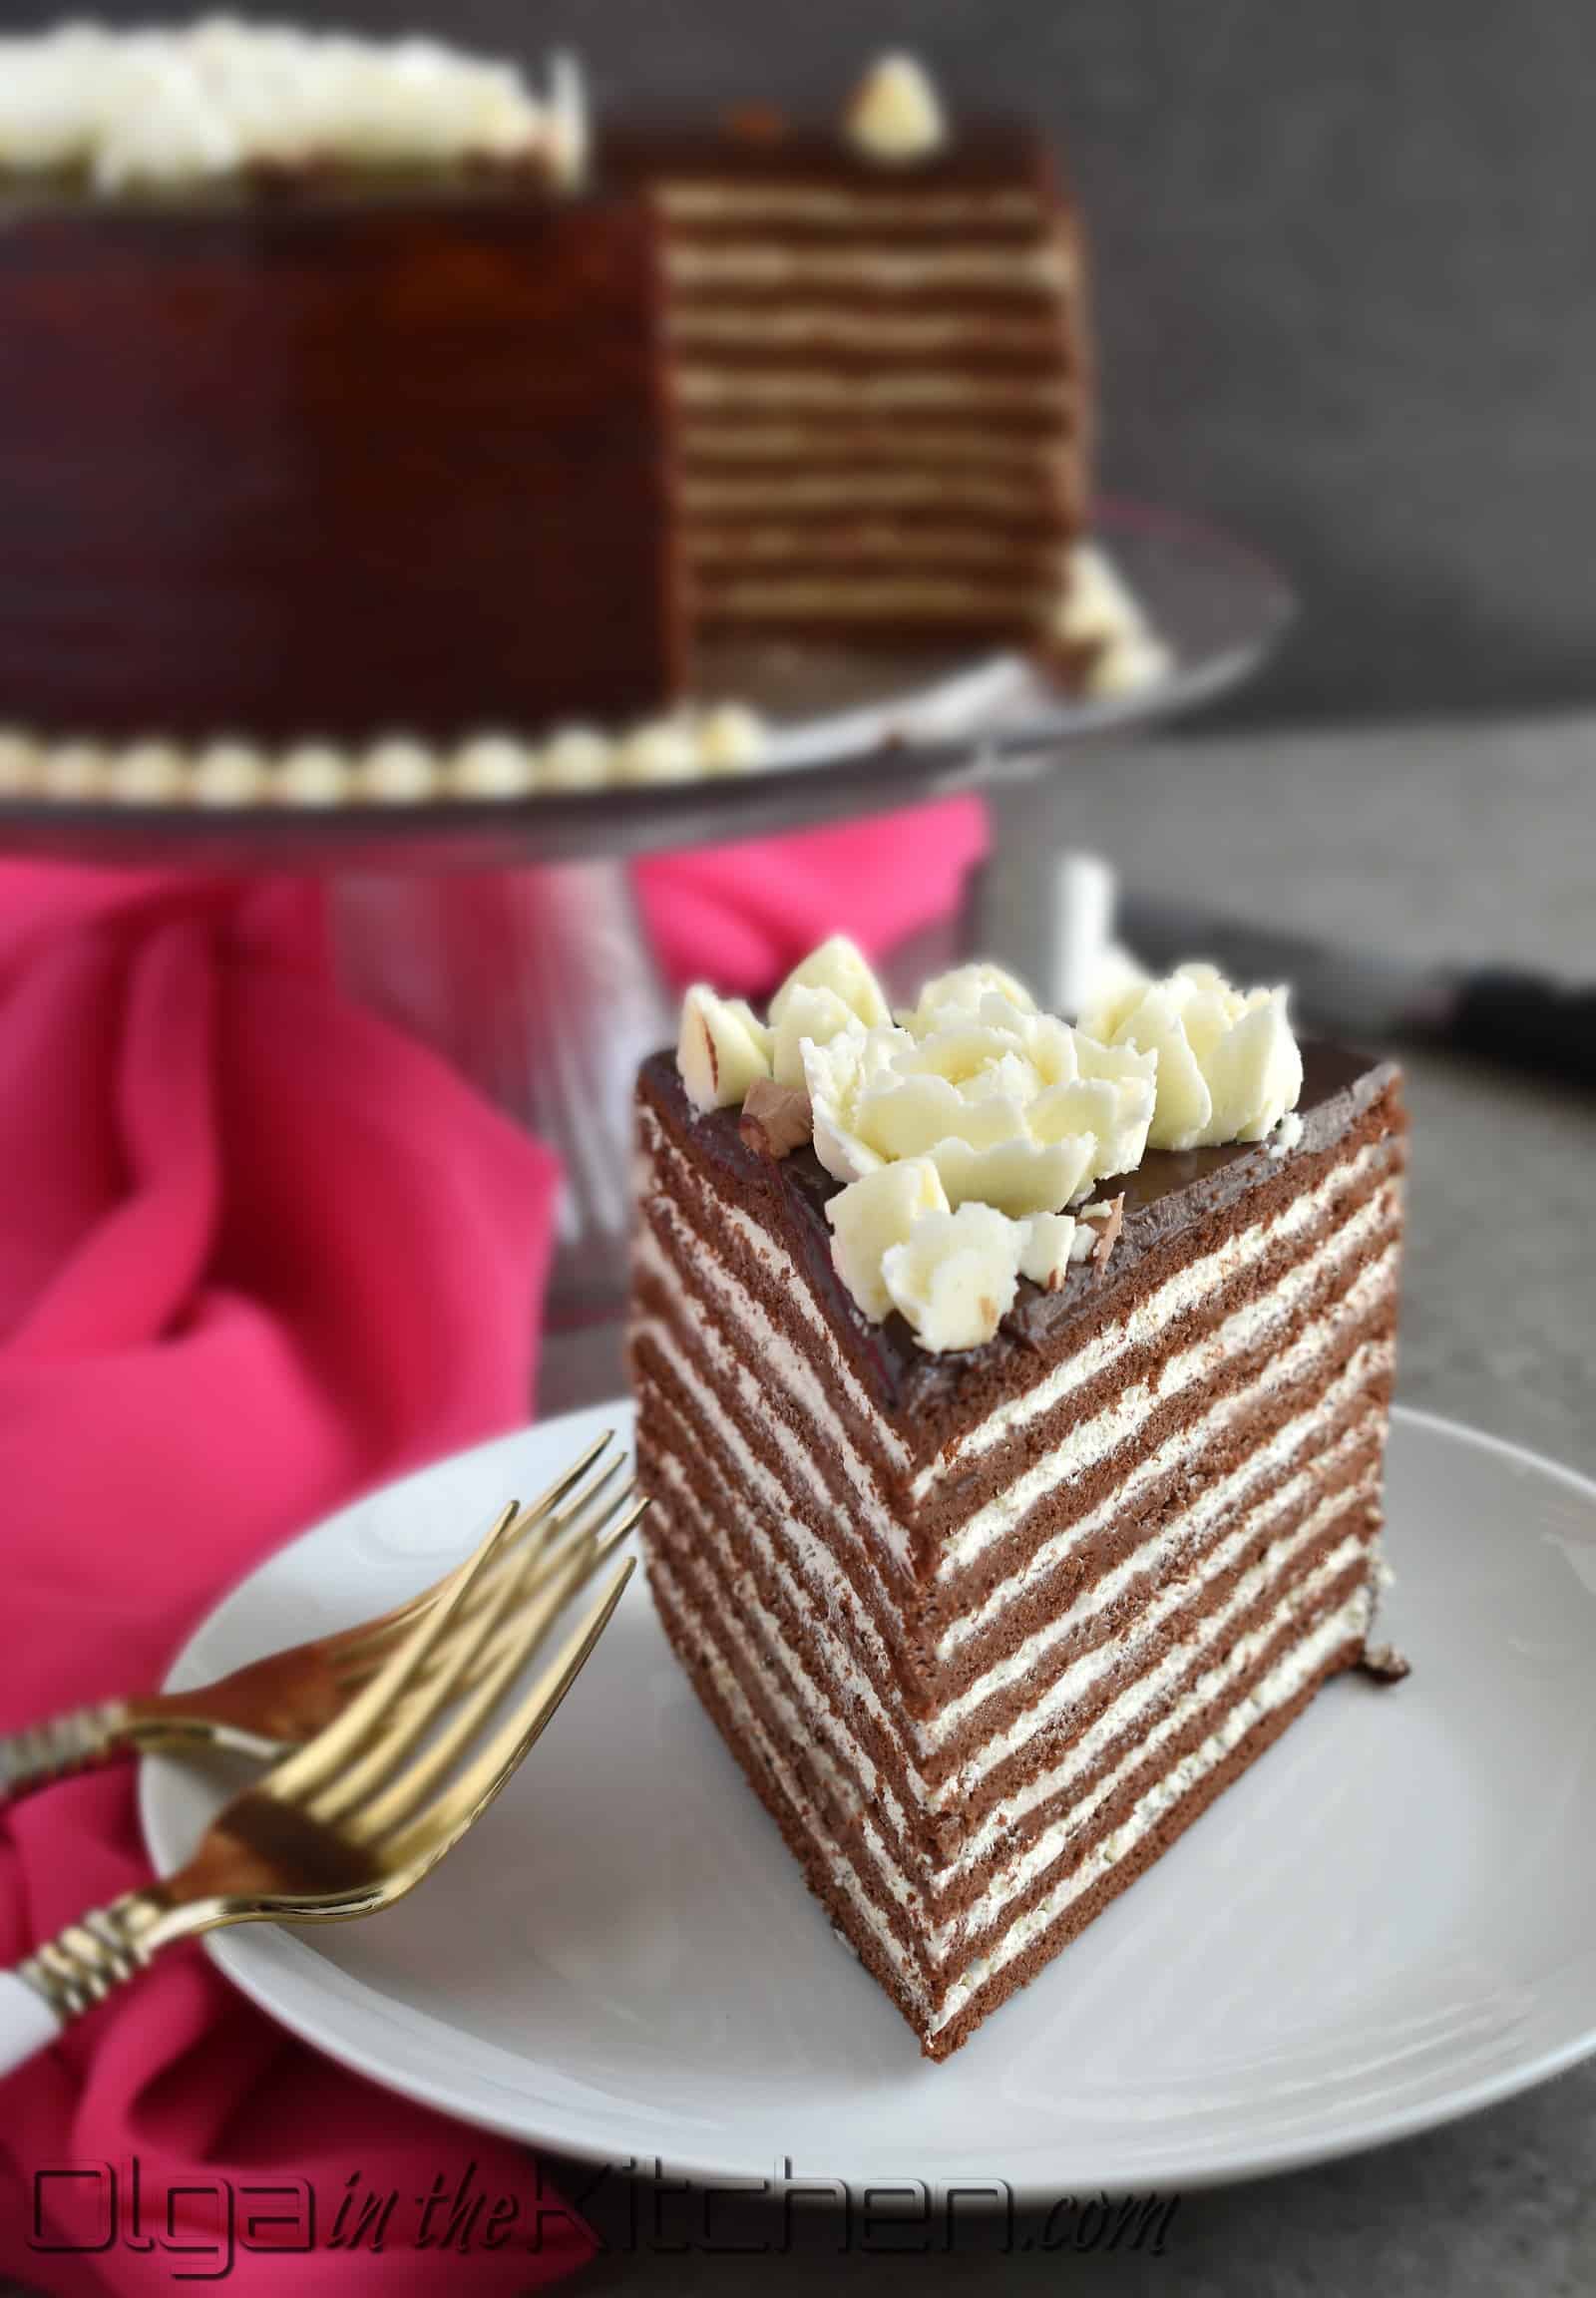
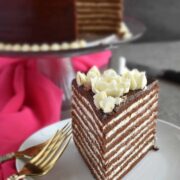
Chocolate Spartak Cake
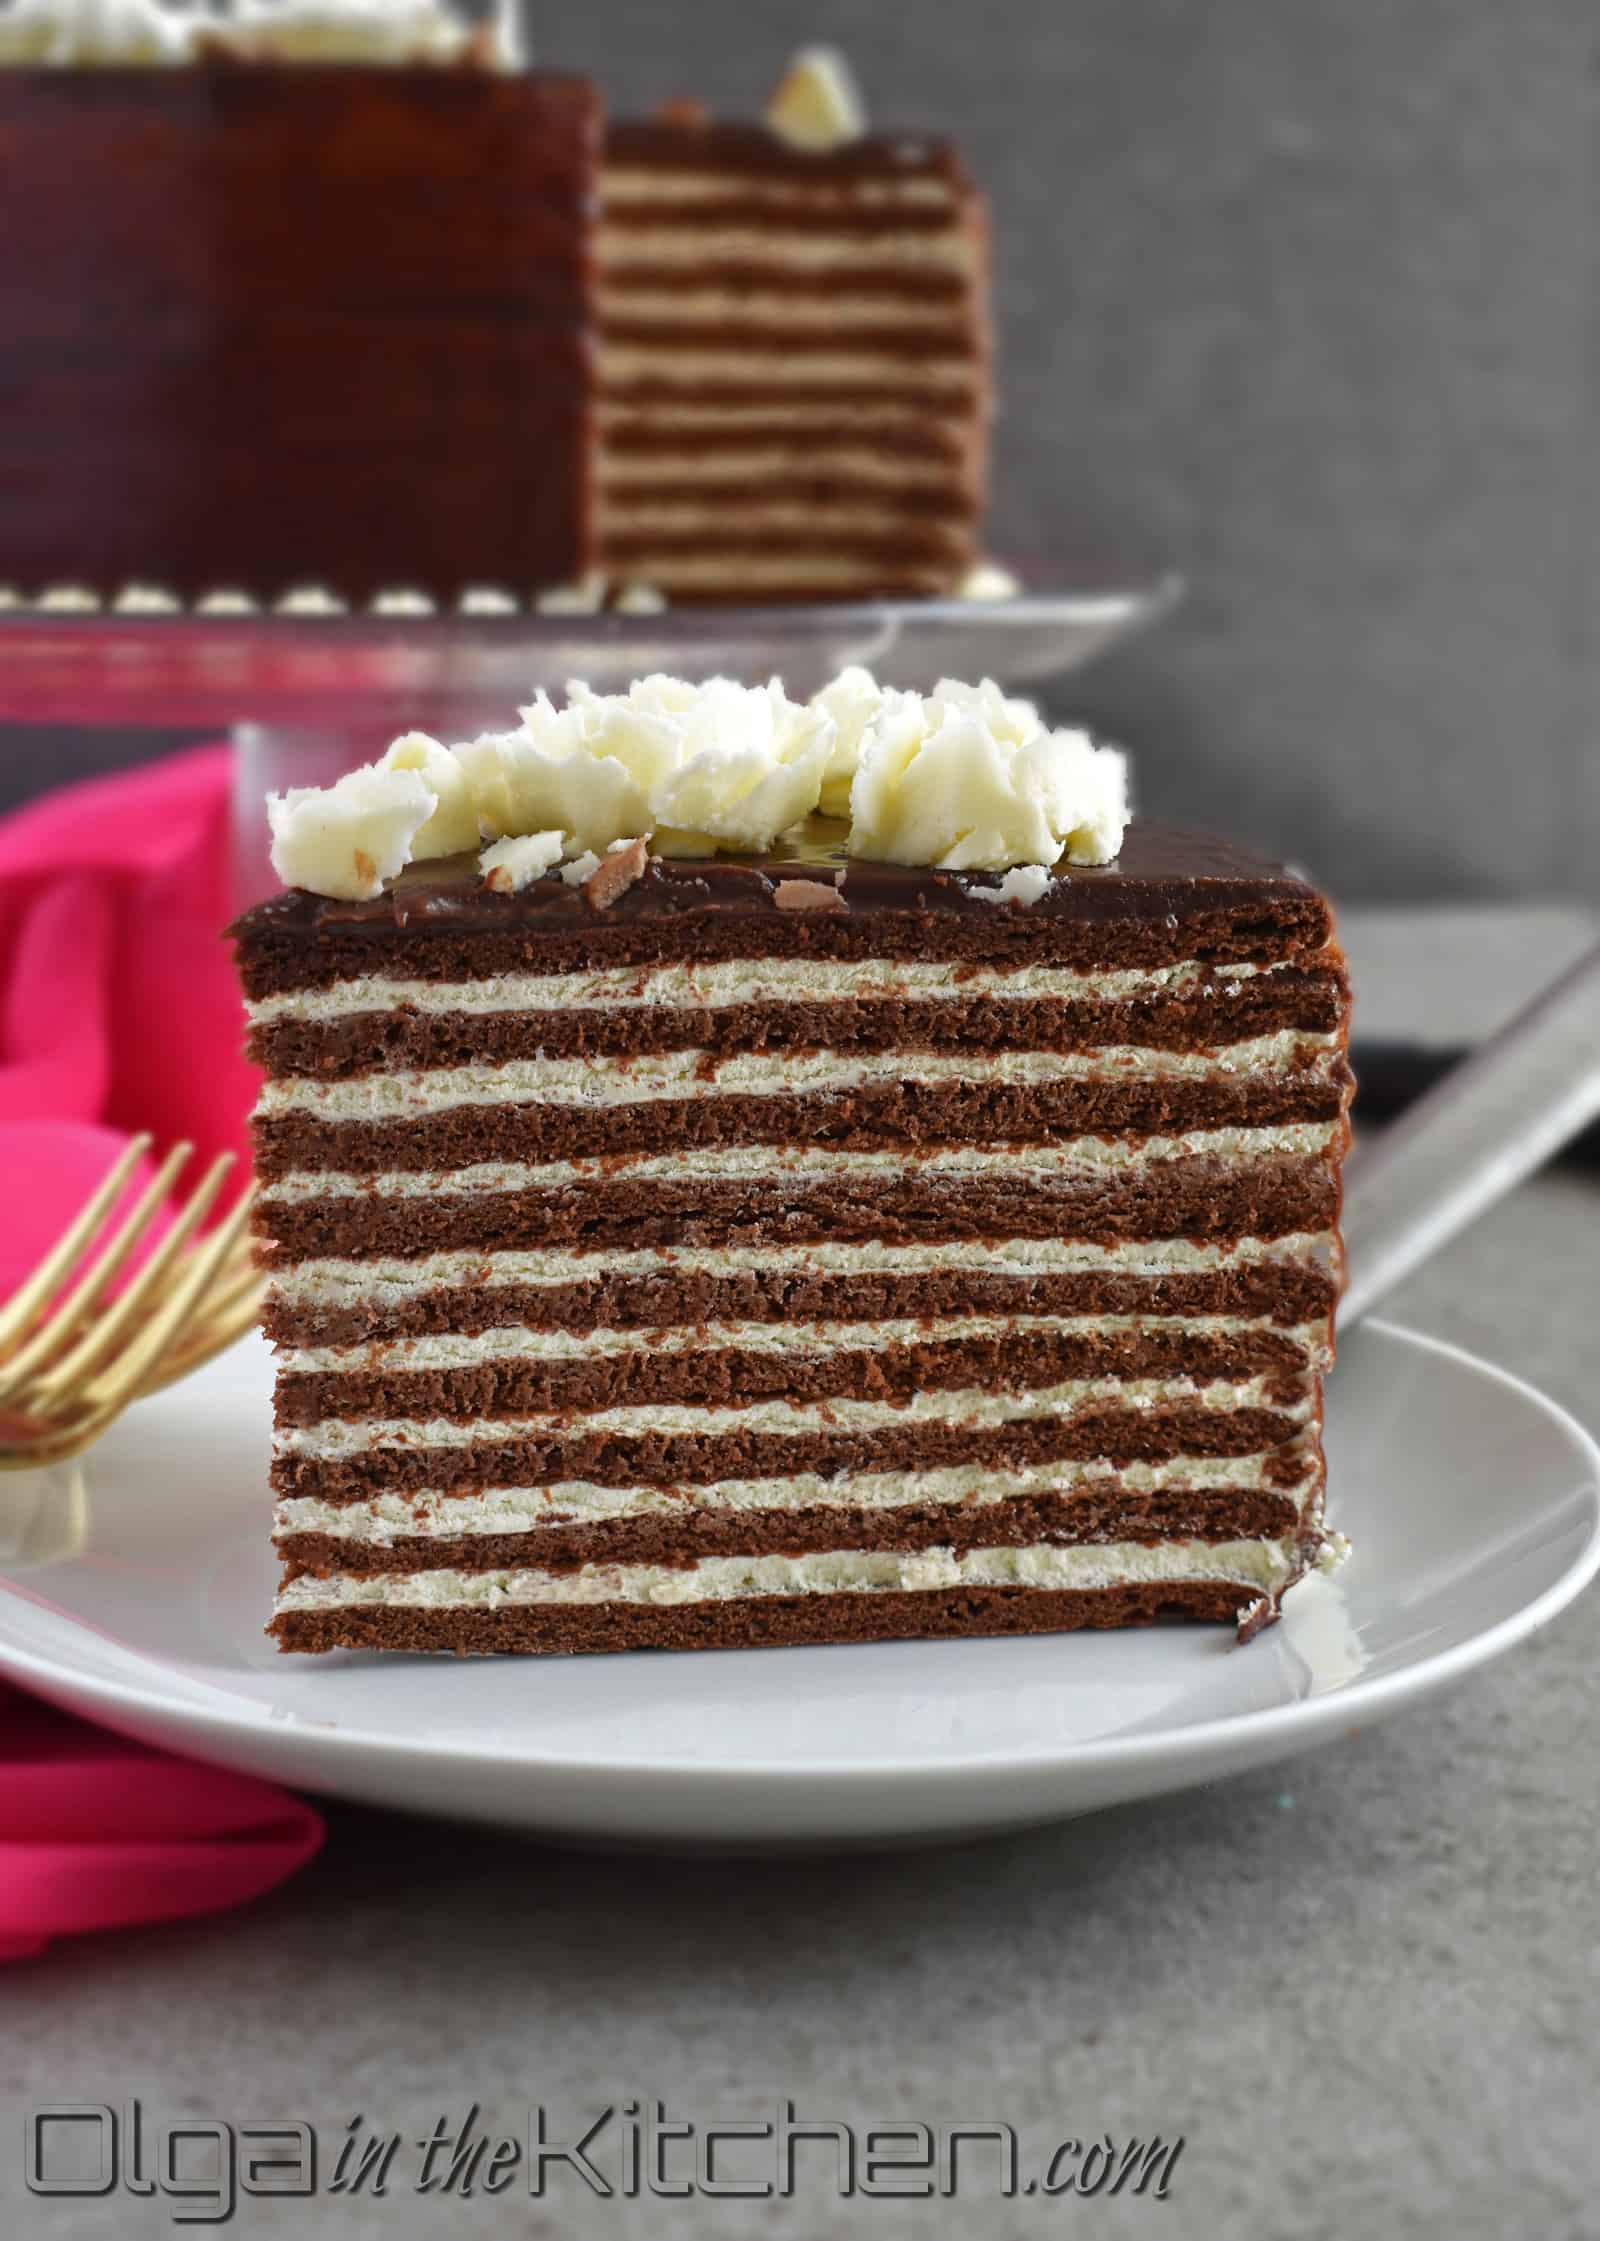
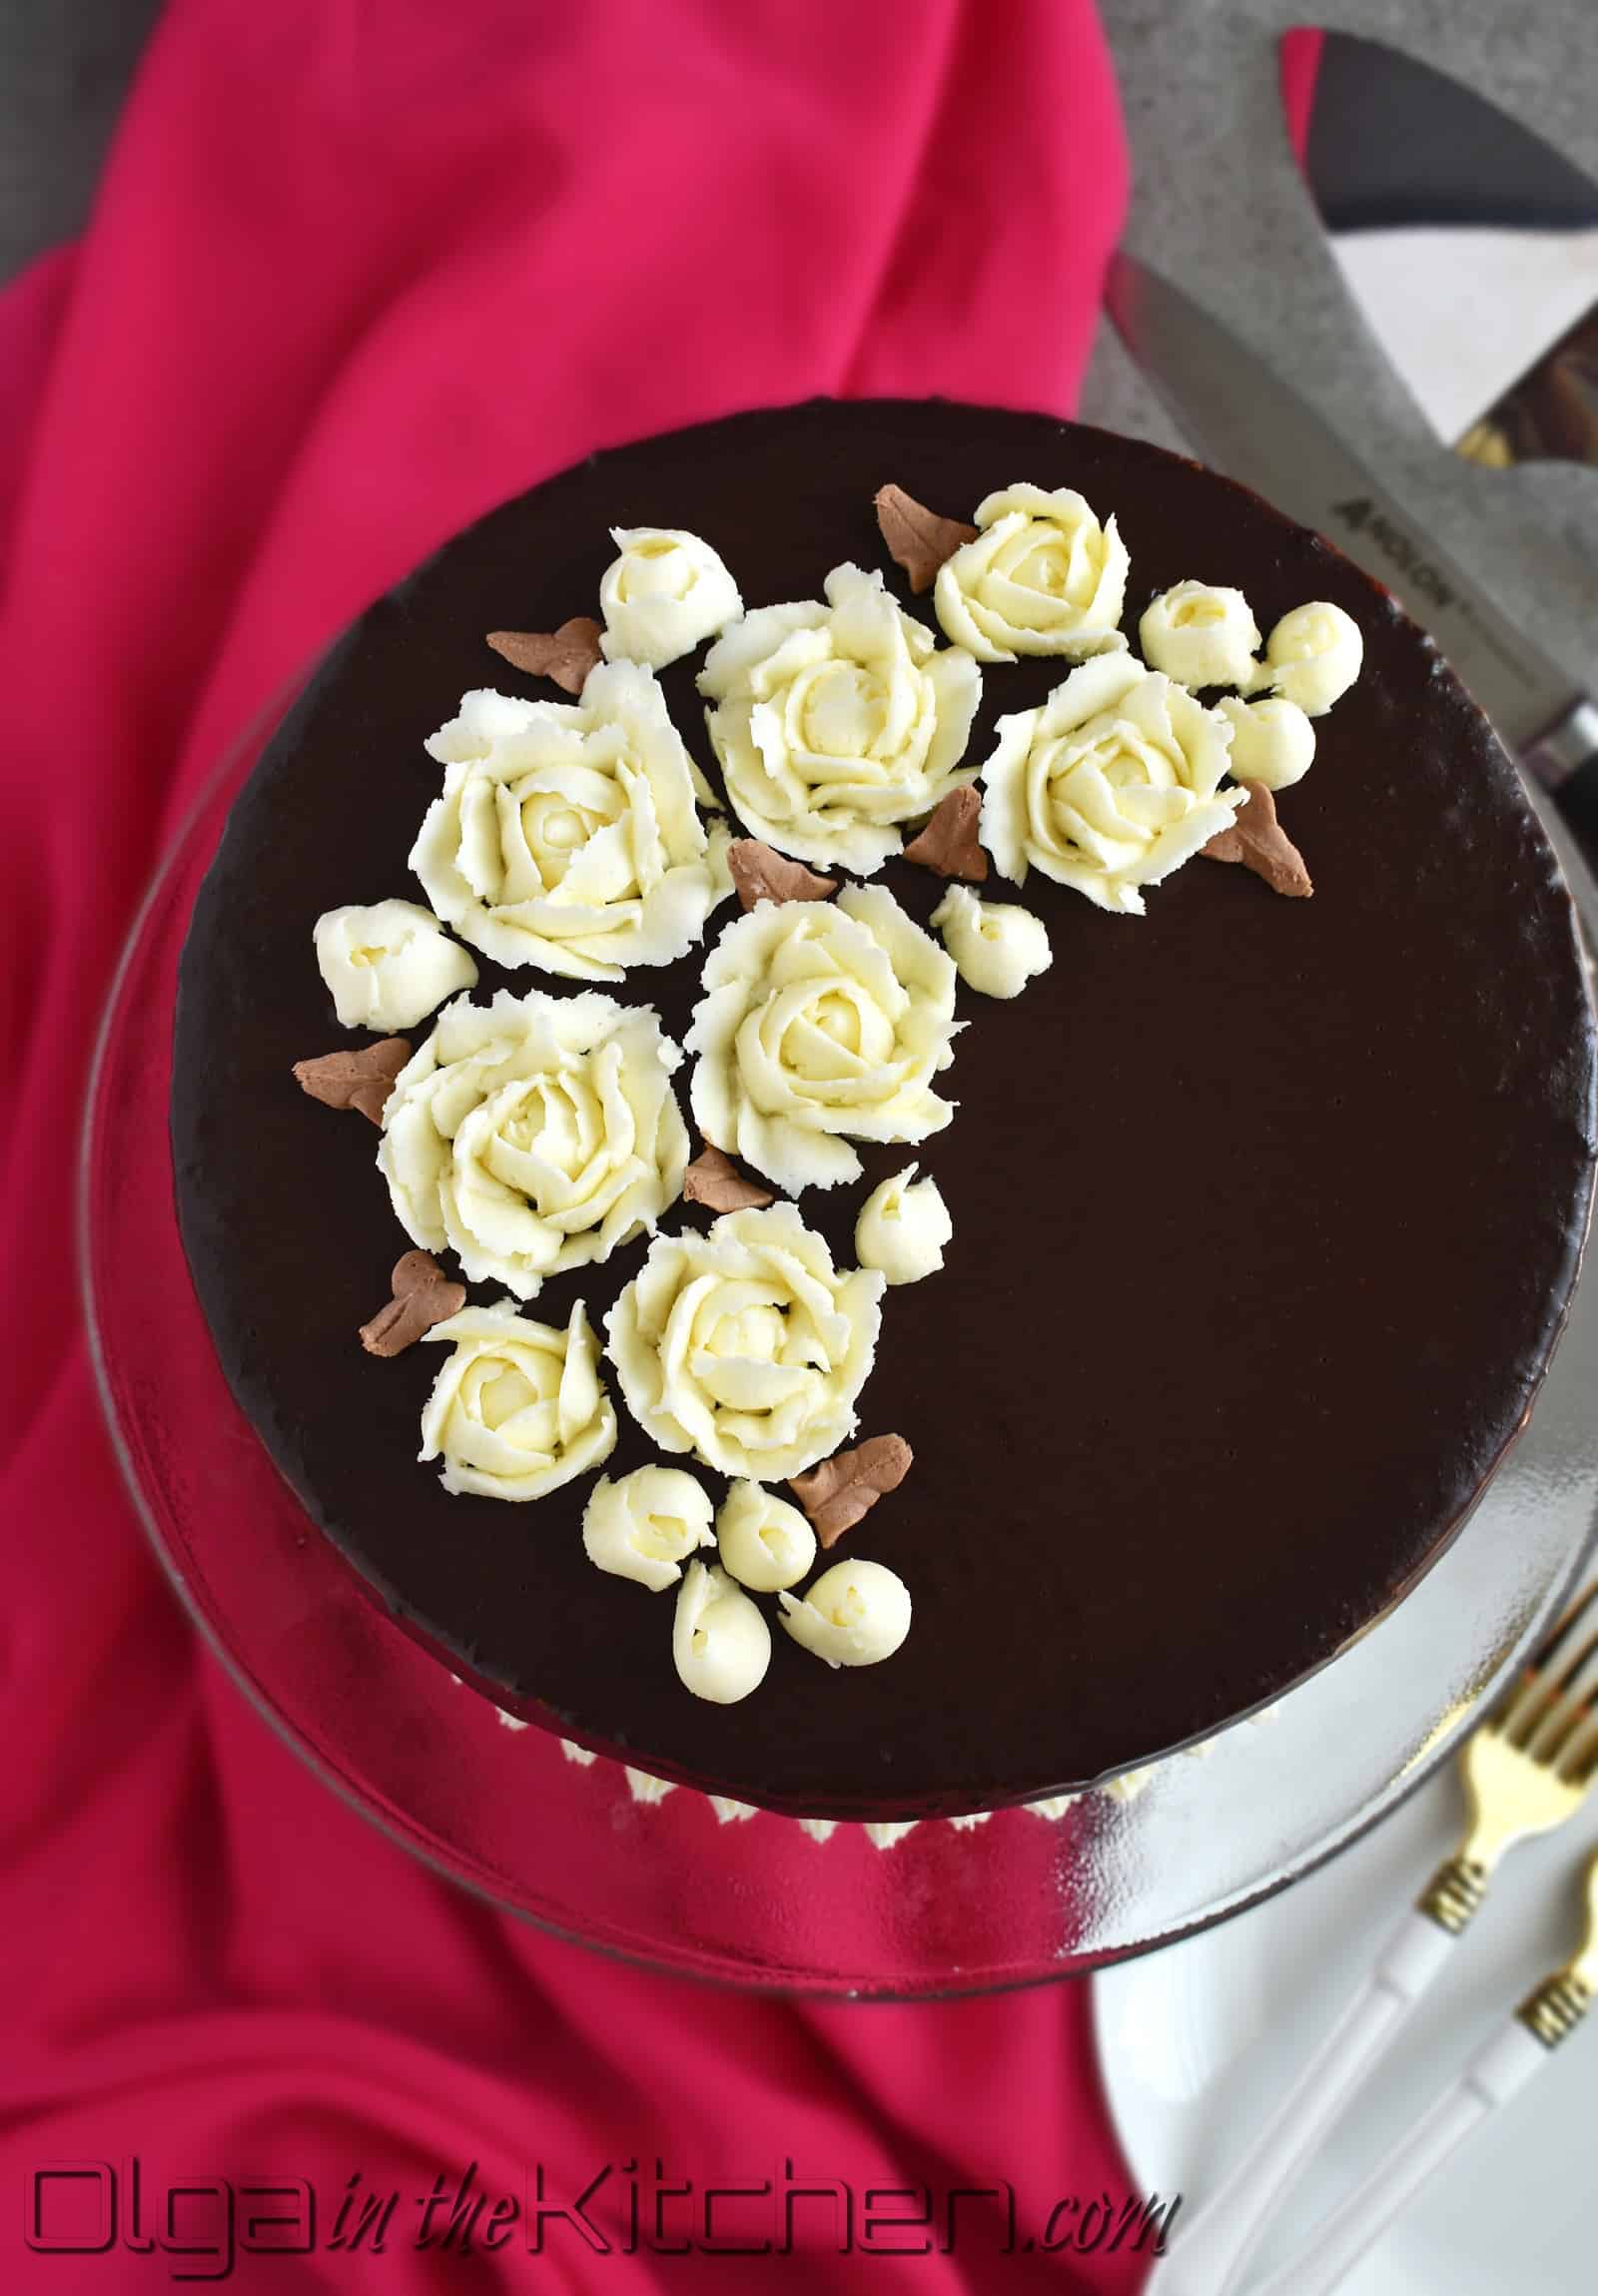
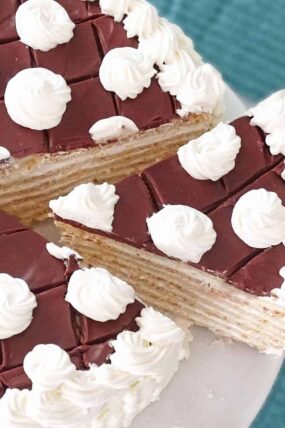
Chocolate Spartak Cake: chocolate-y, 9-layer cake, filled with sour cream frosting, topped with chocolate ganache and decorated with buttercream flowers!
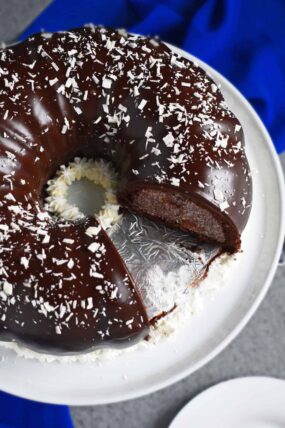
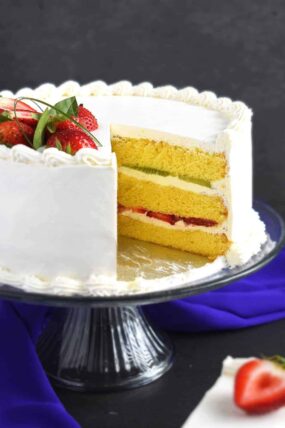
Want more Ukrainian cake recipes? Check them here: Chocolate Cherry Bundt Cake, Honey Cake, Strawberry Kiwi Cake.

This post may contain affiliate links. Read my disclosure policy.
Chocolate Spartak Cake Recipe:
Few months ago I’ve shared a 12” version of this cake for my mom’s birthday. I did 2 servings to make that cake, and decorated with buttercream flowers. This cake was a huge hit. It was stunning, but sadly it had to be eaten! 🙂
This cake is the favorite in my family nowadays! Everyone loves it…kids, adults, me, myself and I! 😀 When you start at a slice, you won’t notice when you’ve eaten the whole cake – you just keep eating it, and it gets better and better with every slice! (no kidding).
Chocolate Spartak Cake takes some effort, but then what cake doesn’t? You have to put effort into anything to make it look beautiful and delicious! But it’s not complicated at all, just takes a bit of time. It’s really easy to work with, just need your muscles to roll out each layer, but you cannot go wrong here. If you end up with a different brand of flour and add slightly more flour while rolling the cake layers than the recipe calls for, don’t worry about it. Once the cake is frosted, leave it at room temperature for few hours before refrigerating and it will do the trick. The cake will fall-apart in your mouth when served.
Chocolate Ganache
You can frost less layers of this cake, and use remaining to make the crumbs for the decoration, but there is something about chocolate ganache and chocolate layers, blending in nicely! Therefore, I always do chocolate ganache for this Spartak cake. I’m using a 36% heavy cream for the ganache in this post since I ran out of the usual 40% Darigold, so the ganache looks slightly on the thinner side, but the taste is still the same. I use the remaining ganache to drizzle other baked goods that same day or next day. Refrigerate and reheat over water bath, but never dispose chocolate! 😀 It’s chocolate!!
The amount of ingredients needed for chocolate ganache is just perfect for a 9” or 10” cake. It makes about 2 1/2 cups of ganache, but you will only use about 1/2 cup of it. The reason I make more because once you start pouring, you should not stop; slowly go throughout the whole cake. If you stop, the ganache will start setting and if you continue minutes later, you will have overlapping chocolate in places where you start pouring again. It won’t destroy the taste of the cake, but it will take away the smooth beauty of this chocolate prince! 😀
The cake must set before being covered in chocolate, otherwise chocolate will crack once the cake layers set. During the process of setting, the cake slightly shrinks down as the cake layers get moist and sit down closer to other layers. For best results, I frost the cake one day, and finish with ganache and buttercream next day.
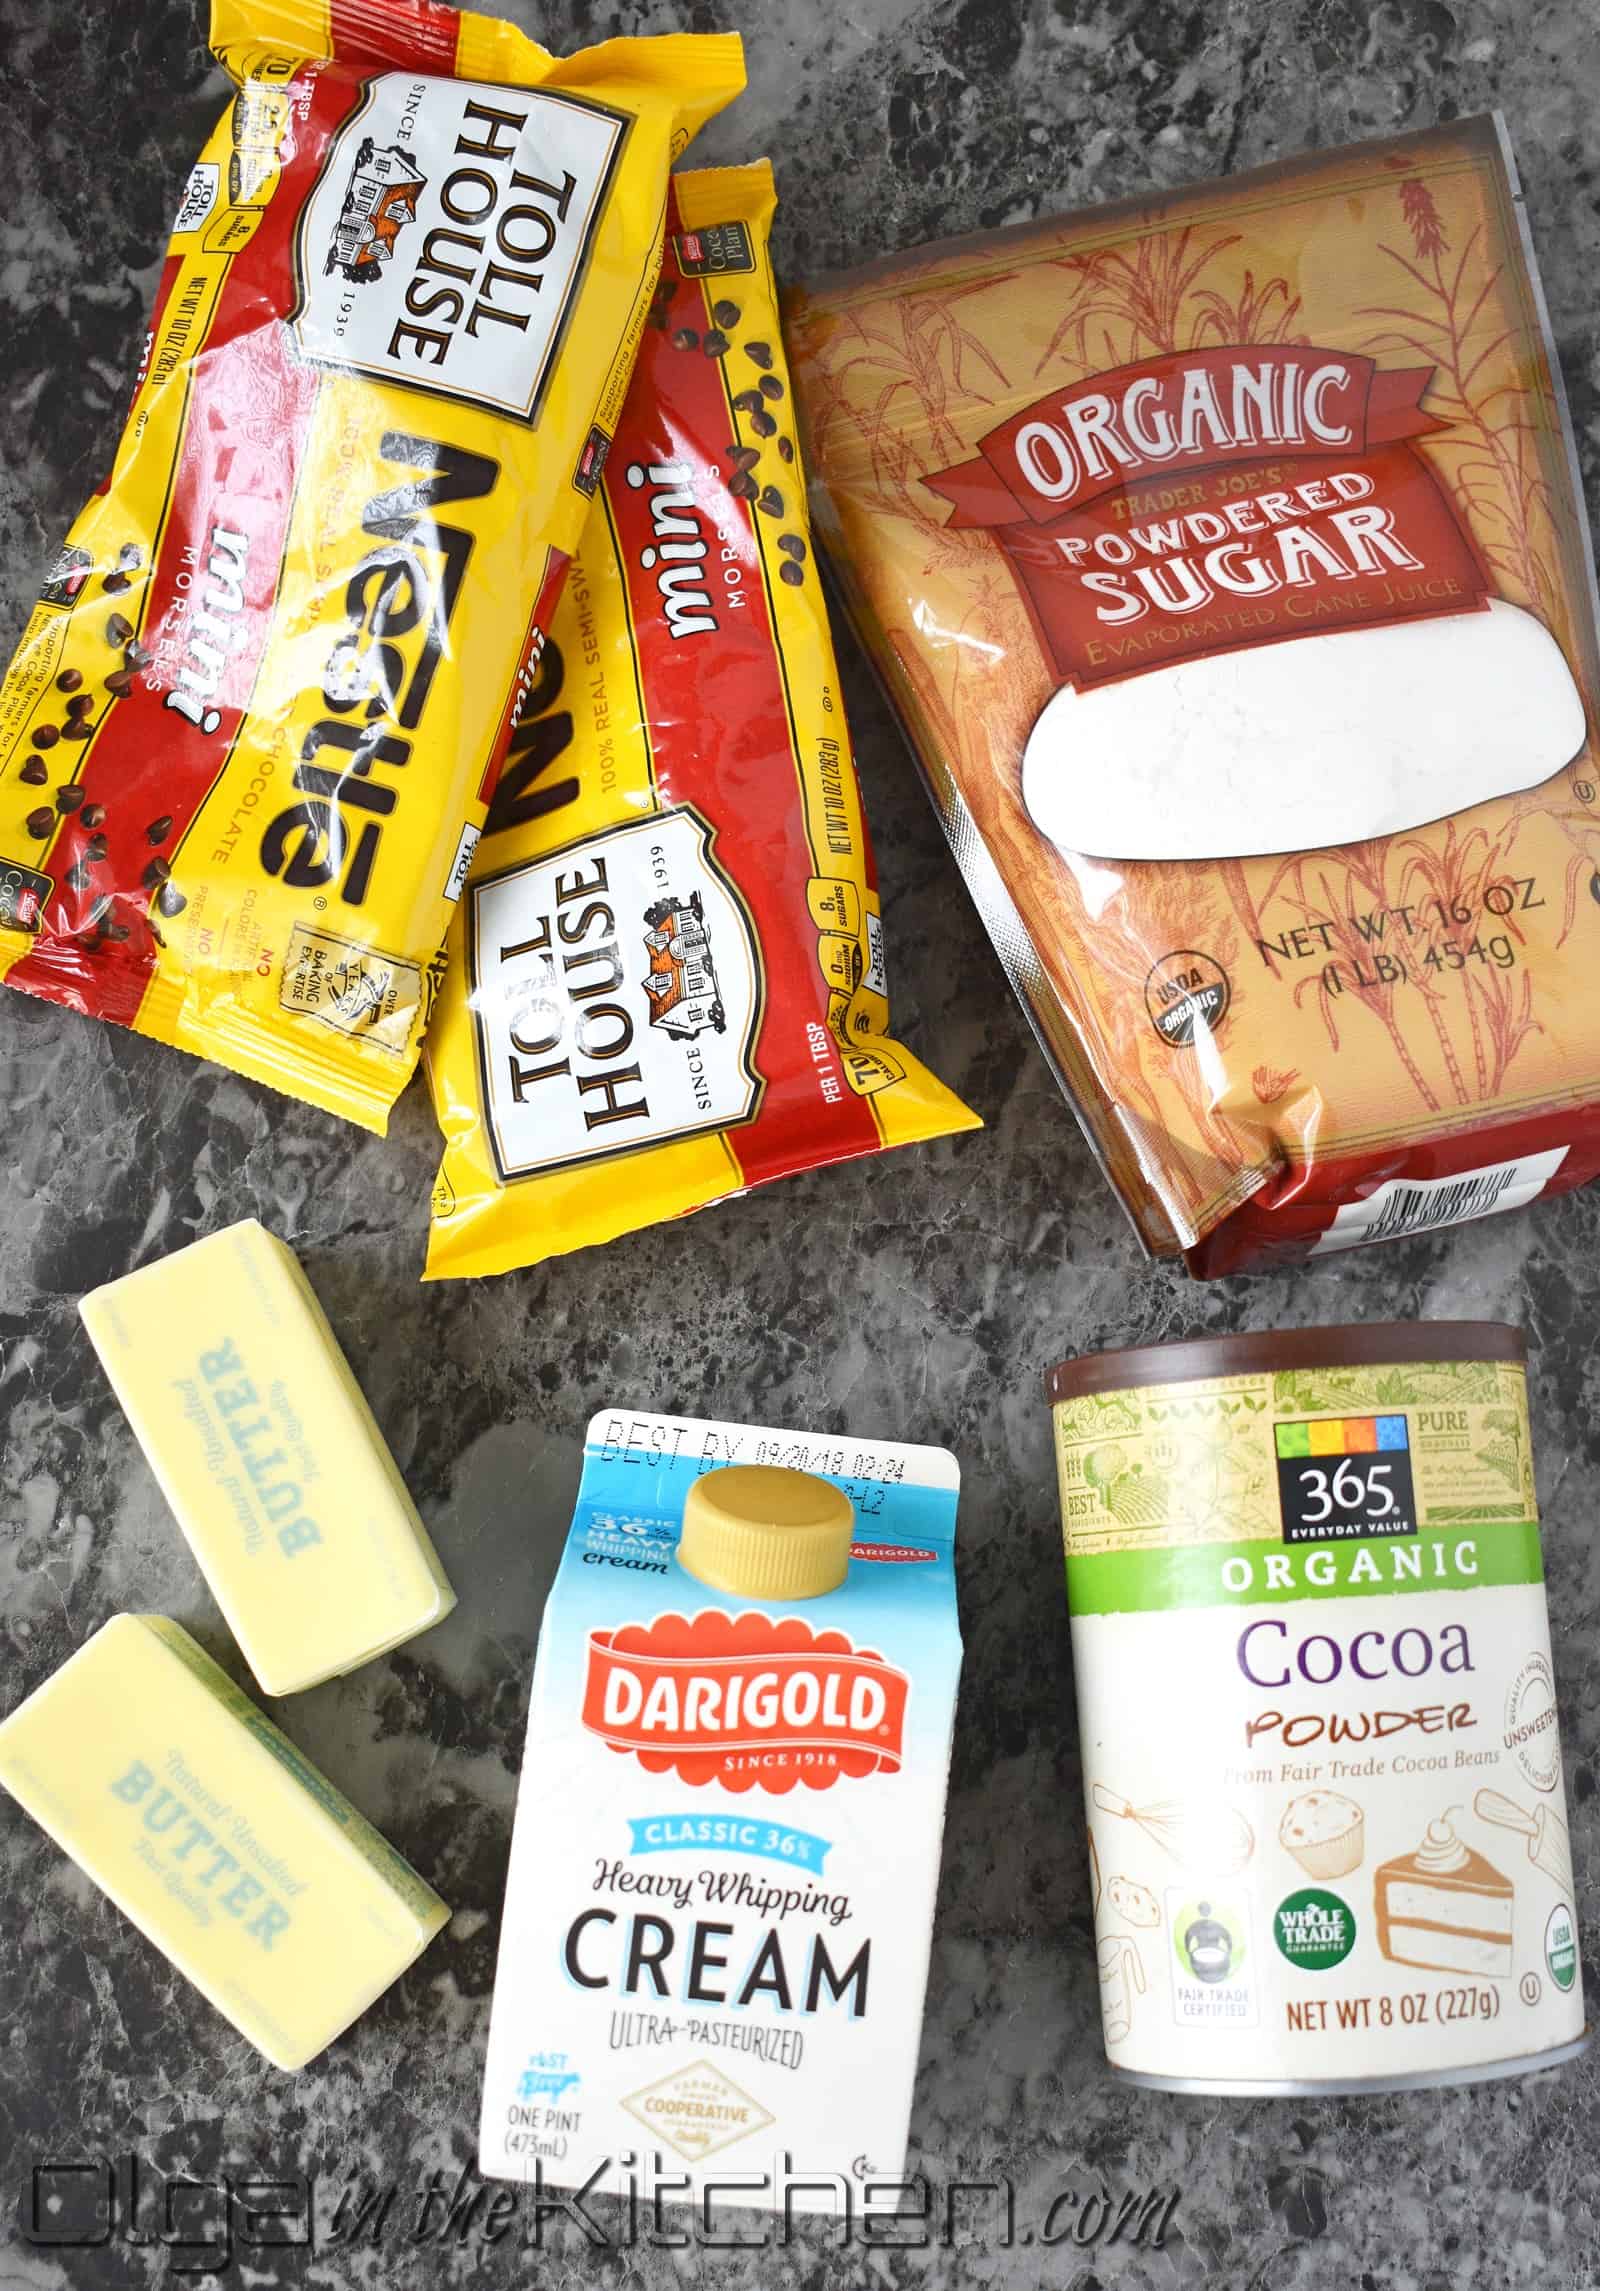
Chocolate Spartak Cake Ingredients:
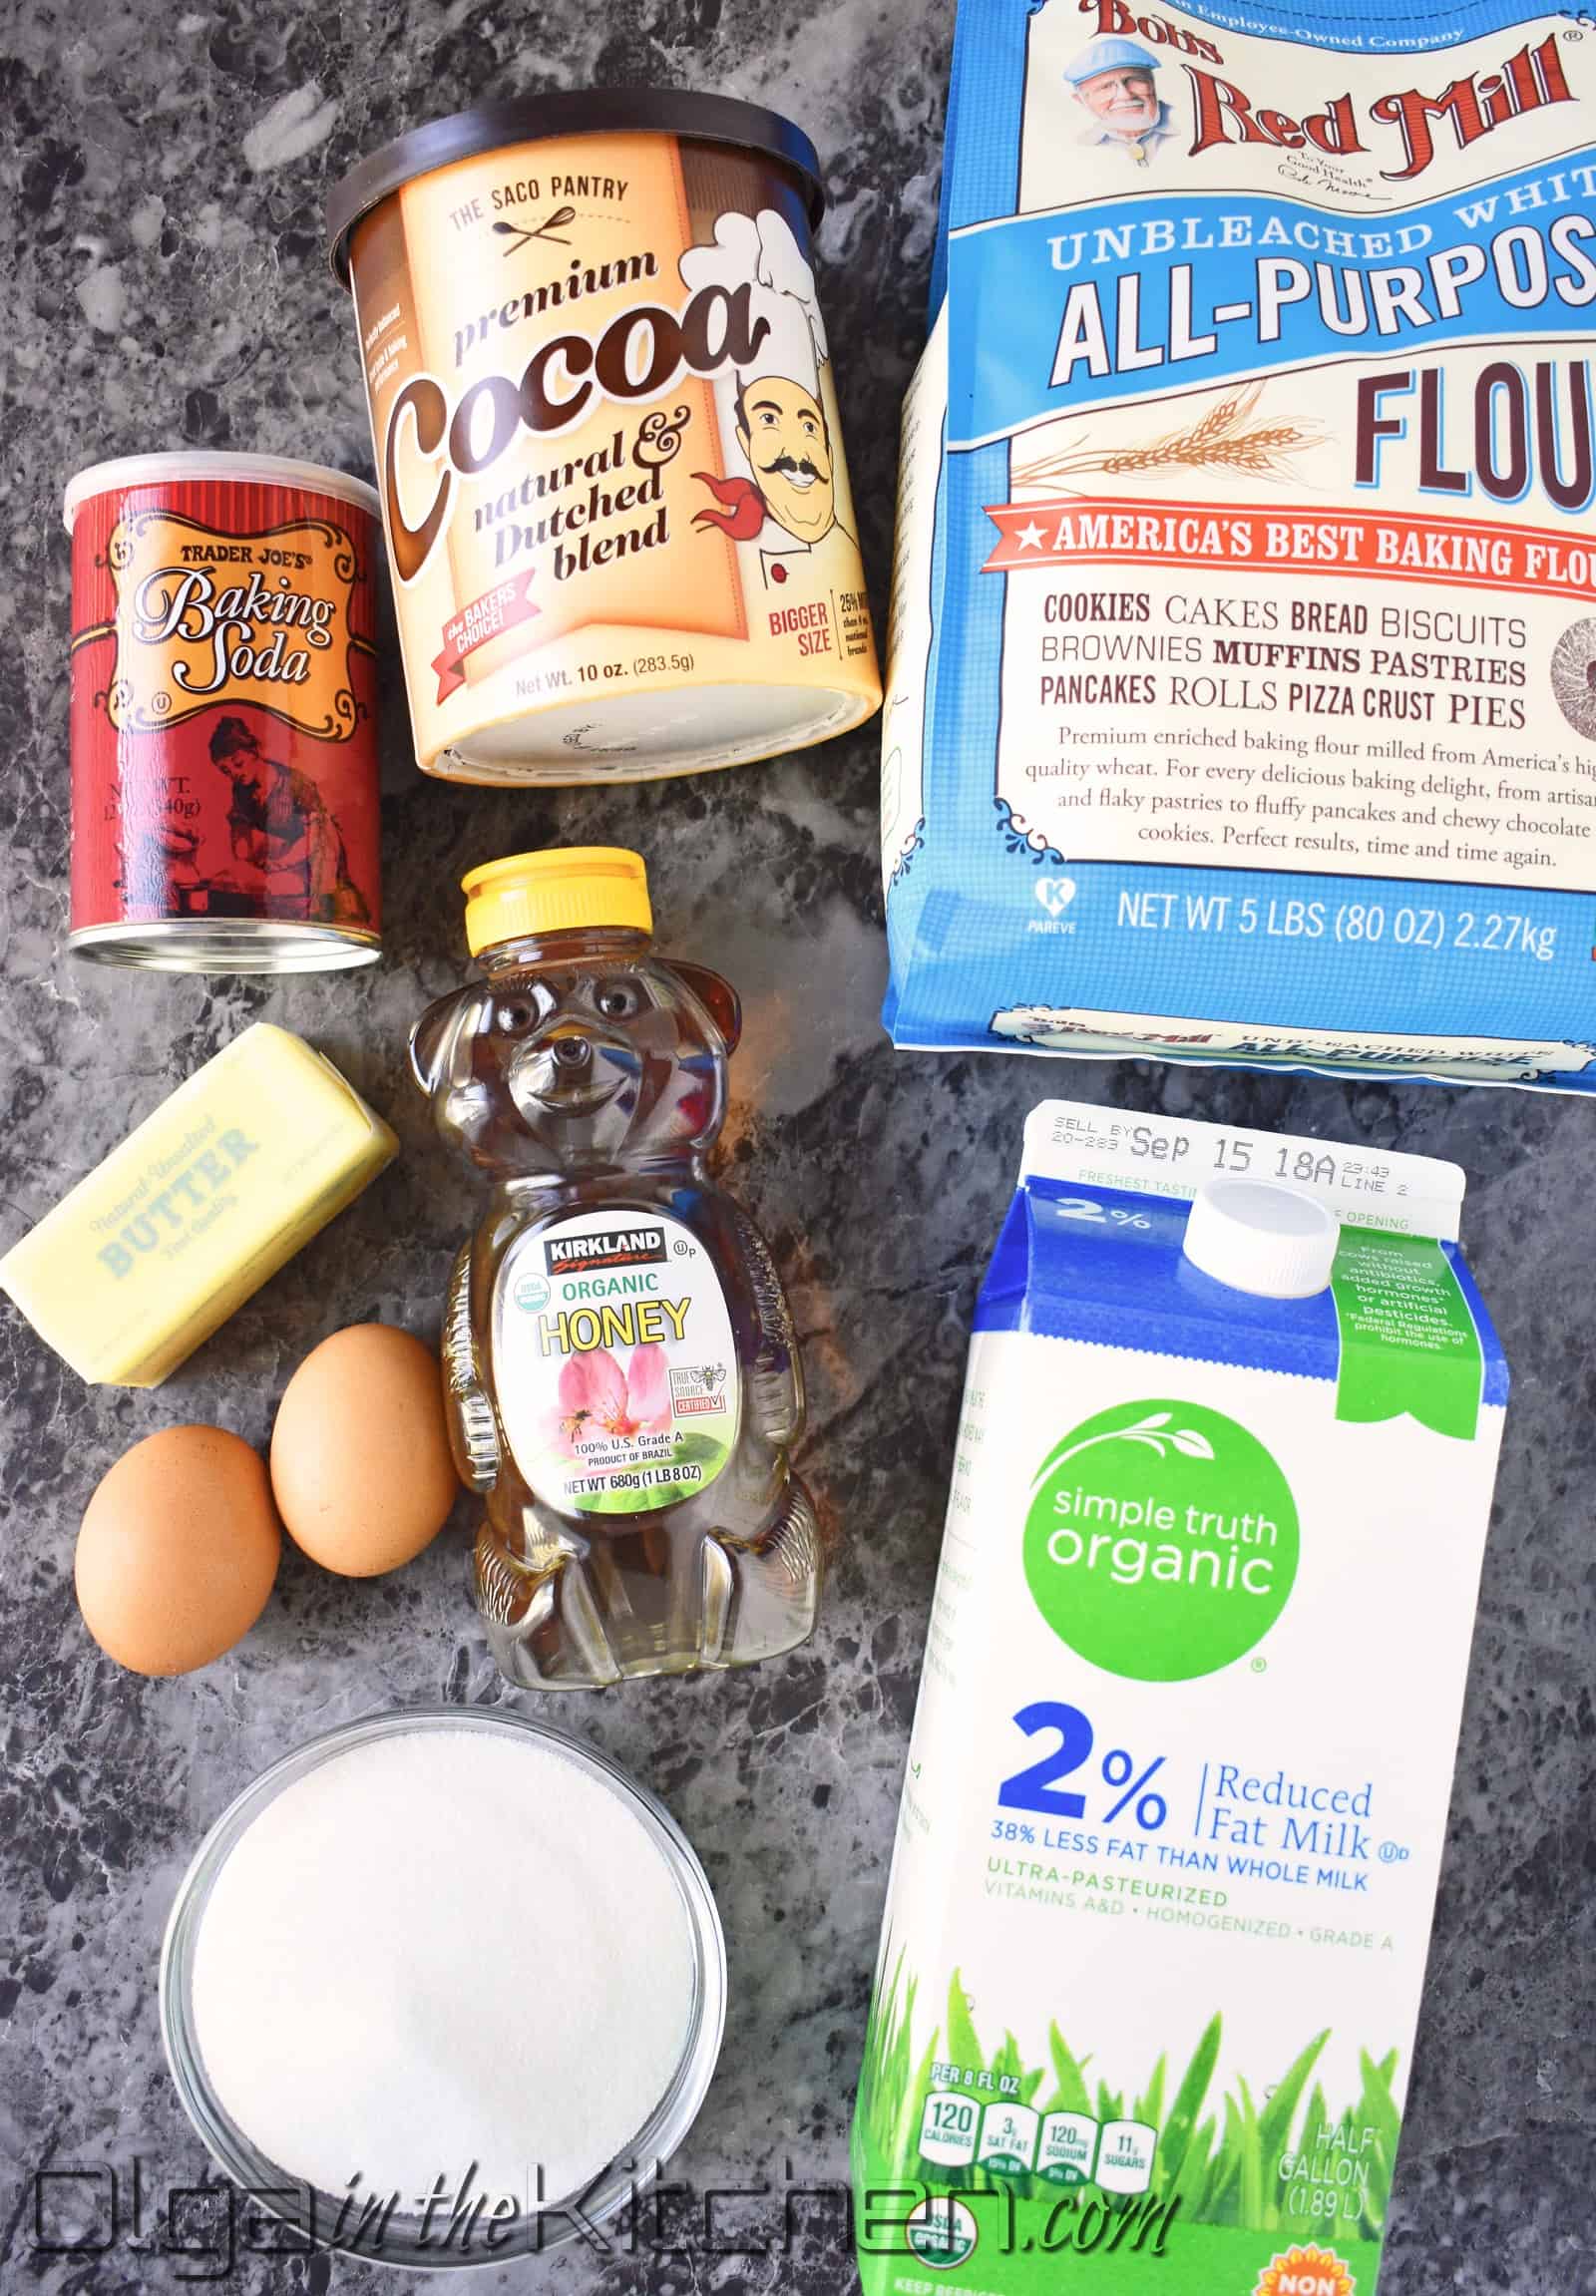
- Large eggs – room temperature
- Granulated sugar
- Unsweetened cocoa powder
- Whole or 2% milk
- Unsalted unsalted butter – softened
- Honey
- Baking soda
- All-purpose flour (I used Bob’s Red Mill)
Sour Cream Frosting Ingredients:
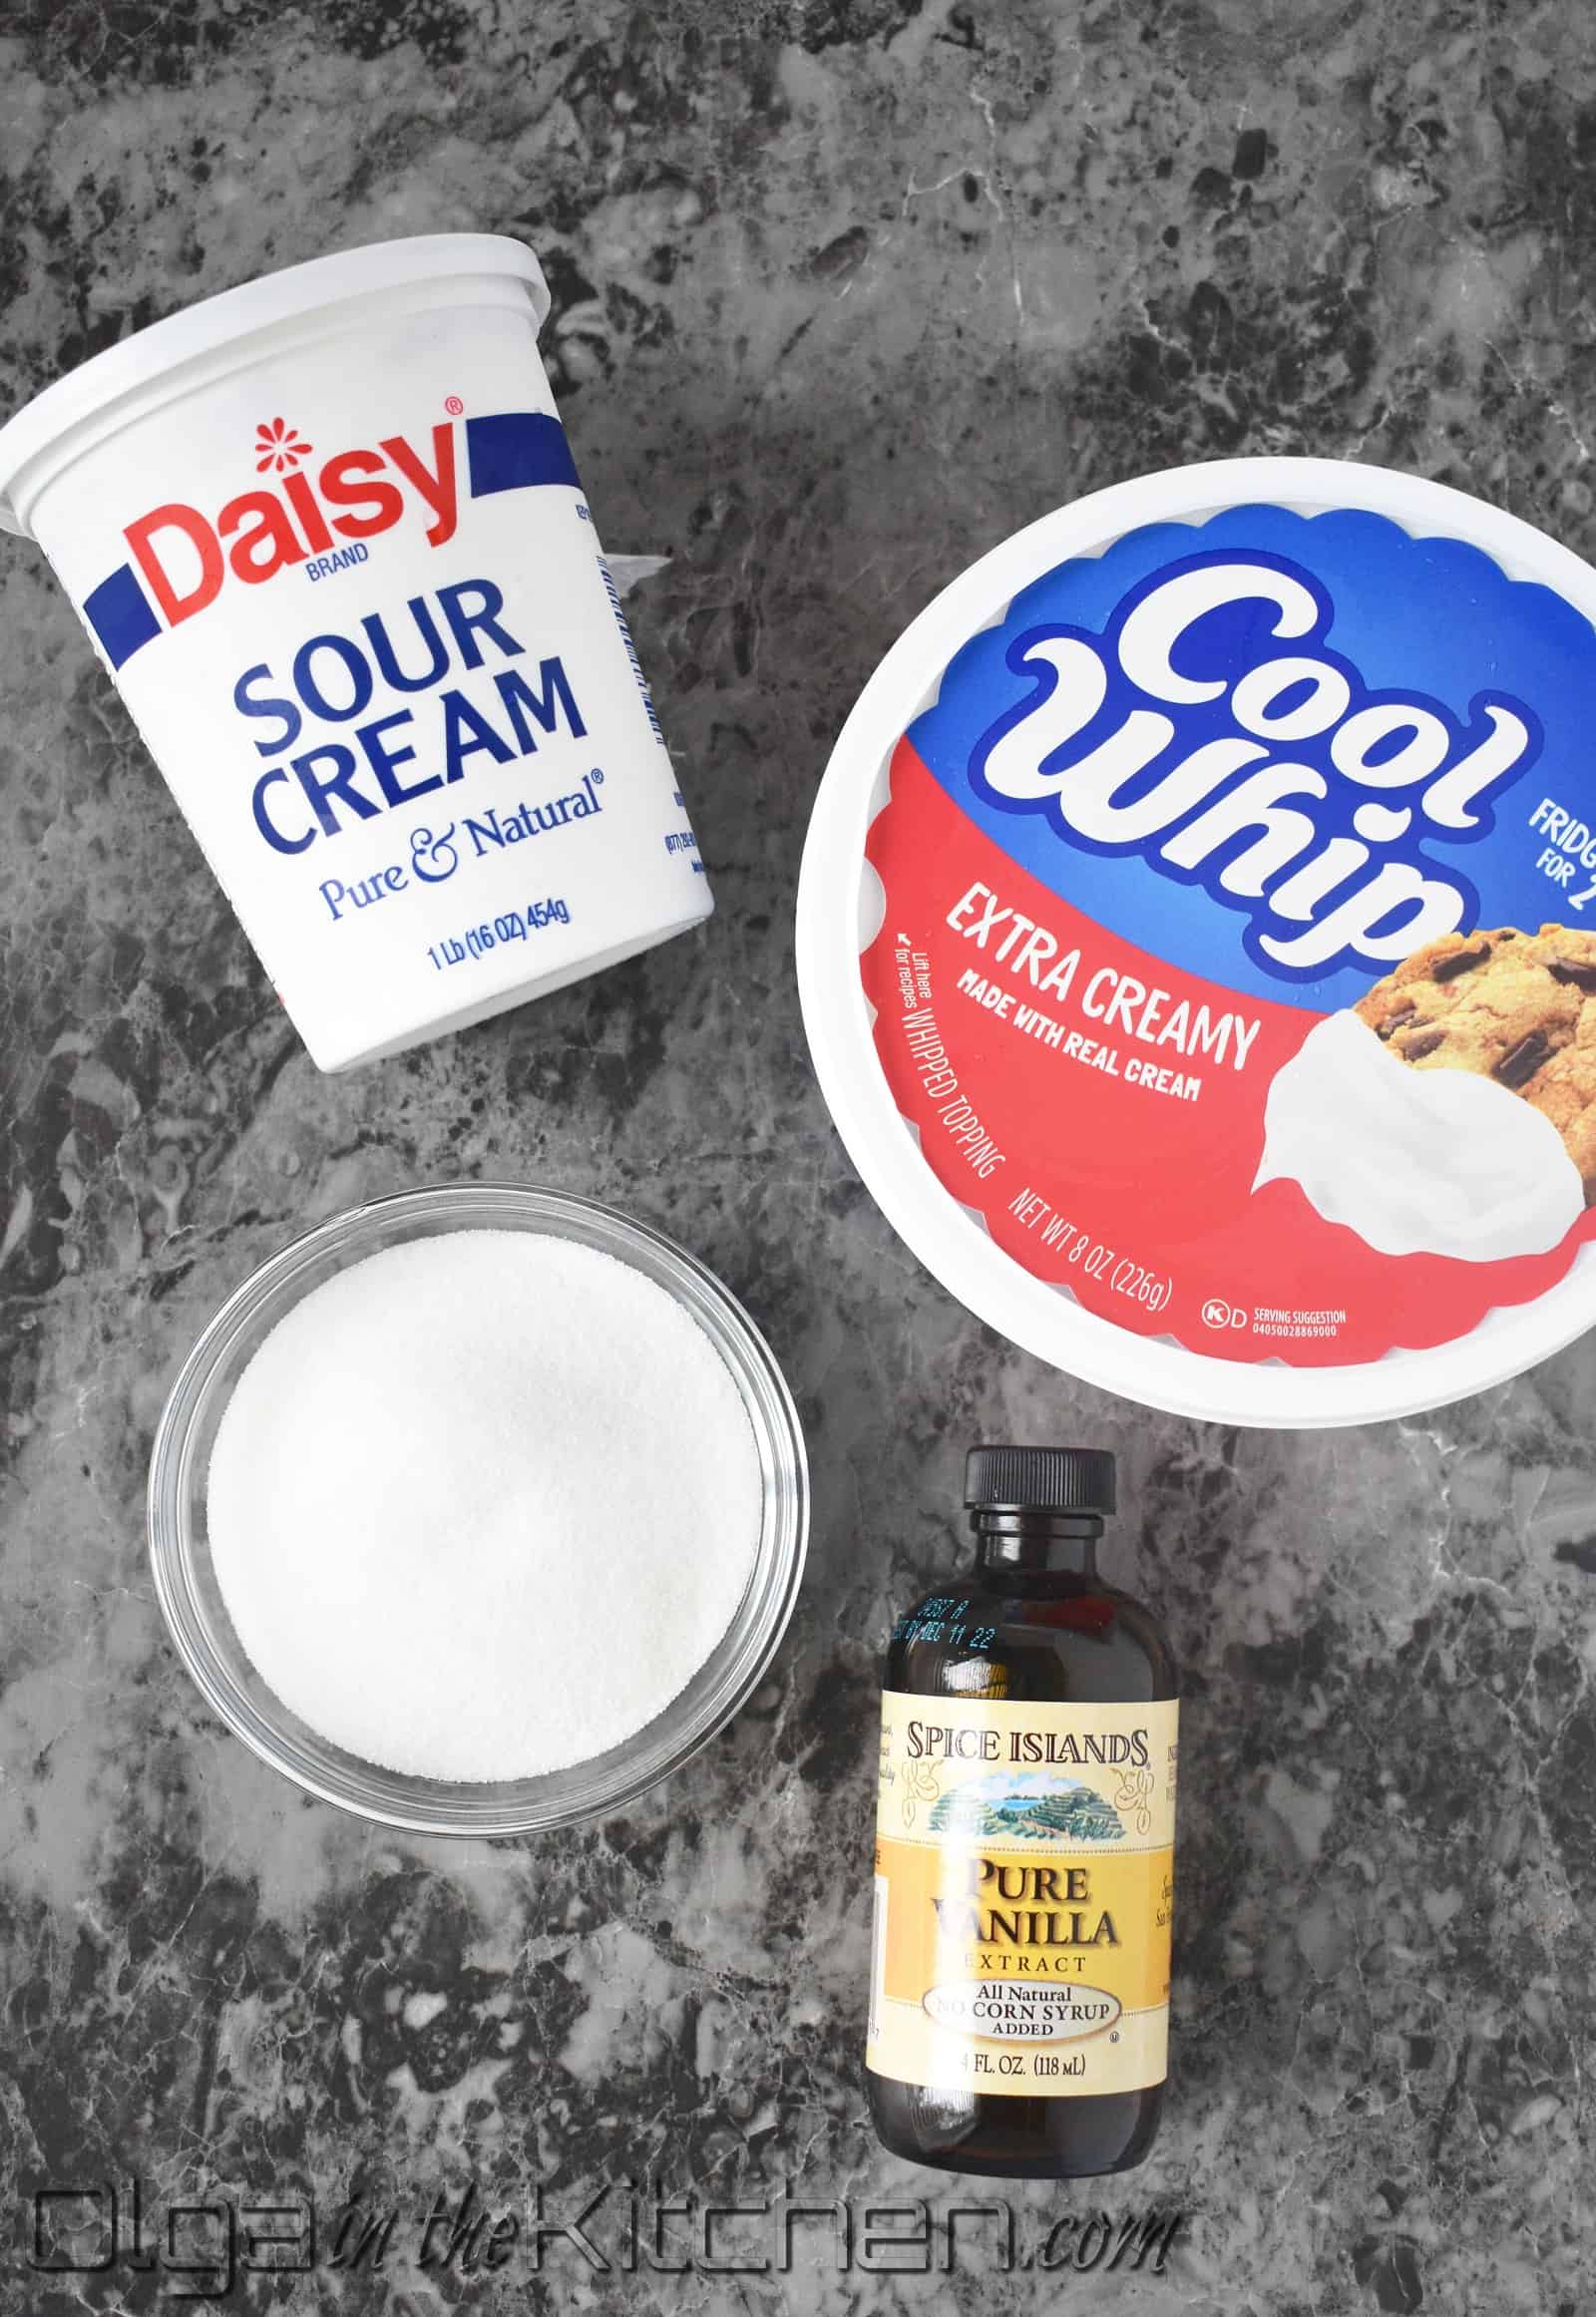
- Sour cream
- Extra creamy cool whip – frozen
- Granulated sugar
- Vanilla extract
Chocolate Ganache and Buttercream Decorating:
- Mini chocolate chips (I use Nestle brand)
- Heavy cream
- Unsalted butter – softened
- Powdered sugar – sifted
1. In a small bowl, combine and whisk 2 eggs and 1/2 cup sugar to break the eggs a bit. In a large bowl, combine and whisk 1/2 cup cocoa powder and remaining 1/2 cup sugar. To the bowl with cocoa, add the egg mixture, 4 tbsps unsalted butter, 2 tbsps honey and 1/3 cup milk.
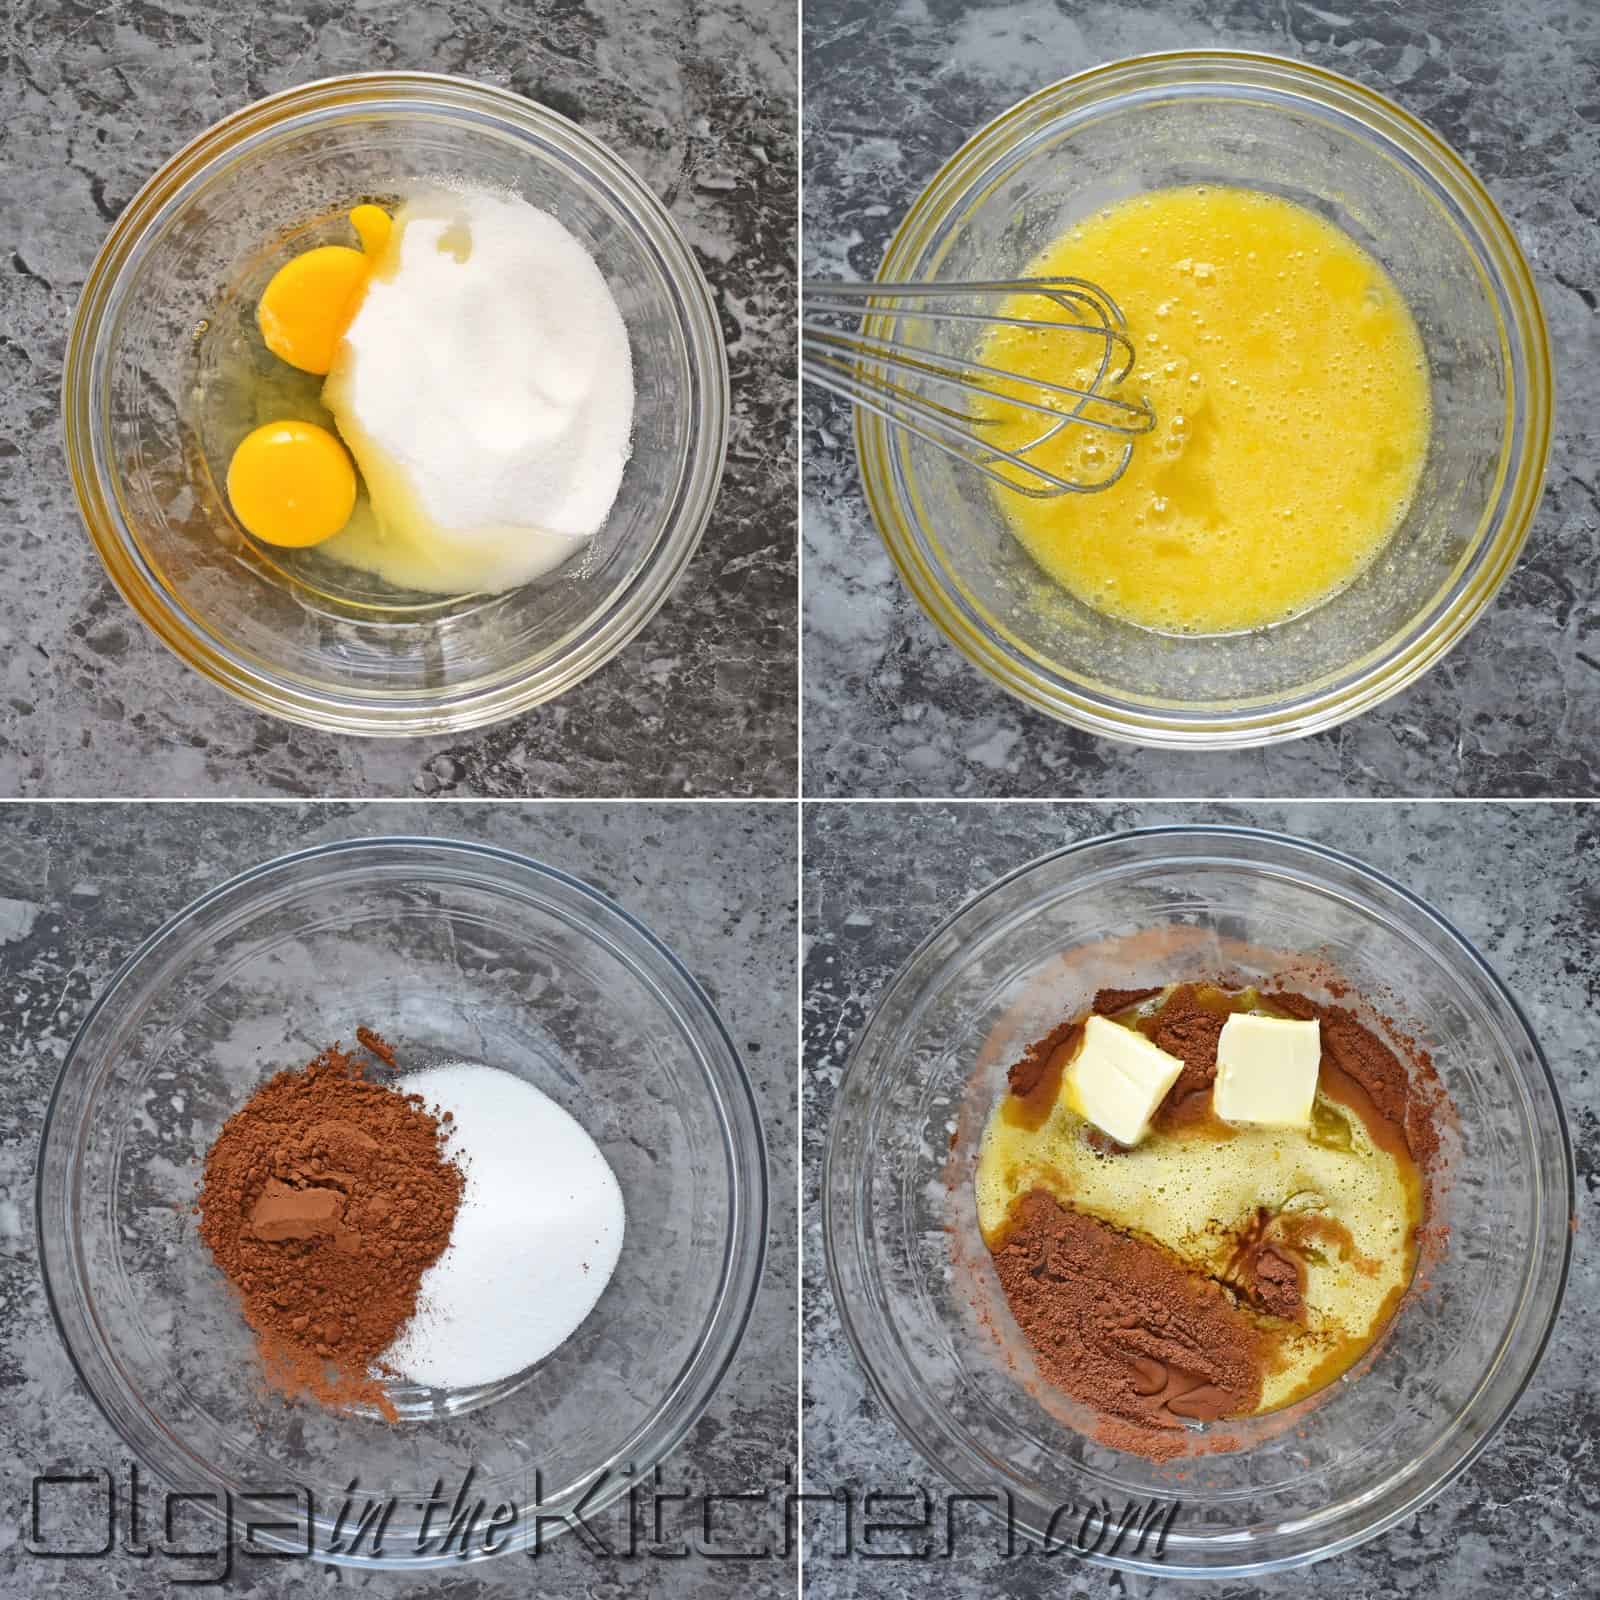
2. Make a water bath, by bringing a large pot with water to a boil and reduce heat to medium. Place a bowl with mixture over the steam (make sure the bowl doesn’t touch the water) and keep stirring for about 10-15 minutes until the butter and the sugar are melted, all ingredients are incorporated and the mixture becomes hot. (I put a tip of my index finger into the mixture to test).
Add 1 tsp baking soda and keep stirring for about 2 minutes until the batter turns foamy and slightly rises. Remove from heat, and immediately sift the flour, or add cup at a time if sifted ahead of time. (Do not let the dough cool or you will ruin the dough; use spatula to fold in flour into hot batter, then transfer the dough to a floured surface to finish incorporating the flour into dough). I do about 2 3/4 cups flour, by adding cup a time and use remaining when rolling out the layers. Preheat the oven to a 360°F.

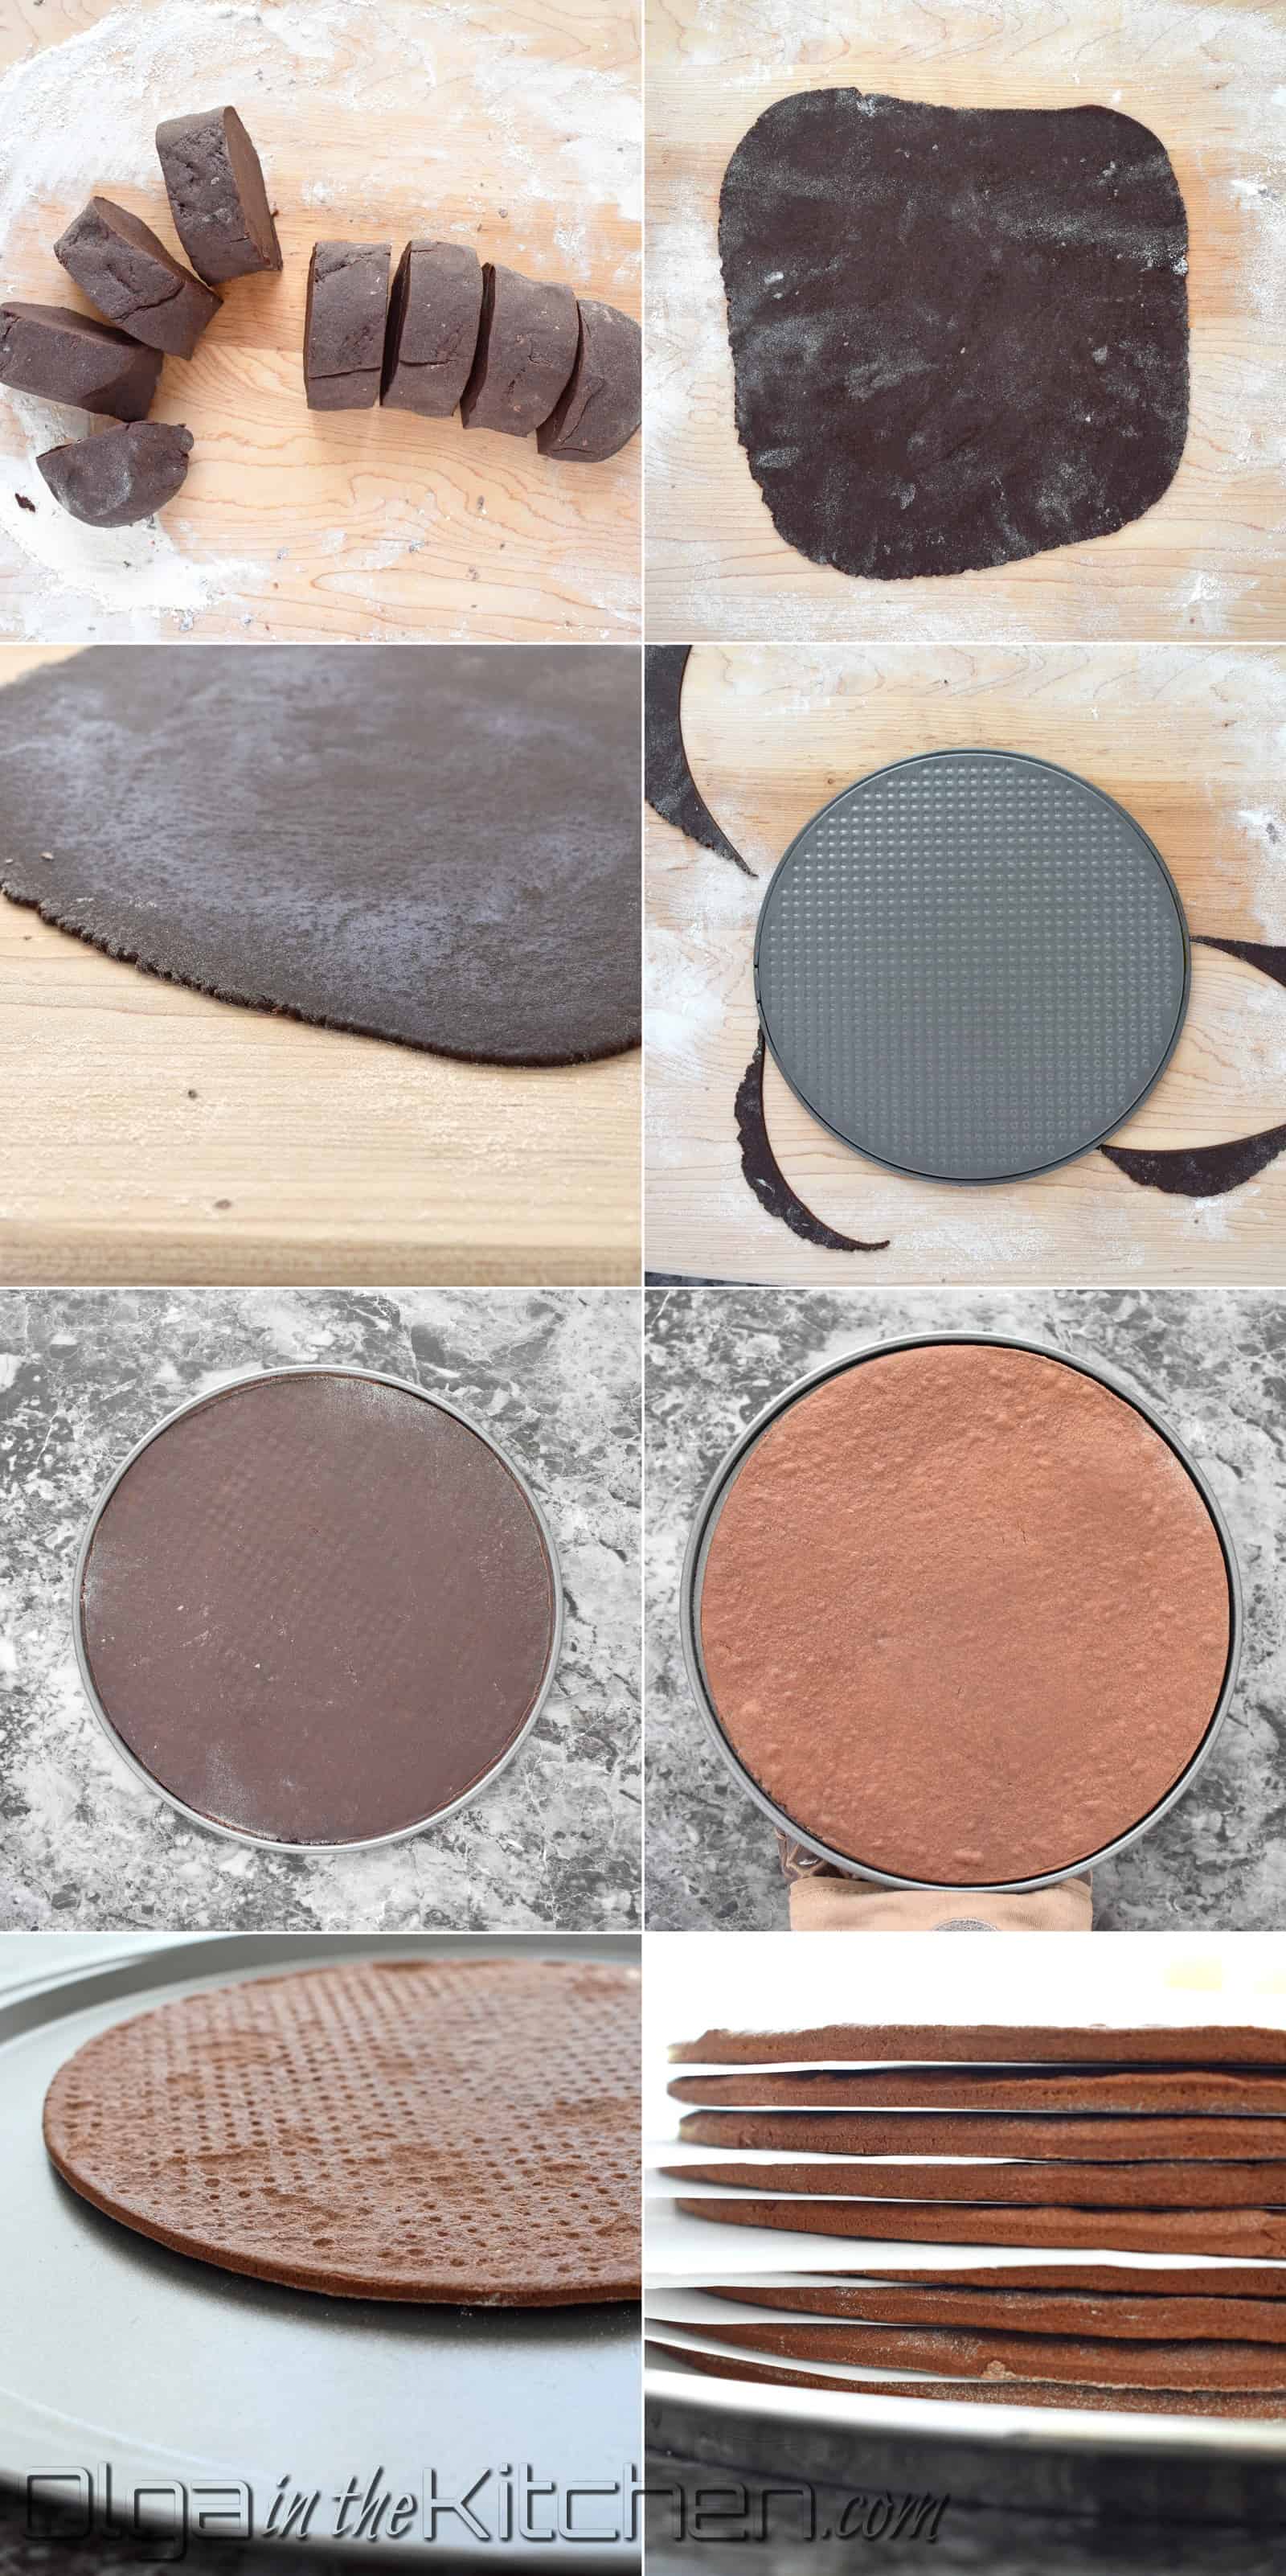
3. Divide the dough into 8 similar to equal pieces. Sprinkle some flour when needed and roll out first dough piece to a very thin layer (about 2-3 mm thick) to cover a 9” form. Place the base of the springform pan over the rolled piece and cut out a circle, going around the form with a sharp knife. Transfer the cut out circle to a lightly oiled springform base, and bake for 8 minutes. (Meanwhile, roll out second piece and place onto same sized form, or wait until the hot form slightly cools off before placing next piece).
As soon as the layer is finished baking, turn it upside down onto a tray. Remove the form with help of oven mitts and leave the layer upside down for 4-5 minutes (this will keep the layer bump-free and keep it flat). Turn it back to correct side, and stack cooled layers with parchment paper in between until ready to frost. Repeat this process until you’ve baked all layers.
NOTE: do NOT throw away those edges! Form a ball from them, roll out and you will end up with 9th or even 10th layer, that could make your cake higher or use the extra layers to crumble and decorate the cake if you don’t want to cover in chocolate ganache. Cake layers will harden once cooled, but will be moist once frosted.
How to Make Sour Cream Frosting:
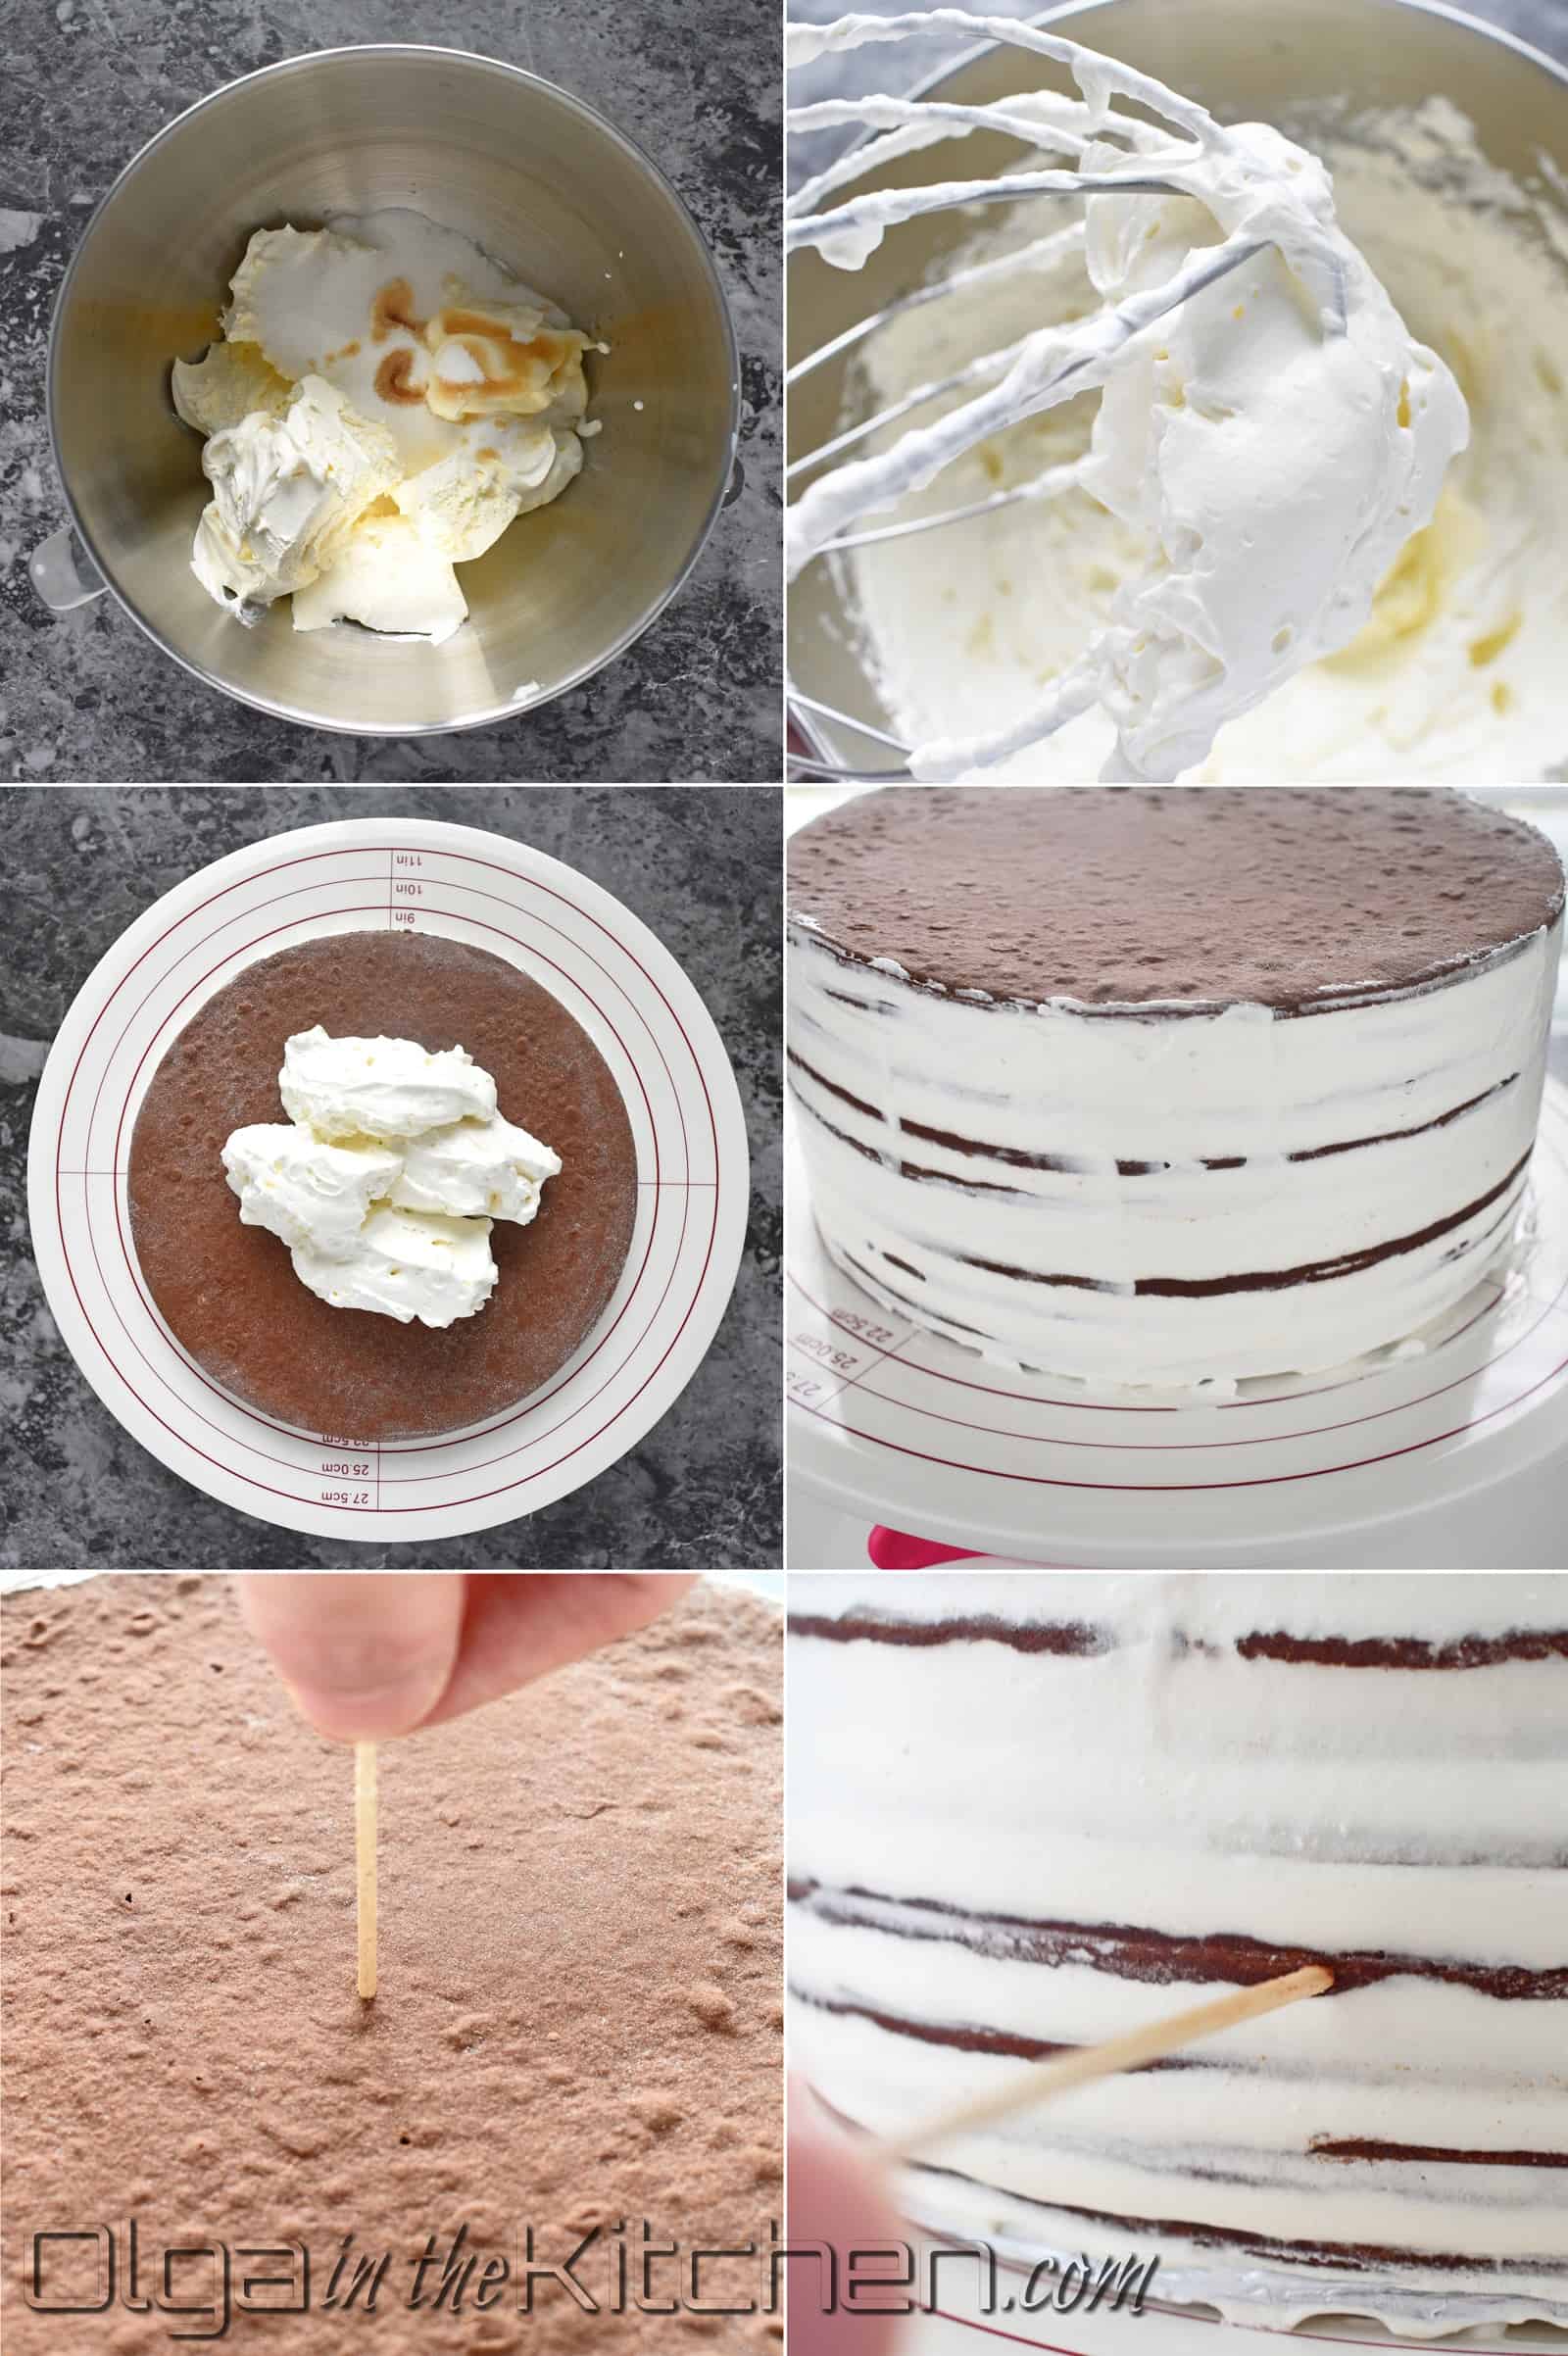
4. Using an electric mixer, beat 16 oz sour cream, 8 oz cool whip, 1/2 cup sugar and 1/2 tsp vanilla extract for 10 mins on high until frosting is thick and firm. Refrigerate until ready to use, but not for prolonged time or the cream might become slightly runny. Cut out a cake diameter carton circle. Wrap foil around carton. Spread a teaspoon of frosting onto foil before you place a first cake layer – this will keep the cake from sliding off the carton. Place about 3-4 tbsps frosting between each cake layer and spread evenly (make sure to get edges). (**If you’re going to cover the cake in chocolate, do not frost the last layer – chocolate will be on top). Frost sides as well with any remaining sour cream frosting. Leave the cake at room temperature for 2 hours so that the cake layers become moist.
After 2 hours, insert a toothpick in the middle of the cake and then into a layer from a side. If the toothpick goes in easily, refrigerate the cake until ready to decorate. Do not keep the cake more than 4 hours at room temperature.
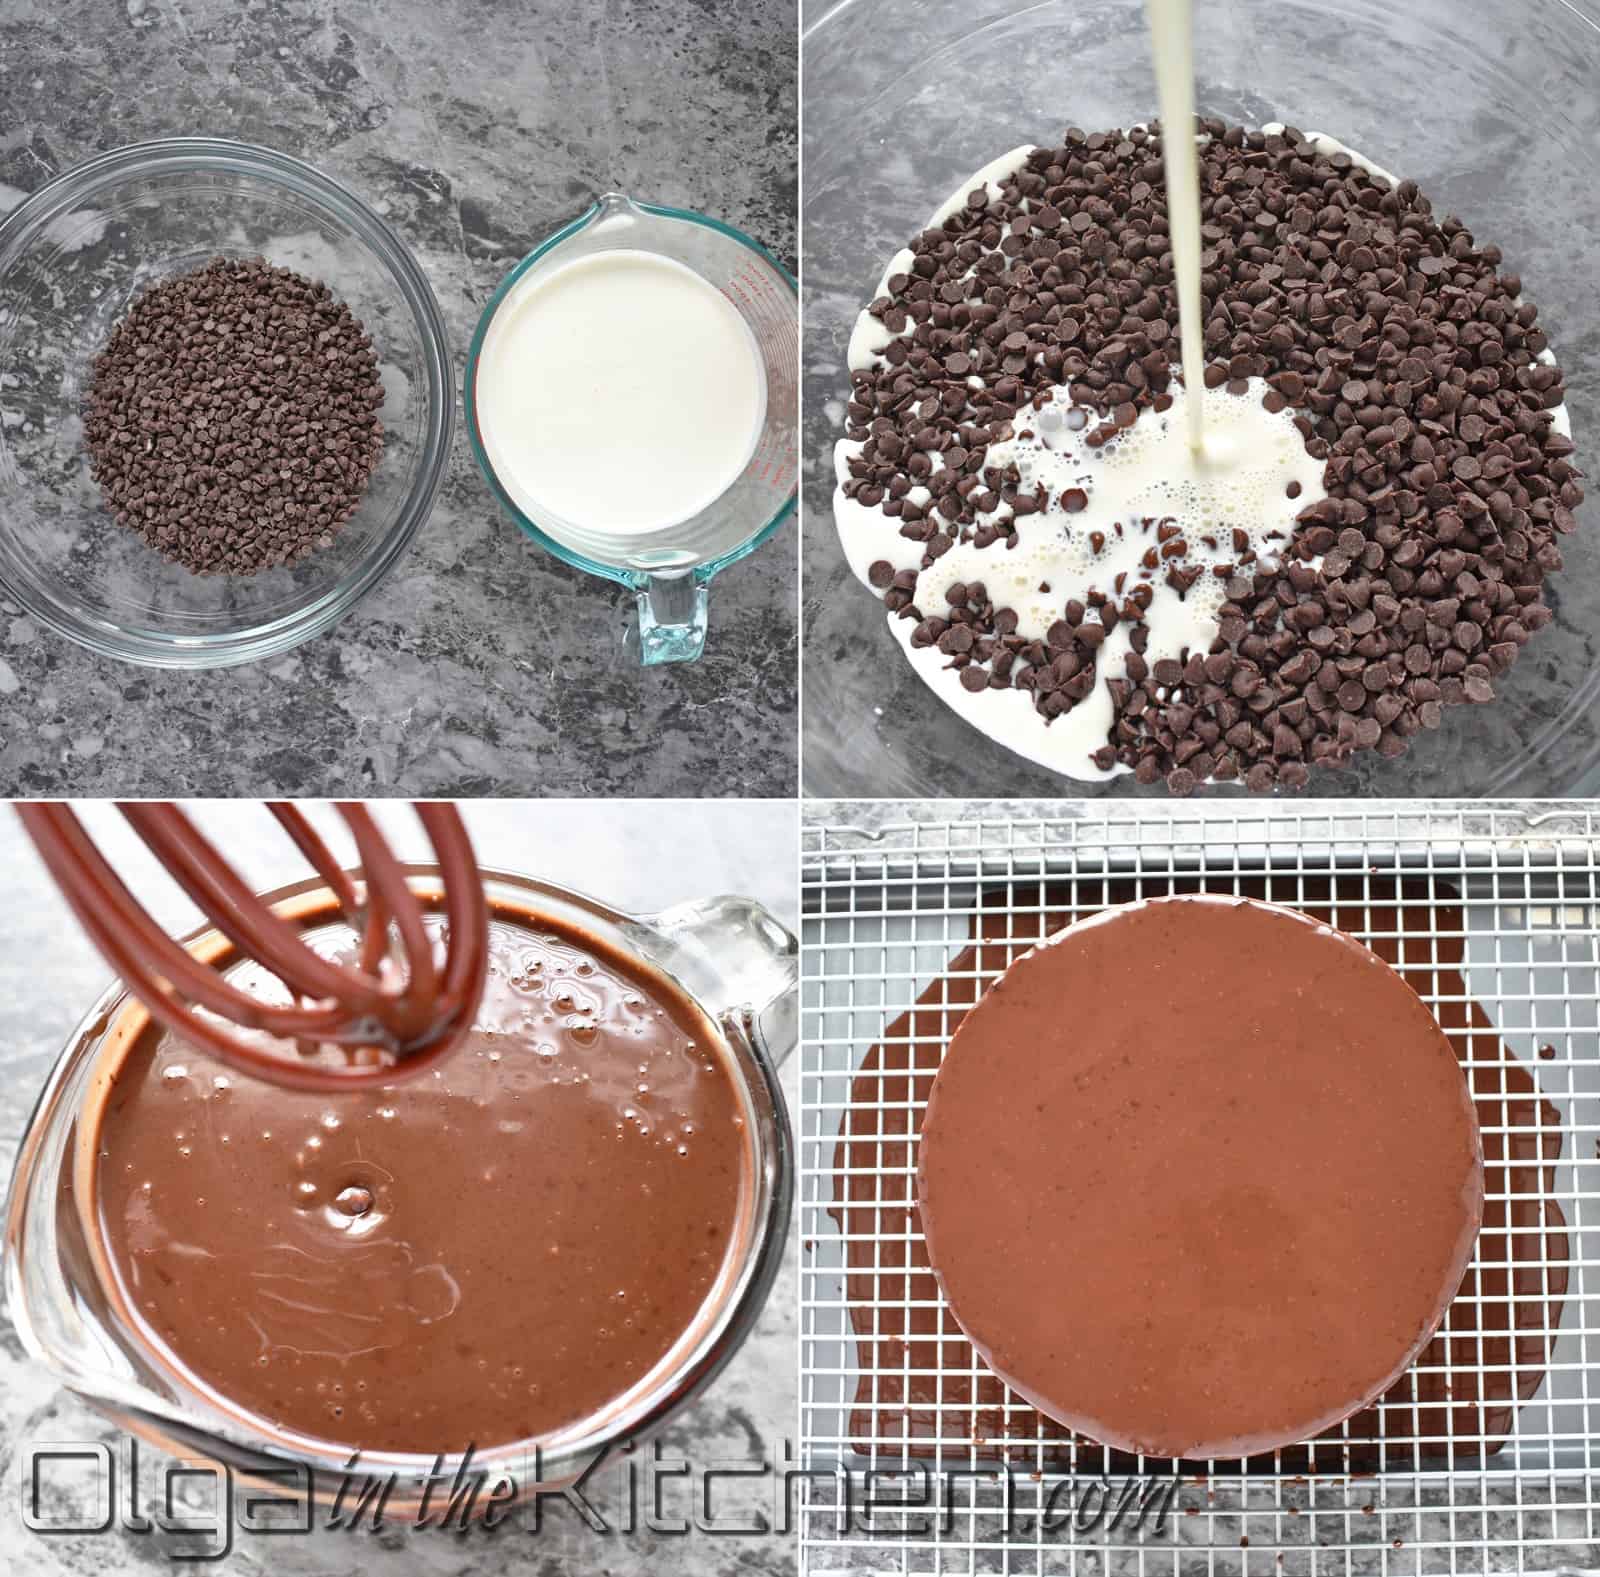
How to Make Chocolate Ganache:
5. Place 2 cups mini chocolate chips into a medium bowl. Microwave 1 1/2 cups heavy cream for about 2 minutes until it’s hot and steamy, but not boiling. Meanwhile transfer the cake to a cooling rack from turning table with help of 2 large knives (make sure the knives hold the cake before you completely lift it up). Pour the heavy cream over the chocolate chips and keep whisking until all chocolate chips had melted. As soon as ganache slightly cools, start pouring over the cake – GO SLOW, starting from the top – pour, spread with a knife and slowly keep pouring on the edges going right and left to cover all the area. Don’t pour too much and don’t go fast or you’ll run out of ganache.
**making more ganache to finish the sides will make overlaps on the cake sides and the cake won’t look nice. Let the cake stand for 5 minutes on cooling rack and then gently, using large knives, transfer to a cake stand.
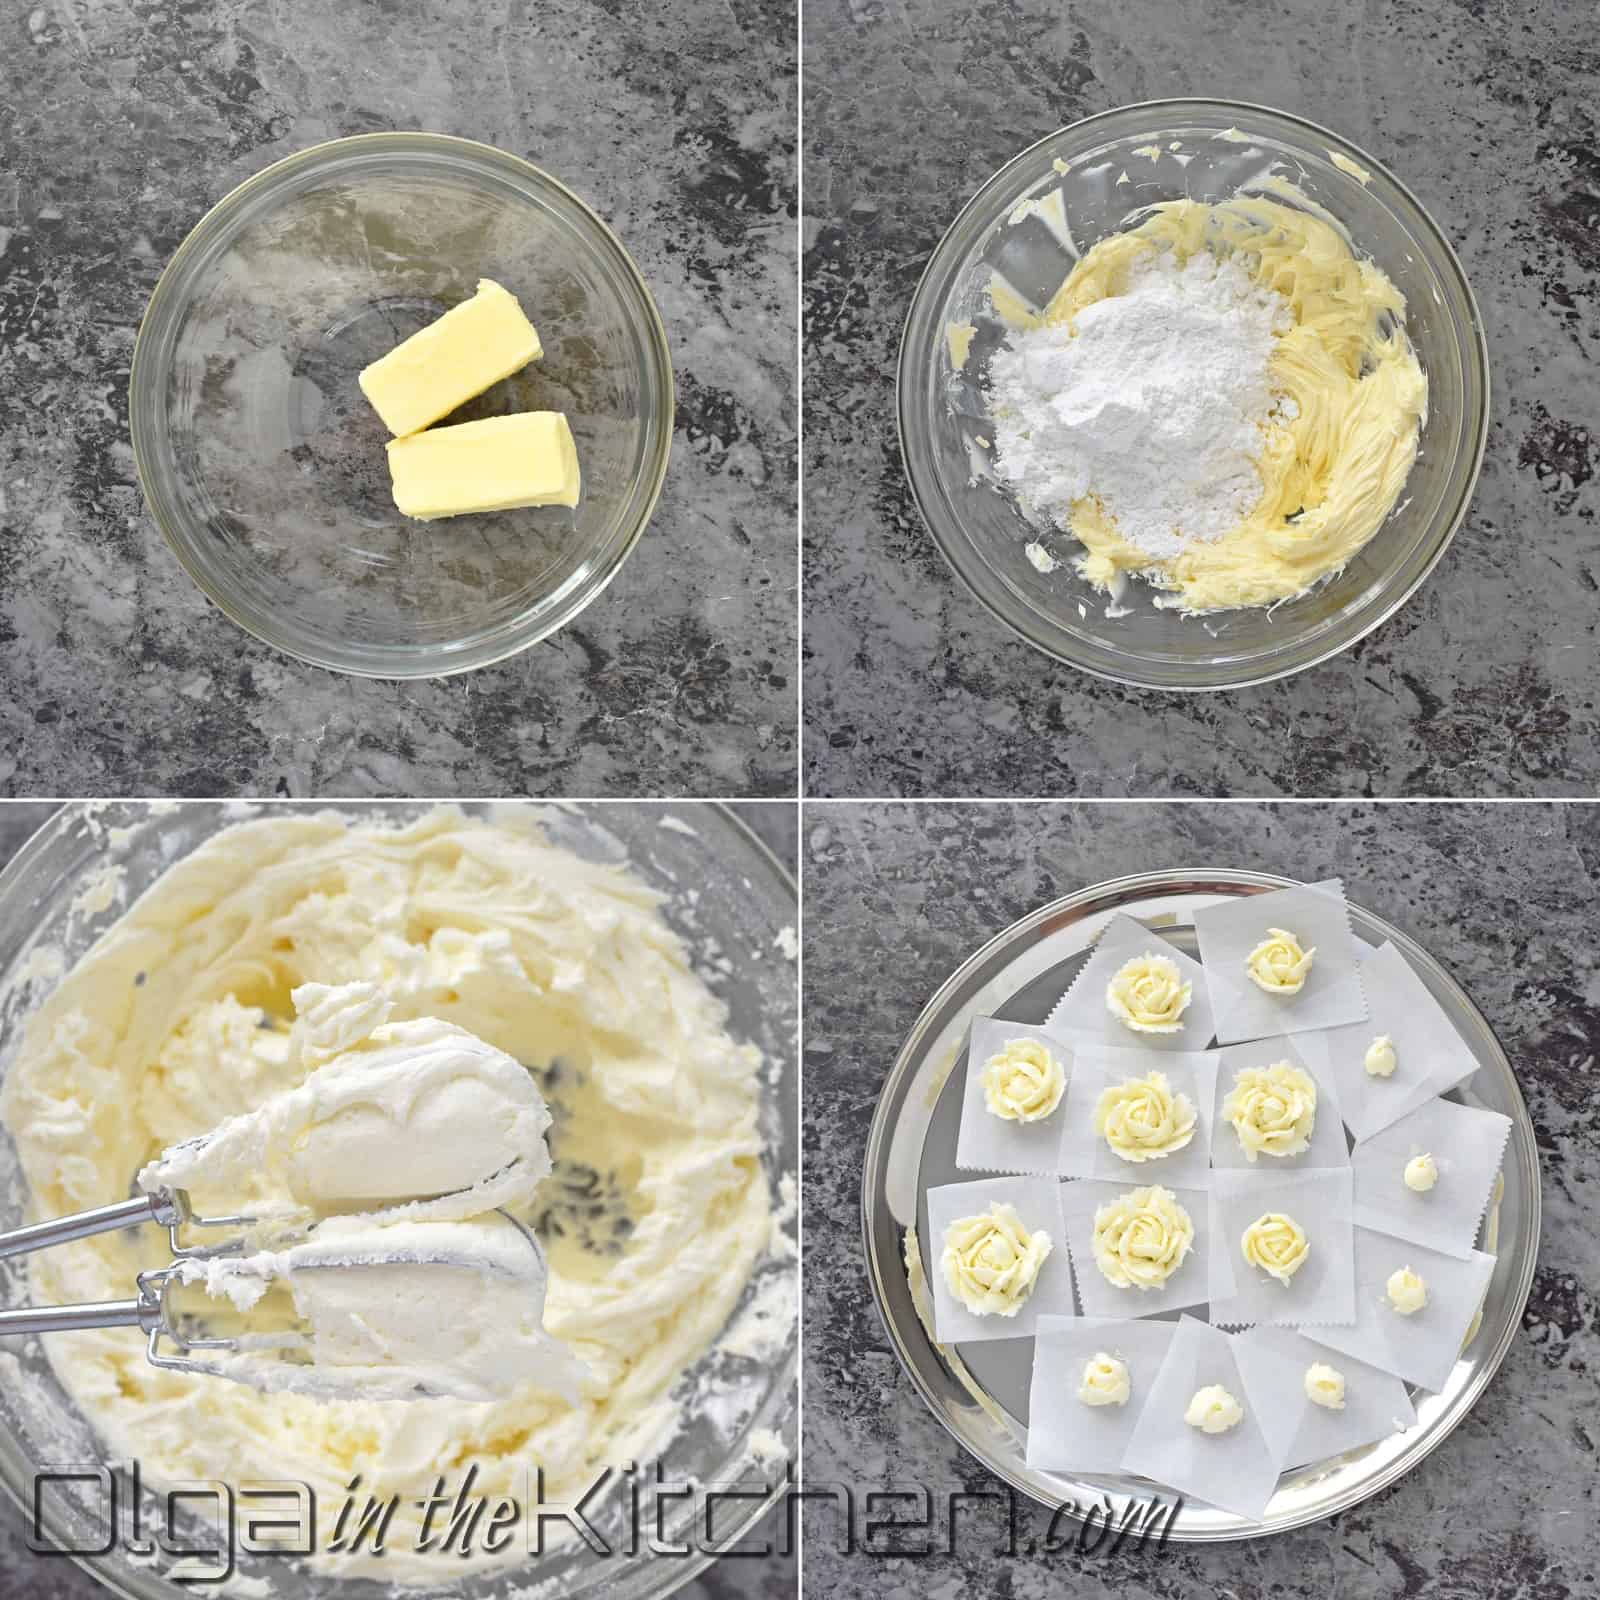
How to Make Buttercream:
6. In a medium bowl, beat 2 sticks unsalted softened butter for about 1 minute. Add 4 cups sifted powdered sugar (1 cup at a time), until all mixed in. Use this buttercream to make roses or any flower or design you like. Pipe onto little parchment paper squares, place onto stainless steel tray and freeze for 5-10 minutes. (The stainless steel tray makes it freeze a lot faster). Transfer flowers to a cake and decorate to your liking. I added a bit of cocoa powder for the brown leaves. Refrigerate cake until ready to serve.
This cake is good up to 5 days in the fridge. Smachnogo! (meaning: bon appetit in Ukrainian!!)
More Cake Recipes to Explore:
- Chocolate Cherry Bundt Cake – easy and fun holiday cake
- Honey Cake with Sour Cream Frosting – the easiest sponge cake recipe
- Strawberry Kiwi Cake – a perfect spring or summer cake
Chocolate Spartak Cake
Ingredients
CAKE INGREDIENTS:
- 2 large eggs, (room temp)
- 1 cup granulated sugar
- 1/2 cup cocoa powder
- 1/3 cup 2 % milk
- 4 tablespoons unsalted butter, (softened)
- 2 tablespoons honey
- 1 teaspoon baking soda
- 3 cups all-purpose flour, (I used Bob’s Red Mill + more for rolling)
FROSTING INGREDIENTS:
- 16 oz sour cream – cold
- 8 oz extra creamy cool whip – frozen
- 1/2 cup granulated sugar
- 1/2 teaspoon vanilla extract
CHOCOLATE GANACHE & BUTTERCREAM DECORATION INGREDIENTS:
- 2 cups mini chocolate chips, (I use Nestle brand)
- 1 1/2 cups heavy cream
- 8 oz 2 sticks unsalted butter (softened)
- 4 cups powdered sugar – sifted
Instructions
- In a small bowl, combine and whisk 2 eggs and 1/2 cup sugar to break the eggs a bit. In a large bowl, combine and whisk 1/2 cup cocoa powder and remaining 1/2 cup sugar. To the bowl with cocoa, add the egg mixture, 4 tbsps unsalted butter, 2 tbsps honey and 1/3 cup milk.
- Make a water bath, by bringing a large pot with water to a boil and reduce heat to medium. Place a bowl with mixture over the steam (make sure the bowl doesn’t touch the water) and keep stirring for about 10-15 minutes until the butter and the sugar are melted, all ingredients are incorporated and the mixture becomes hot. (I put a tip of my index finger into the mixture to test). Add 1 tsp baking soda and keep stirring for about 2 minutes until the batter turns foamy and slightly rises. Remove from heat, and immediately sift the flour, or add cup at a time if sifted ahead of time. (Do not let the dough cool or you will ruin the dough; use spatula to fold in flour into hot batter, then transfer the dough to a floured surface to finish incorporating the flour into dough). I do about 2 3/4 cups flour, by adding cup a time and use remaining when rolling out the layers. Preheat the oven to a 360°F.
- Divide the dough into 8 similar to equal pieces. Sprinkle some flour when needed and roll out first dough piece to a very thin layer (about 2-3 mm thick) to cover a 9” form. Place the base of the springform pan over the rolled piece and cut out a circle, going around the form with a sharp knife. Transfer the cut out circle to a lightly oiled springform base, and bake for 8 minutes. (Meanwhile, roll out second piece and place onto same sized form, or wait until the hot form slightly cools off before placing next piece). As soon as the layer is finished baking, turn it upside down onto a tray. Remove the form with help of oven mitts and leave the layer upside down for 4-5 minutes (this will keep the layer bump-free and keep it flat). Turn it back to correct side, and stack cooled layers with parchment paper in between until ready to frost. Repeat this process until you’ve baked all layers. NOTE: do NOT throw away those edges! Form a ball from them, roll out and you will end up with 9th or even 10th layer, that could make your cake higher or use the extra layers to crumble and decorate the cake if you don't want to cover in chocolate ganache. Cake layers will harden once cooled, but will be moist once frosted.
- MAKE THE FROSTING: Using an electric mixer, beat 16 oz sour cream, 8 oz cool whip, 1/2 cup sugar and 1/2 tsp vanilla extract for 10 mins on high until frosting is thick and firm. Refrigerate until ready to use, but not for prolonged time or the cream might become slightly runny. Cut out a cake diameter carton circle. Wrap foil around carton. Spread a teaspoon of frosting onto foil before you place a first cake layer – this will keep the cake from sliding off the carton. Place about 3-4 tbsps frosting between each cake layer and spread evenly (make sure to get edges). (**If you're going to cover the cake in chocolate, do not frost the last layer - chocolate will be on top). Frost sides as well with any remaining sour cream frosting. Leave the cake at room temperature for 2 hours so that the cake layers become moist. After 2 hours, insert a toothpick in the middle of the cake and then into a layer from a side. If the toothpick goes in easily, refrigerate the cake until ready to decorate. Do not keep the cake more than 4 hours at room temperature.
- MAKE THE GANACHE: Place 2 cups mini chocolate chips into a medium bowl. Microwave 1 1/2 cups heavy cream for about 2 minutes until it’s hot and steamy, but not boiling. Meanwhile transfer the cake to a cooling rack from turning table with help of 2 large knives (make sure the knives hold the cake before you completely lift it up). Pour the heavy cream over the chocolate chips and keep whisking until all chocolate chips had melted. As soon as ganache slightly cools, start pouring over the cake – GO SLOW, starting from the top – pour, spread with a knife and slowly keep pouring on the edges going right and left to cover all the area. Don’t pour too much and don't go fast or you’ll run out of ganache. **making more ganache to finish the sides will make overlaps on the cake sides and the cake won’t look nice. Let the cake stand for 5 minutes on cooling rack and then gently, using large knives, transfer to a cake stand.
- MAKE THE BUTTERCREAM:In a medium bowl, beat 2 sticks unsalted softened butter for about 1 minute. Add 4 cups sifted powdered sugar (1 cup at a time), until all mixed in. Use this buttercream to make roses or any flower or design you like. Pipe onto little parchment paper squares, place onto stainless steel tray and freeze for 5-10 minutes. (The stainless steel tray makes it freeze a lot faster). Transfer flowers to a cake and decorate to your liking. I added a bit of cocoa powder for the brown leaves. Refrigerate cake until ready to serve. This cake is good up to 5 days in the fridge. Smachnogo! (meaning: bon appetite in Ukrainian!!)
Sign Up for My Email List
Something sweet for your inbox! Join others and subscribe to my free email list. You’ll get every new recipe and post as they’re published, plus an email with my most popular tips and recipes.

Katerina says:
This is seriously the best Spartak Cake recipe I have ever made or came across! I was surprised how easy it was and once it’s creamed and moistens, oh boy it’s so good. It’s a mouthwatering dessert that I will be making over and over and again. Excellent recipe!!
Olga in the Kitchen says:
Thank you for sharing that with us, Katerina! I’m so happy to hear you enjoyed this recipe! 🙂
Michelle Rowes says:
This is the best spartak cake I have ever made or ate!
Olga in the Kitchen says:
Thank you for the wonderful review, Michelle! 🙂
Naomi says:
AMAZING recipe! This is my first attempt making cake and this recipe is the BEST! So so good, the layers are so soft with the cream! The perfect amount of sweetness! Amazing website!!!
Olga in the Kitchen says:
Thank you for the wonderful review, Naomi! I’m so happy to hear you enjoyed this recipe 🙂
Sweeny says:
This came out awesome…
Thank you for the detailed steps…
Olga in the Kitchen says:
I’m happy to hear you enjoyed it! 🙂
Lauren Kelly says:
How creative!! I absolutely LOVE the design!
Olga in the Kitchen says:
Thank you, Lauren!😊
Deadra says:
Pure perfection!!!My 6 yr old daughter requested a chocolate cake or should I say “black and white” (according to her) for her Birthday and I decided to make this cake. It was the best decision made!!! All of us could not stop raving about this cake… soooo delicious. I made once Spartak cake from another blog and it was not even near as perfect!!! If someone wants to impress a loved one with a chocolate cake, do not even second guess yourself… Make this cake! Worth the time. Thanks you so much for the detailed step by step instructions and photos. Xo, Deadra
Olga in the Kitchen says:
Deadra, thank you so much for taking the time to write a great review! I’m so happy to hear you enjoyed this cake recipe! 🙂
Kelly says:
This is the most incredible chocolate cake I’ve ever tasted. Looks hard at first but when I started making it, it was so easy andI didn’t realized when it was finished. My family and husband especially told me that this should be the #1 cake in our house. Thank you for sharing your delicious recipes with the world!
Olga in the Kitchen says:
That’s so awesome, Kelly! I’m so happy to hear your family enjoyed this recipe!
Katya L says:
This is one of my favorite cakes, Olga. Everyone in our family loves it. This one looks absolutely divine. You always make cake making looks so doable and that’s why I only make your cakes. 🥰
Olga in the Kitchen says:
Thank you for your kind words, Katya! I’m so happy to hear your family enjoys this recipe 🙂
JT says:
The perfect chocolate recipe. We did exactly like you did except the flowers. Still practicing on that. It was my dream to always learn to make those butter flowers. The cake texture and flavor was simply irresistible. Couldn’t stop at one slice.
Olga in the Kitchen says:
Thank you for the wonderful review, JT! I’m so happy to hear you enjoyed this cake recipe!
Olya.s says:
Hi Olga! Cake looks awesome! I want to try it out, but was wondering how far in advance can I make the layers, can I do 2 weeks in advance?
Olga in the Kitchen says:
Yes, you can do 2 weeks in advance or up to 1 month in advance. The layers are dry as cookie so they don’t go bad. Just cover them with plastic food wrap until ready to cream.